Introduction
In the corona days (still not over) I would walk near my house for an hour a day and come back home. One day, when I went out for a walk again, I thought of unnecessary photos on my phone. Thousands of photos from university Whatshap groups. It would take me a long time to find unnecessary photos among them. But I had an idea to lighten this workload.
I probably have nearly ten thousand photos in my gallery. Of these, I thought at least 300–400 photos were blurry (there are 378 blurry photos in my gallery). “How can I handle this?” When I thought, it came to my mind that I was a software engineer. I immediately finished my walk and went back home and sat down at my computer and made a small project called “Blur Detection” that I will tell you below.
Part 1: Logic
After about 3 hours, I had written 117 lines of code and the algorithm was not working as I wanted. Realizing that he couldn’t handle it like that, I started to think a little. I thought of a topic that had been covered in the lesson about 3 years ago: “filter of the Laplacian”.
The Laplace filter is mainly used to define the edge lines in a picture. What is meant here by the edge are the sharp color separations that usually separate objects from the background. The Laplace filter, also known as the Sharpening Filter, uses a window while operating. You can understand the event better with the short video below.
For example, below is a 3 × 3 (3 * 3) window and a coefficient value in each cell that can be used during this process:
1 1 11 -8 11 1 1
In this window above, the pixel value in each cell is simply multiplied by the coefficient in that cell, and the results are added to the new value of the pixel in the middle.
For example, consider a matrix whose current values are given below:
4 5 63 3 82 1 7
The new value in the middle of this matrix is calculated by the formula:
1 x 4 + 1 x 5 + 1 x 6 + 1 x 3 + -8 x 3 + 1 x 8 + 1 x 2 + 1 x 1 + 1 x 7 = 12
Filtered matrix:
4 5 63 12 82 1 7
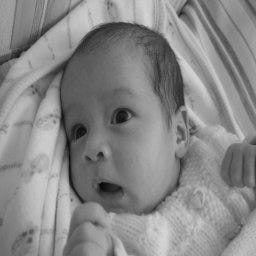
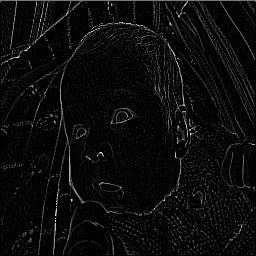
found as. Below is a normal version of a picture with a Laplace filter applied:
Part 2: Application
First, let’s import the necessary libraries.
import cv2
import argparse
import glob
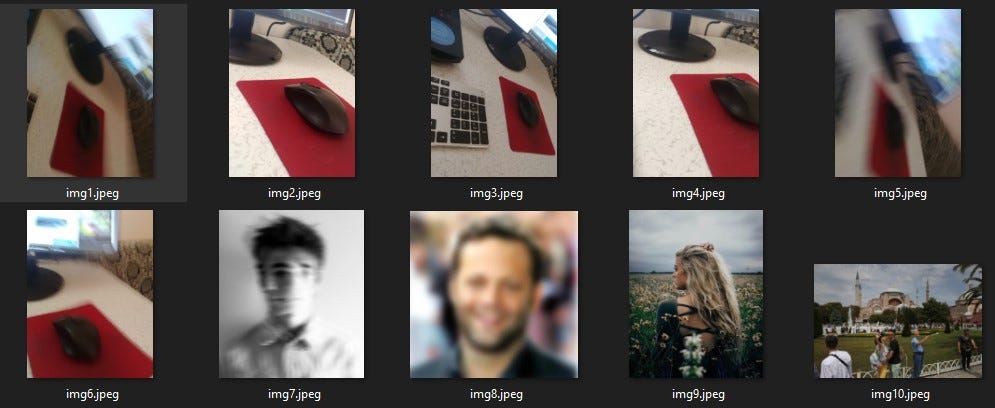
Let’s open a folder called “images” that contains enough photos. Photos:
Let’s go back to coding now. Let’s make the necessary adjustments with the “argparse” package.
ap = argparse.ArgumentParser()
ap.add_argument('-i', '--images', required=True,)
ap.add_argument('-t', '--threshold', type=float)
args = vars(ap.parse_args())
To keep the images in the folder in a single array, we write the following code:
images = [cv2.imread(file) for file in glob.glob("{}/*.jpeg".format(args['images']))]
Now it is time to take the pictures in the folder one by one and apply the Laplacian method to find blur.
for image in images:
	gray = cv2.cvtColor(image, cv2.COLOR_BGR2GRAY)
	fm = cv2.Laplacian(gray, cv2.CV_64F).var()
	text = "Not Blurry"

	if fm < args["threshold"]:
		text = "Blurry"

	cv2.putText(image, "{}: {:.2f}".format(text, fm), (10, 30),
		cv2.FONT_HERSHEY_SIMPLEX, 0.8, (0, 0, 255), 3)
	cv2.imshow("Image", image)
	cv2.waitKey(0)
- 1.line: We start a loop to rotate the photos in the folder one by one.
- 2.line: We turn the photo into grayscale.
- 3.line: We use the Laplacian method. As a result, a float type number will be returned. (For example 4.312563 or 764.471094)
- 6.line: We compare the result inline 3 with the threshold value we have determined. If the result is below the threshold value, we perceive it as “blurry”. In general, the threshold value gives very good results at 100.
Type the following on the console screen for it to run
python blur_detection.py -i images -t 100
And it finished. We did a little project for blur detection using OpenCV so easily.
About the Author
Muhammed Furkan Gülşen
I have been a web developer for over 5 years. First, I continued as a Frontend developer. Later, I learned Backend and continued to improve myself as a FullStack developer. During this period, I managed projects as a Project Manager in the Facebook Developer Circle community. After doing this job for about 1 year, I received an offer from a company and switched to that company. I have been working in this company for more than 10 months, both as a full-stack developer and as a Data Scientist.While this process was going on (for the last 2 years) I started data science. Later the process continued as machine learning, deep learning, image processing, and finally Computer Vision.


