Hanging indents can help writers organize a works cited page or bibliography. While citations can be manually formatted by hitting ‘Enter’ five times and adding five spaces for indentation, the process is undeniably time-consuming.
Google Slides offers a range of options for adding hanging indents to your presentations, ranging from simple shortcuts on your reliable mechanical keyboard to advanced indention controls. If you’re considering adding hanging indents to your upcoming presentation, stay tuned as we show you how.

How to autoplay your Google Slides presentation
Deliver your upcoming presentation effortlessly
What Is a Hanging Indent?
Hanging indents (AKA second-line or reverse indents) are used for the second and subsequent lines of a citation in MLA, APA, and Chicago formats. The format makes citations easy to read, and lets readers quickly identify breaks between citations and find author names.
With a hanging indent, the first line of a citation starts at the left margin, and every subsequent line is set back by 1/2 inch, creating a clear, organized appearance in your documentation.
How to set up a hanging indent in Google Sheets using keyboard shortcuts
You can quickly add a hanging indent in Google Slides using your keyboard. It’s a convenient method, but it lacks customization options. Google Slides includes other built-in tools that allow precise adjustments to specific measurements. For those preferring keyboard shortcuts, here’s how to set up a hanging indent:
- Create a new slide or open an existing one and highlight the text or paragraph you want to format.
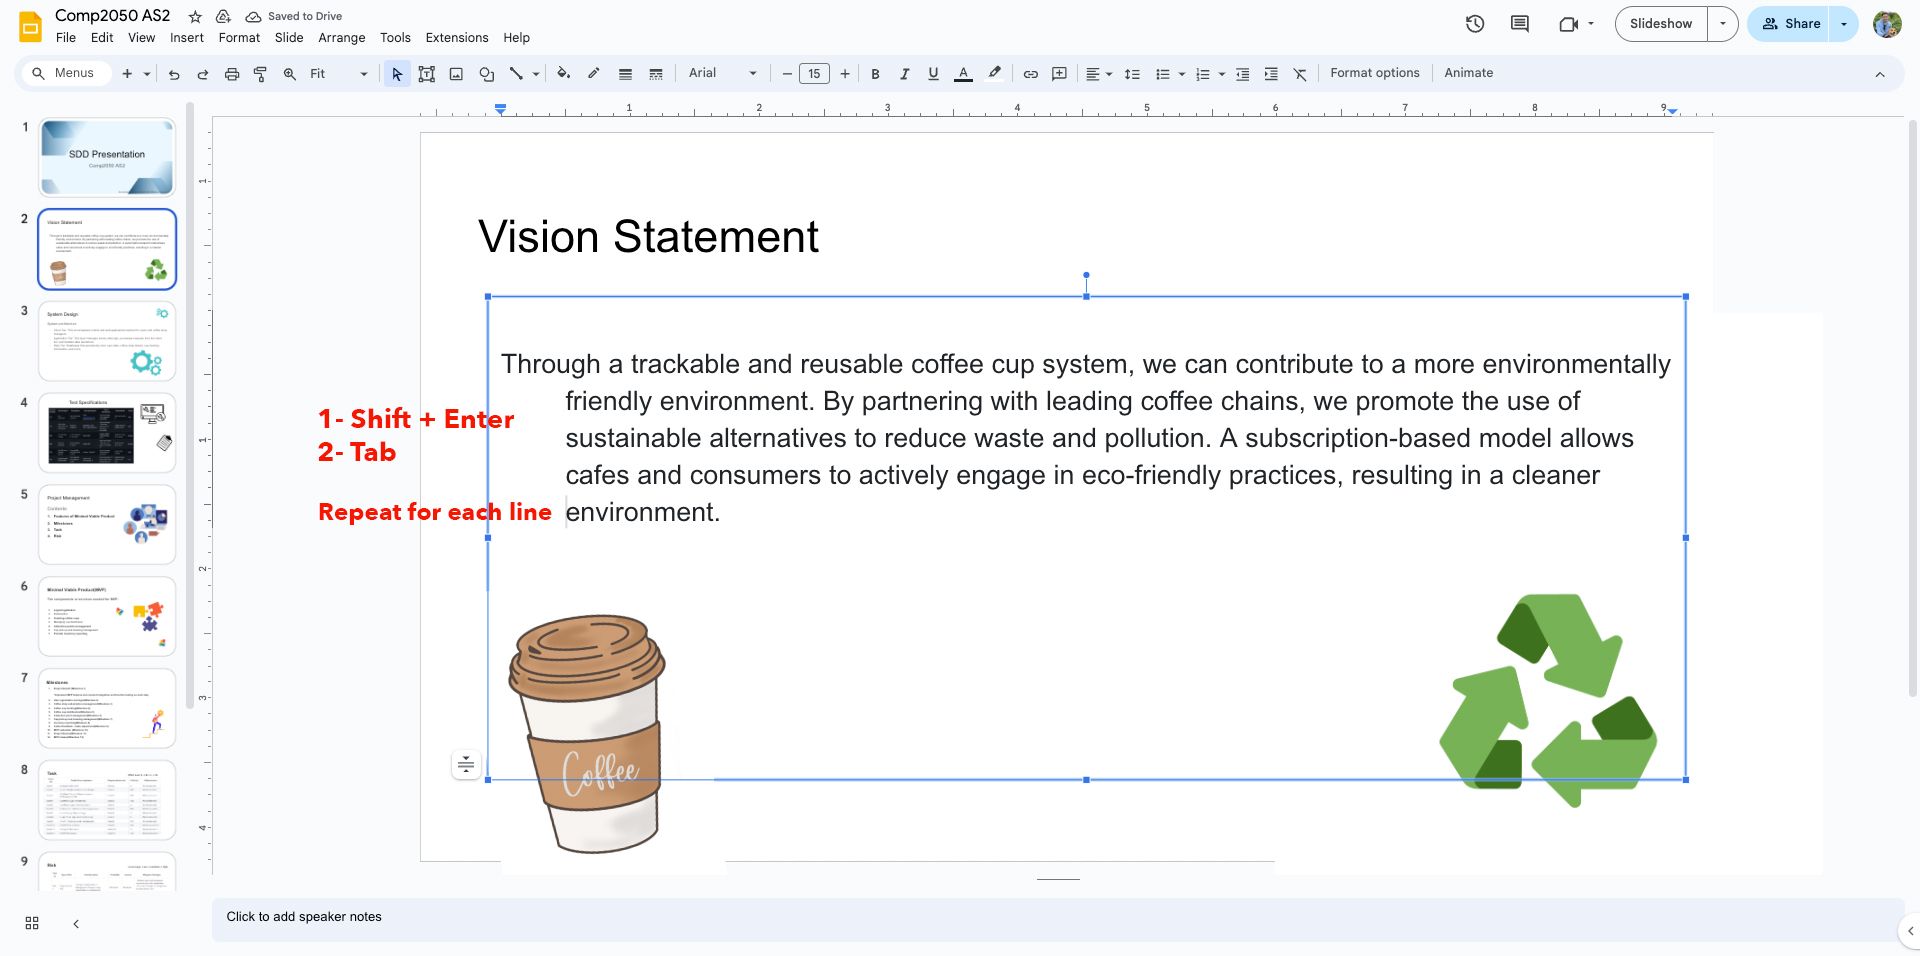
- Press Shift+Enter (Shift+Return on Mac) and place the text on its line, then press Tab to indent the text.
- Repeat this process for every line except the first line to create a hanging indent.
Don’t directly apply the indentation to the second line, as it will indent the entire paragraph.
How to use Google Sheet’s Format tab to create a hanging indent
The Format tab on the menu bar lets you customize text and its attributes, such as spacing, lining, and adding hanging indents. The following steps will guide you through the process:
- Create a new slide or open an existing one and highlight the text or paragraph you want to format.
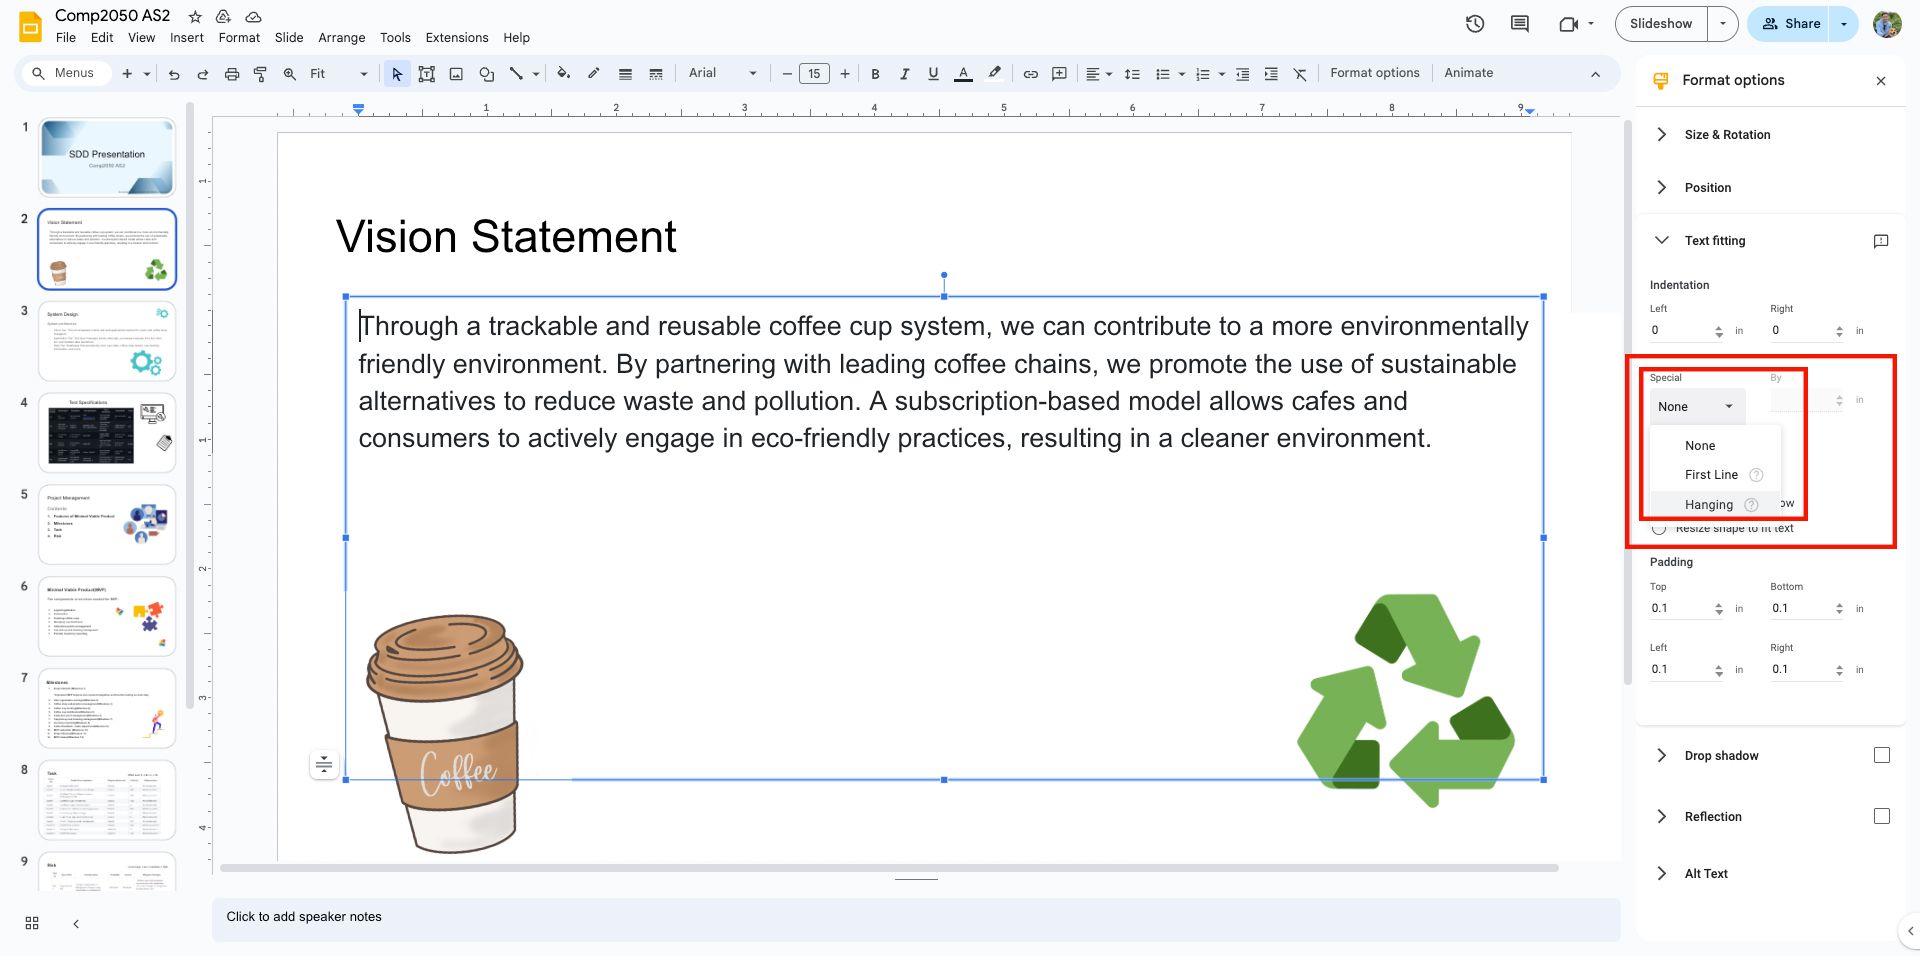
- Select Format options from the Format dropdown menu.
- Choose Text Fitting from the dialog box.
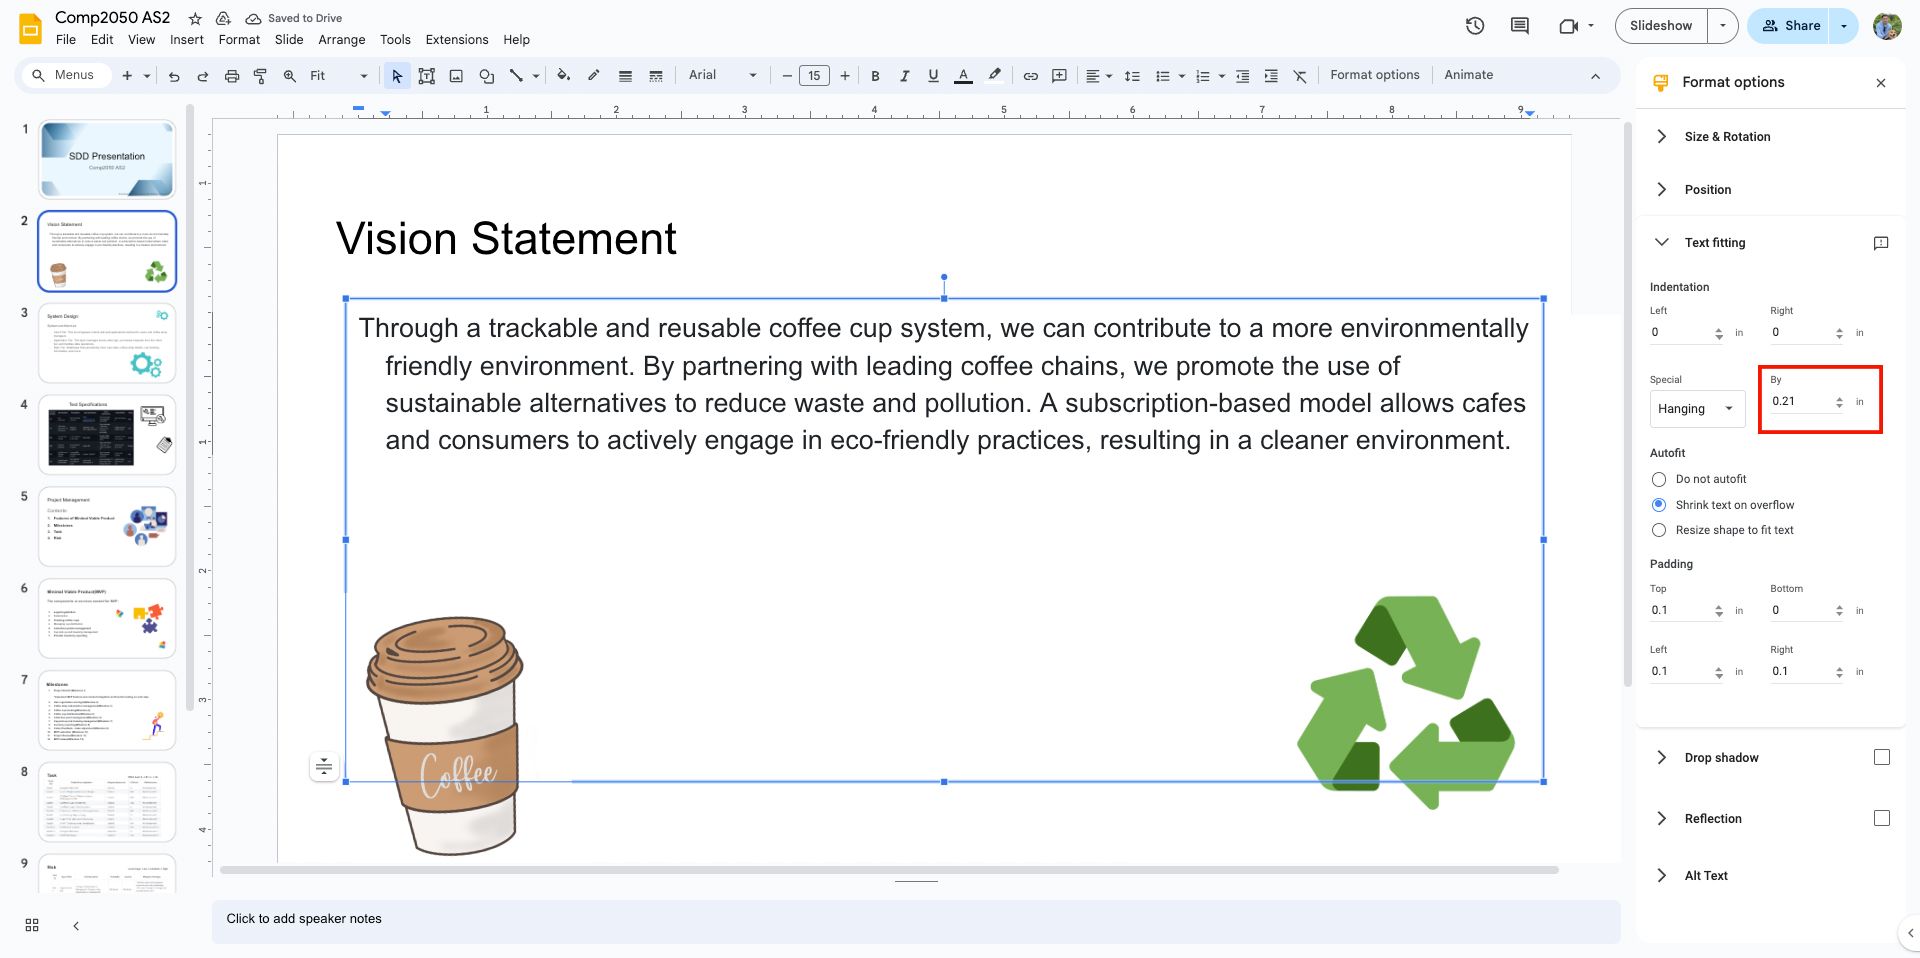
- Choose Hanging from the Special menu under Indentation.
- Use the By arrows to fine-tune the indent spacing.
- Close the dialog box once you’re done.
Create a hanging indent with Google Sheet’s ruler
Google Slides provides a ruler to measure your indents precisely. These steps explain how to create a hanging indent in a Google Slides presentation using the ruler tool:
- Create a new slide or open an existing one and highlight the text or paragraph you want to format.
- Click the View tab and select Show Ruler to toggle on the ruler tool if it isn’t visible.
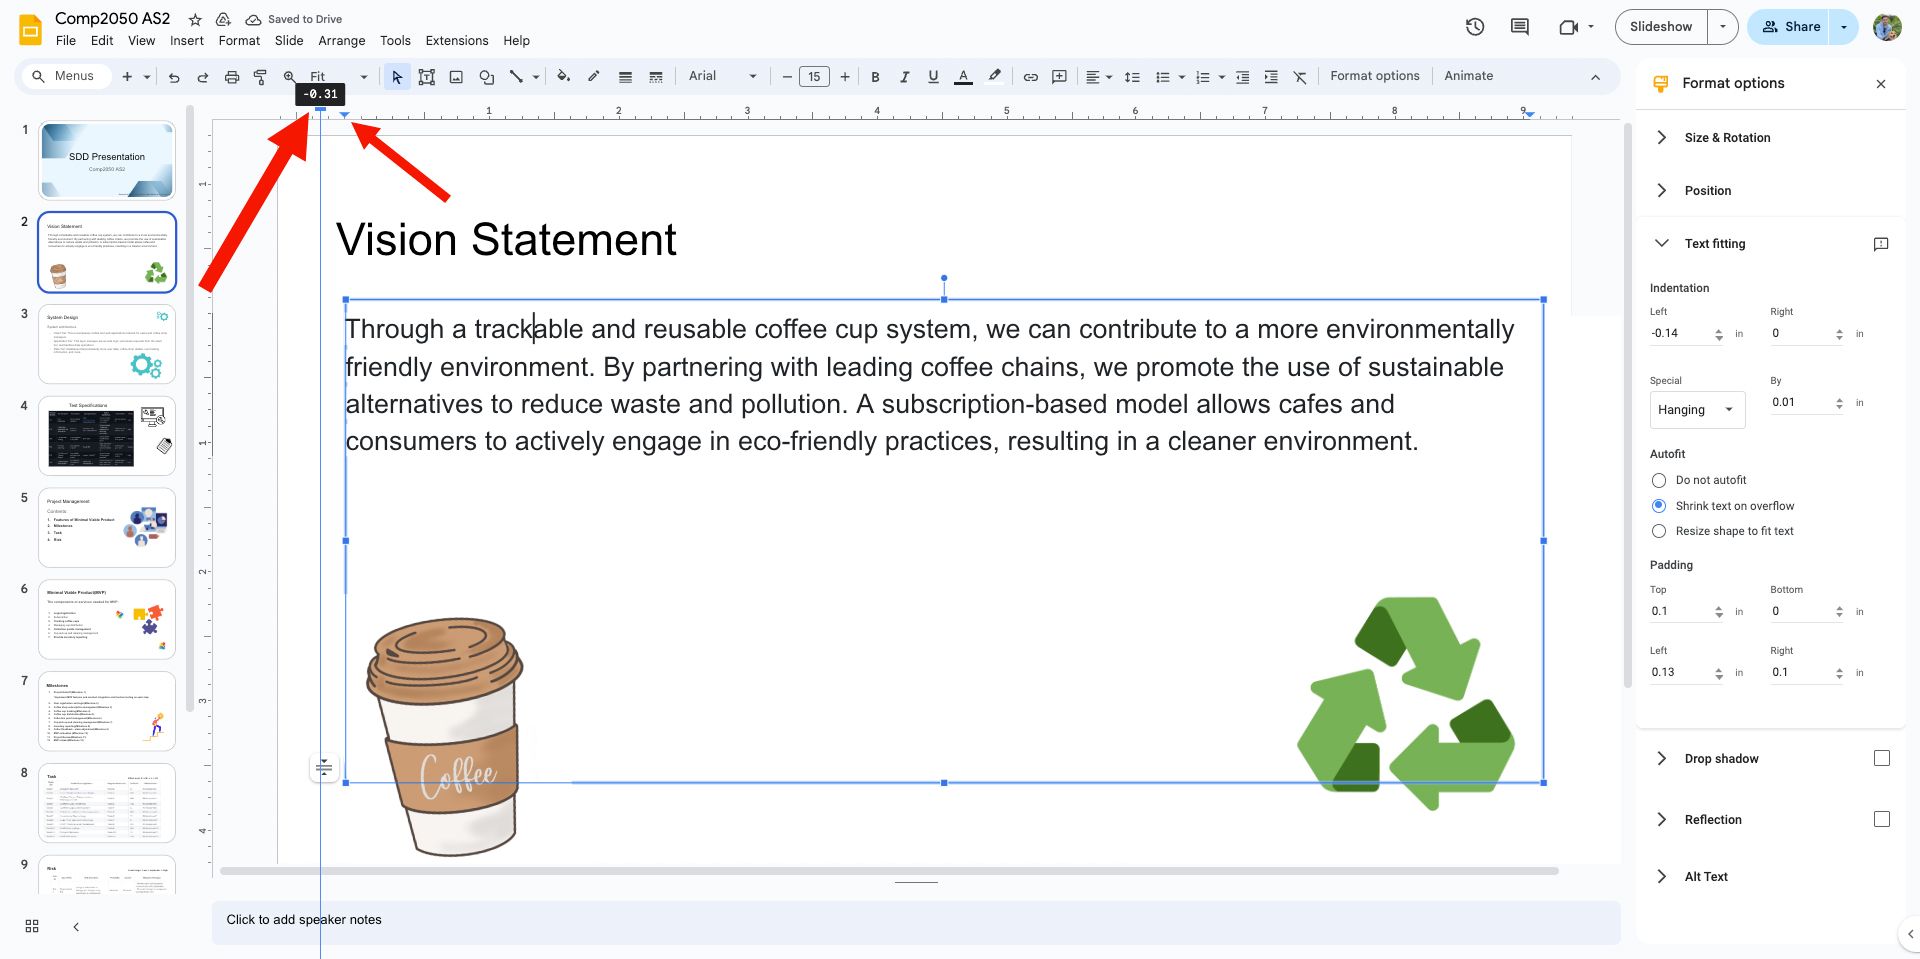
- Locate the hanging indent marker (inverted blue triangle) on the ruler to adjust the paragraph’s position.
- Grab the left indent control (blue bar above the triangle) and move it to where you want the first line to begin.
- Click outside the ruler to apply the changes after adjusting the marker to your desired indent spacing.
Does Google Slides support hanging indents on smartphones and tablets?
No, but there’s a workaround. The Google Slides apps on Android and iOS do not include the Ruler tool or the Format tab.
There is, however, a workaround. Attach an external keyboard to your mobile device. Once connected, use Ctrl + Enter and Tab shortcuts to insert hanging indents. With this trick, your presentation will still look professional even if you cannot access Google Slides on your desktop.
Do hanging indents work with bullet points and numbered lists?
This formatting strategy can effectively apply to bullet points and numbered lists within your Google Slides presentations. Doing so improves readability and makes it easier for your audience to follow and understand your key points.

Google Workspace: Everything you need to know about Google’s collaborative workplace platform
Google Workspace is essential for WFH and hybrid work
Creating Google Slides presentations is easier with Gemini AI
Google Slides provides a solid framework for developing presentations. Hanging indents can help you make your presentations more professional. Another option is to use eye-catching visuals.
Google has facilitated this by incorporating its generative AI, Gemini, into Google Slides, making it easier to create engaging content. A few well-chosen prompts can greatly increase your audience’s engagement with your presentation.


