


This article was published as a part of the Data Science Blogathon
Cat and dog classification using CNN
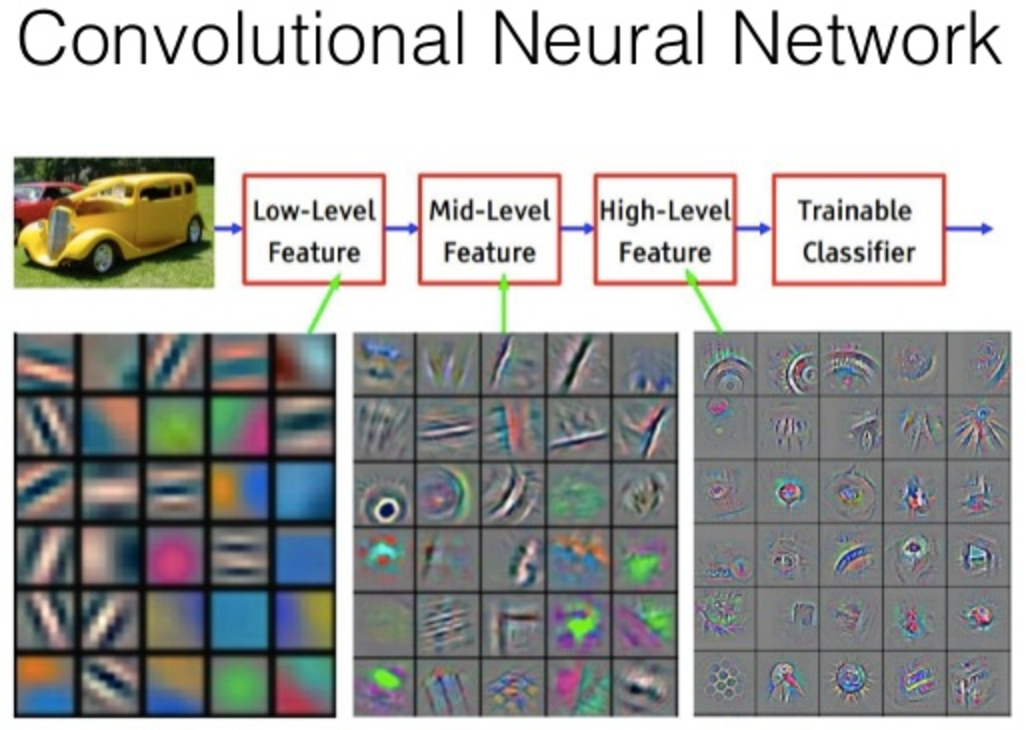
Convolutional Neural Network (CNN) is an algorithm taking an image as input then assigning weights and biases to all the aspects of an image and thus differentiates one from the other. Neural networks can be trained by using batches of images, each of them having a label to identify the real nature of the image (cat or dog here). A batch can contain few tenths to hundreds of images. For each and every image, the network prediction is compared with the corresponding existing label, and the distance between network prediction and the truth is evaluated for the whole batch. Then, the network parameters are modified to minimize the distance and thus the prediction capability of the network is increased. The training process continues for every batch similarly.
Dogs vs. Cats Prediction Problem
The main goal of this tutorial is to develop a system that can identify images of cats and dogs. The input image will be analyzed and then the output is predicted. The model that is implemented can be extended to a website or any mobile device as per the need. The Dogs vs Cats dataset can be downloaded from the Kaggle website. The dataset contains a set of images of cats and dogs. Our main aim here is for the model to learn various distinctive features of cat and dog. Once the training of the model is done it will be able to differentiate images of cat and dog.
Installing Required Packages for Python 3.6
1. Numpy -> 1.14.4 [ Image is read and stored in a NumPy array ]
2. TensorFlow -> 1.8.0 [ Tensorflow is the backend for Keras ]
3. Keras -> 2.1.6 [ Keras is used for implementing the CNN ]
Import Libraries
1. NumPy- For working with arrays, linear algebra.
2. Pandas – For reading/writing data
3. Matplotlib – to display images
4. TensorFlow Keras models – Need a model to predict right !!
5. TensorFlow Keras layers – Every NN needs layers and CNN needs well a couple of layers.
import pandas as pd
import numpy as np
import matplotlib.pyplot as plt
from keras.models import Sequential
from keras.layers import Convolution2D
from keras.layers import MaxPooling2D
from keras.layers import Dense
from keras.layers import Flatten
CNN does the processing of Images with the help of matrixes of weights known as filters. They detect low-level features like vertical and horizontal edges etc. Through each layer, the filters recognize high-level features.
We first initialize the CNN,
#initializing the cnn
classifier=Sequential()
For compiling the CNN, we are using adam optimizer.
Adaptive Moment Estimation (Adam) is a method used for computing individual learning rates for each parameter. For loss function, we are using Binary cross-entropy to compare the class output to each of the predicted probabilities. Then it calculates the penalization score based on the total distance from the expected value.
Image augmentation is a method of applying different kinds of transformation to original images resulting in multiple transformed copies of the same image. The images are different from each other in certain aspects because of shifting, rotating, flipping techniques. So, we are using the Keras ImageDataGenerator class to augment our images.
#part2-fitting the cnn to the images
from keras.preprocessing.image import ImageDataGenerator
train_datagen = ImageDataGenerator(rescale = 1./255,
                                   shear_range = 0.2,
                                   zoom_range = 0.2,
                                   horizontal_flip = True)
We need a way to turn our images into batches of data arrays in memory so that they can be fed to the network during training. ImageDataGenerator can readily be used for this purpose. So, we import this class and create an instance of the generator. We are using Keras to retrieve images from the disk with the flow_from_directory method of the ImageDataGenerator class.
# Generating images for the Test set
test_datagen = ImageDataGenerator(rescale = 1./255)
# Creating training set
training_set = train_datagen.flow_from_directory('C:/Users/khushi shah/AndroidStudioProjects/catanddog/dataset/training_set',
                                                 target_size = (64, 64),
                                                 batch_size = 32,
                                                 class_mode = 'binary')
# Creating the Test set
test_set = test_datagen.flow_from_directory('C:/Users/khushi shah/AndroidStudioProjects/catanddog/dataset/test_set',
                                            target_size = (64, 64),
                                            batch_size = 32,
                                            class_mode = 'binary')
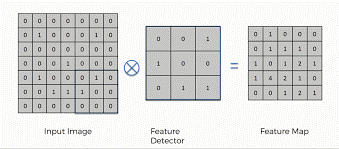
Convolution
Convolution is a linear operation involving the multiplication of weights with the input. The multiplication is performed between an array of input data and a 2D array of weights known as filter or kernel. The filter is always smaller than input data and the dot product is performed between input and filter array.
Activation
The activation function is added to help ANN learn complex patterns in the data. The main need for activation function is to add non-linearity into the neural network.

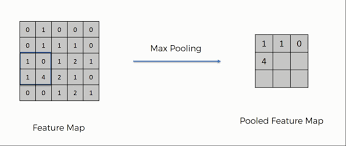
Pooling
The pooling operation provides spatial variance making the system capable of recognizing an object with some varied appearance. It involves adding a 2Dfilter over each channel of the feature map and thus summarise features lying in that region covered by the filter.
So, pooling basically helps reduce the number of parameters and computations present in the network. It progressively reduces the spatial size of the network and thus controls overfitting. There are two types of operations in this layer; Average pooling and Maximum pooling. Here, we are using max-pooling which according to its name will only take out the maximum from a pool. This is possible with the help of filters sliding through the input and at each stride, the maximum parameter will be taken out and the rest will be dropped.
The pooling layer does not modify the depth of the network unlike in the convolution layer.
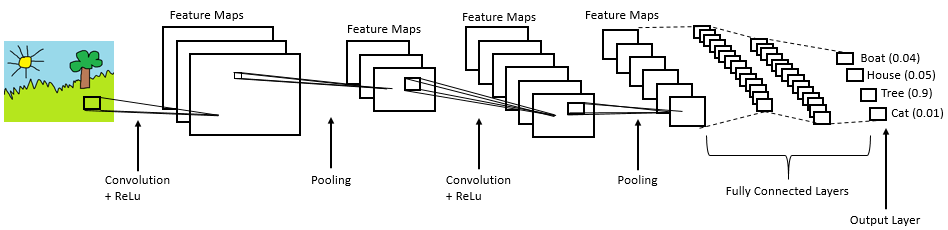
Fully Connected
The output from the final Pooling layer which is flattened is the input of the fully connected layer.
The Full Connection process practically works as follows:
The neurons present in the fully connected layer detect a certain feature and preserves its value then communicates the value to both the dog and cat classes who then check out the feature and decide if the feature is relevant to them.

Full CNN overview
#step1-convolution
classifier.add(Convolution2D(32,3,3,input_shape=(64,64,3),activation='relu'))
#step2-maxpooling
classifier.add(MaxPooling2D(pool_size=(2,2)))
#step3-flattening
classifier.add(Flatten())
#step4-fullconnection
classifier.add(Dense(output_dim=128,activation='relu'))
classifier.add(Dense(output_dim=1,activation='sigmoid'))
We are fitting our model to the training set. It will take some time for this to finish.
classifier.fit_generator(training_set,samples_per_epoch=8000,nb_epoch=25,validation_data=test_set,nb_val_samples=2000)
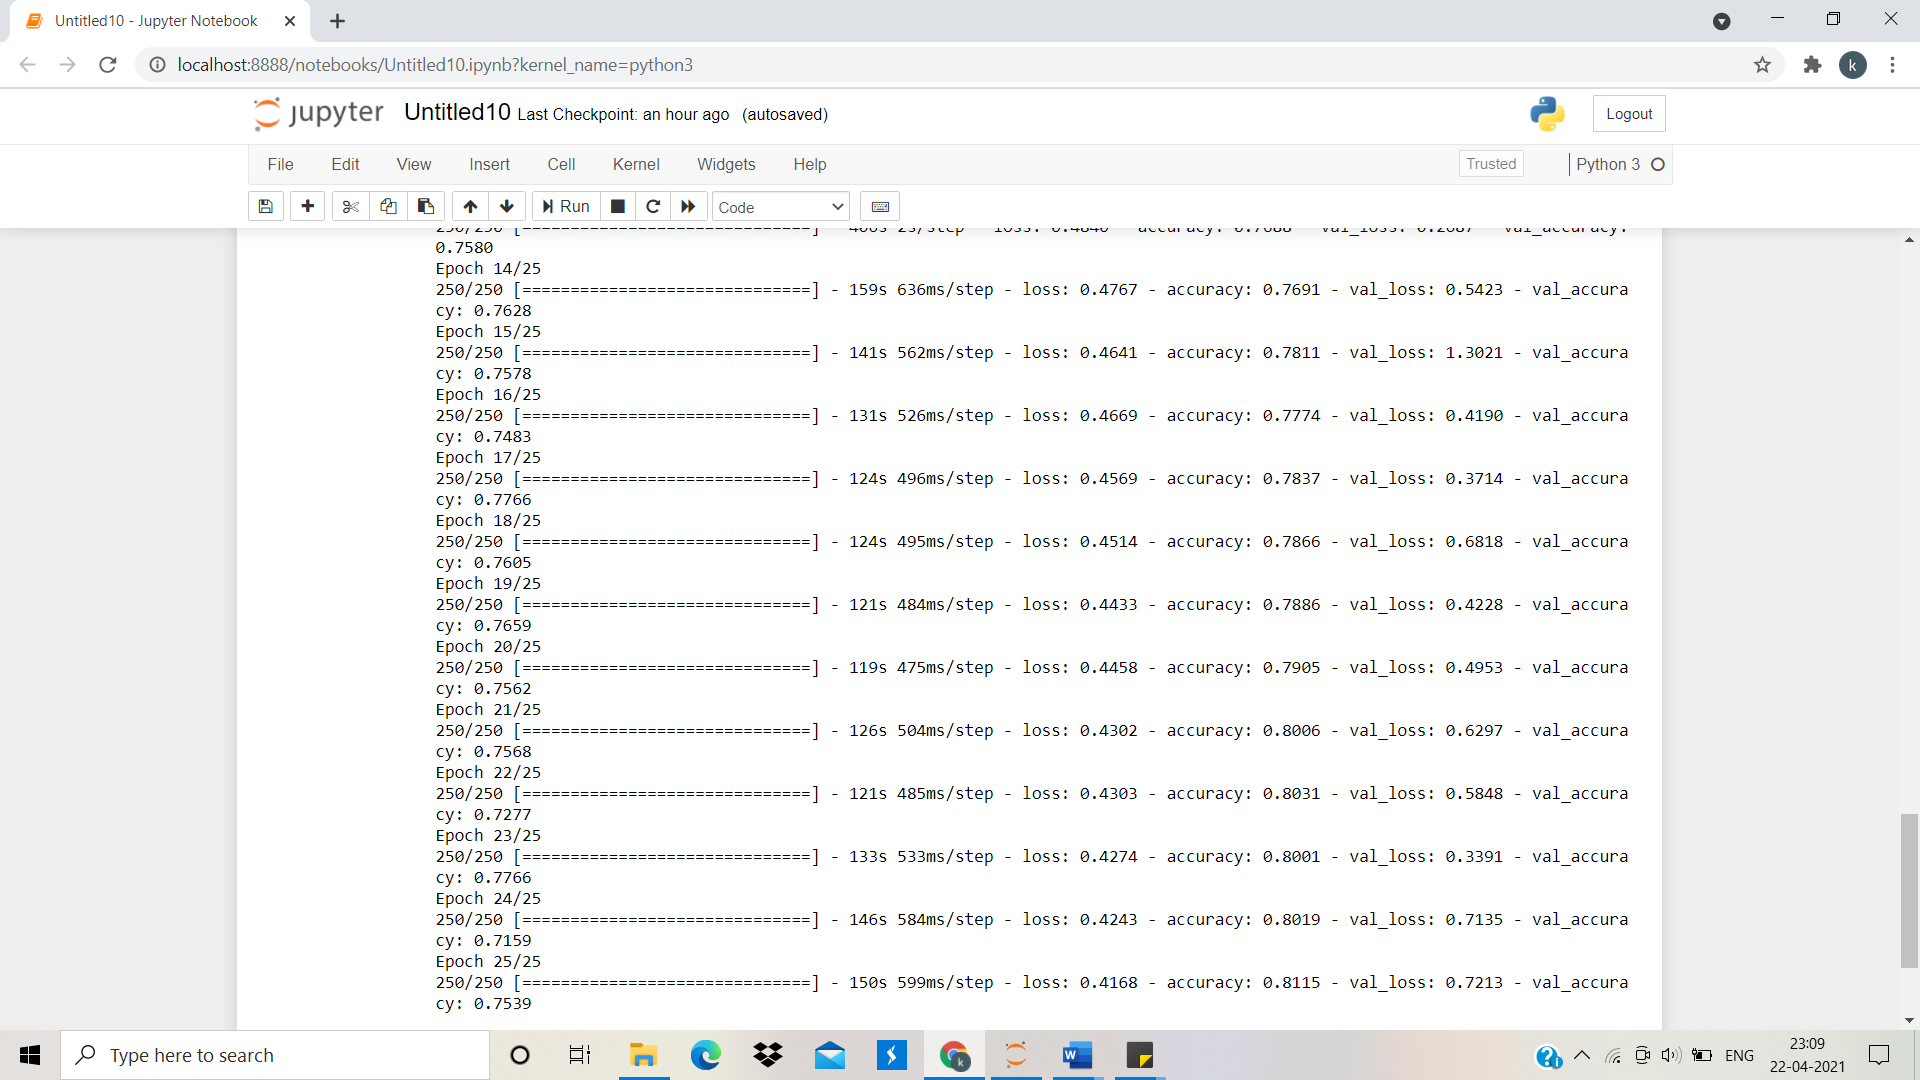
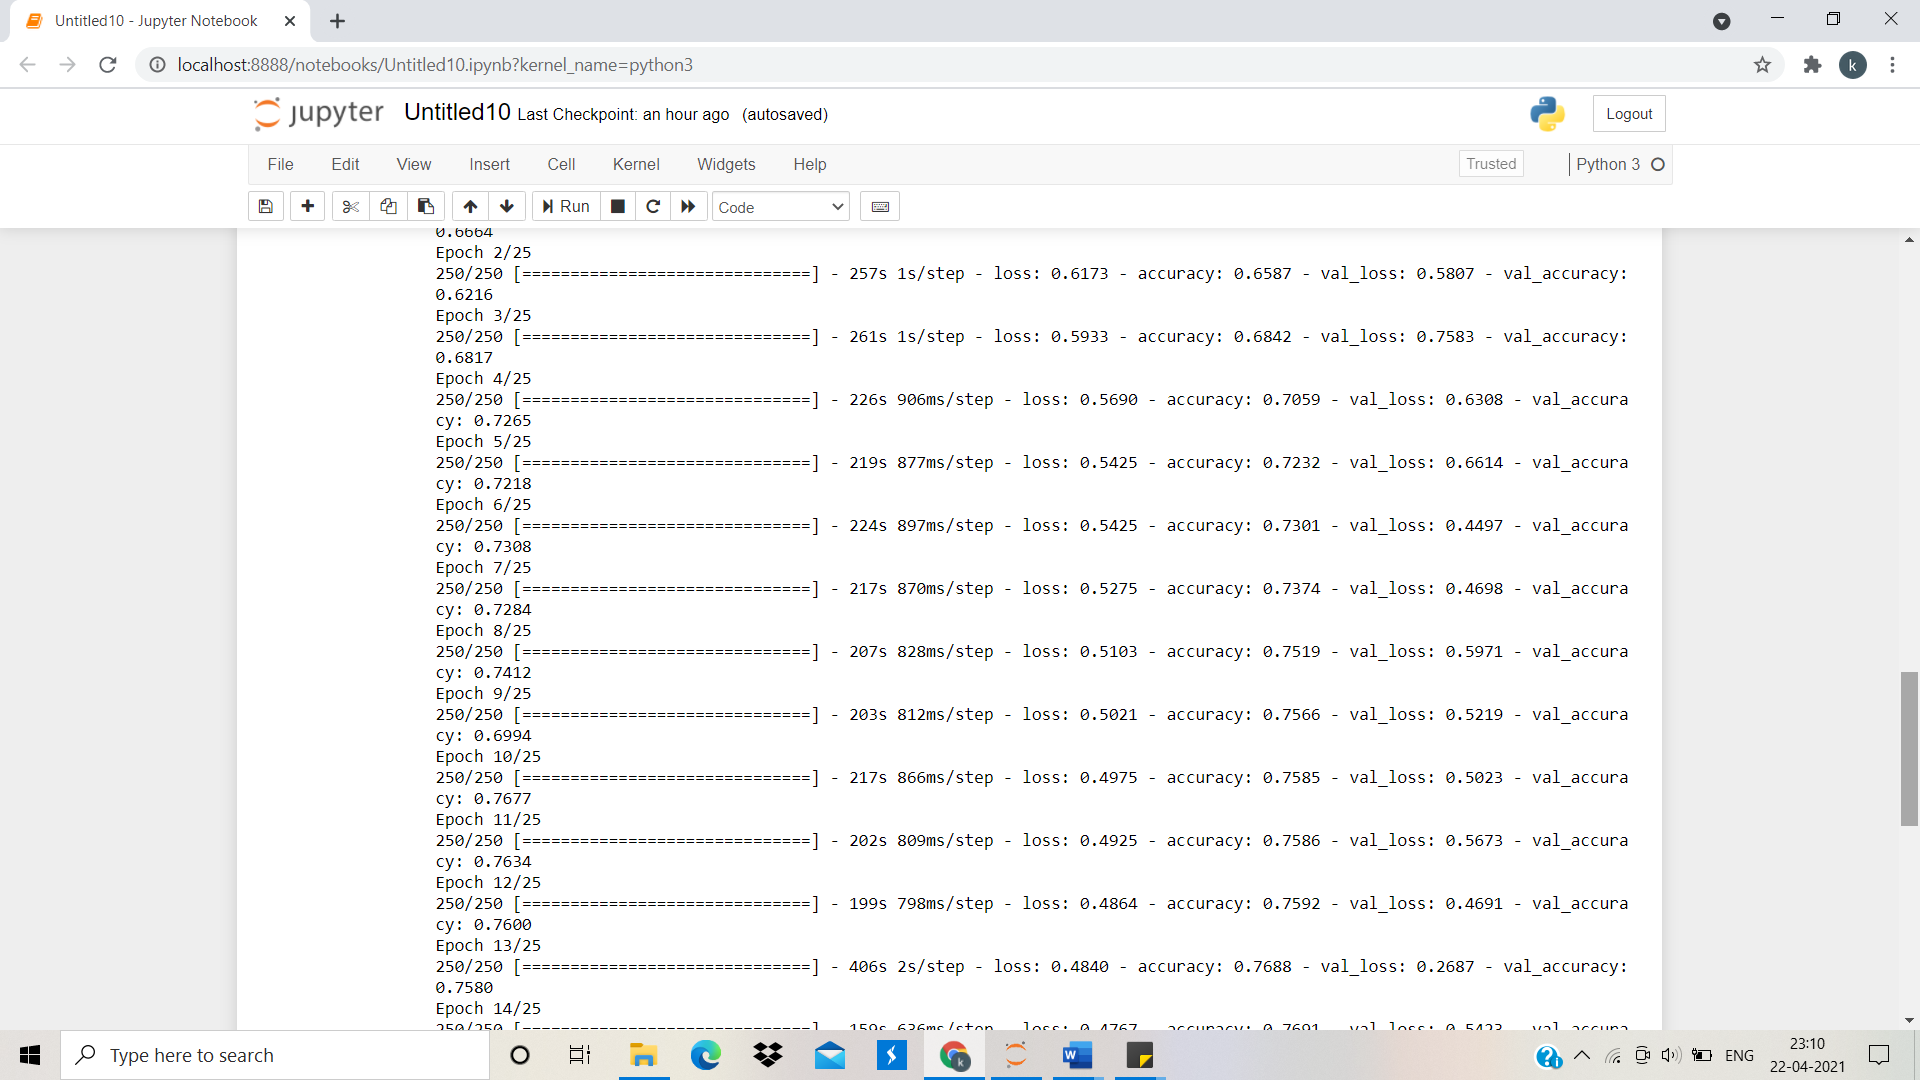
It is seen that we have 0.8115 accuracies on our training set.
We can predict new images with our model by predict_image function where we have to provide a path of new image as image path and using predict method. If the probability is more than 0.5 then the image will be of a dog else of cat.
#to predict new images
def predict_image(imagepath, classifier):
    predict = image.load_img(imagepath, target_size = (64, 64))
    predict_modified = image.img_to_array(predict)
    predict_modified = predict_modified / 255
    predict_modified = np.expand_dims(predict_modified, axis = 0)
    result = classifier.predict(predict_modified)
    if result[0][0] >= 0.5:
        prediction = 'dog'
        probability = result[0][0]
        print ("probability = " + str(probability))
    else:
        prediction = 'cat'
        probability = 1 - result[0][0]
        print ("probability = " + str(probability))
        print("Prediction = " + prediction)
Features Provided:
· We can test our own images and verify the accuracy of the model.
· We can integrate the code directly into our other project and can be extended into a website or mobile application device.
· We can extend the project to different entities by just finding the suitable dataset, change the dataset and train the model accordingly.
Applications:
We get a general idea of how image classification can be performed. The scope of the project can be further extended to different industries with the scope for automation by just modifying the dataset as needed for the issue.
Conclusion:
I hope you now have a basic understanding of Convolutional Neural networks and can classify images of cats and dogs.
Connect with me:
LinkedIn: https://www.linkedin.com/in/khushi-shah-961a181a6/
The media shown in this article are not owned by Analytics Vidhya and are used at the Author’s discretion.