While there is no shortage of calendar apps, Proton Calendar stands out due to its privacy-focused approach. However, before switching to Proton Calendar, move your existing calendars for a seamless transition. Whether you are a Google, Outlook, or iCloud calendar user, you can easily move your calendars and keep your schedule intact. If you primarily use Microsoft 365 in your workflow, here’s how to import your Outlook calendar into Proton Calendar on the desktop and Android.
Why should you import Outlook Calendar to Proton?
Proton is known for its privacy-focused apps and features. The company offers multiple services, such as Mail, Calendar, VPN, Pass, Drive, and Docs. When you switch from the Google or Microsoft ecosystem, you may want to transfer all your data, including calendar events.
With Proton Calendar, you can enjoy end-to-end encrypted events where only you have access to event details, location, attendees, and other data. Plus, it integrates well with the existing Proton apps, and you can access your calendar events from the Mail sidebar.
As for the pricing, the Proton Free plan offers three personal calendars. If you upgrade to Proton Unlimited for $12 per month, you have access to 25 personal calendars and calendar sharing. Now, let’s move your Outlook calendars to the Proton ecosystem.
Transfer Outlook Calendar to Proton Calendar
Proton offers a built-in tool for transferring your emails, calendars, and contacts from the Microsoft ecosystem. It’s available only on the web. Let’s check it in action.
Use the default import tool
Although Proton Calendar has apps for all platforms, the trick is accessible only on the web version. Follow the steps below.
- Visit Proton Calendar on the web and sign in with your account details.
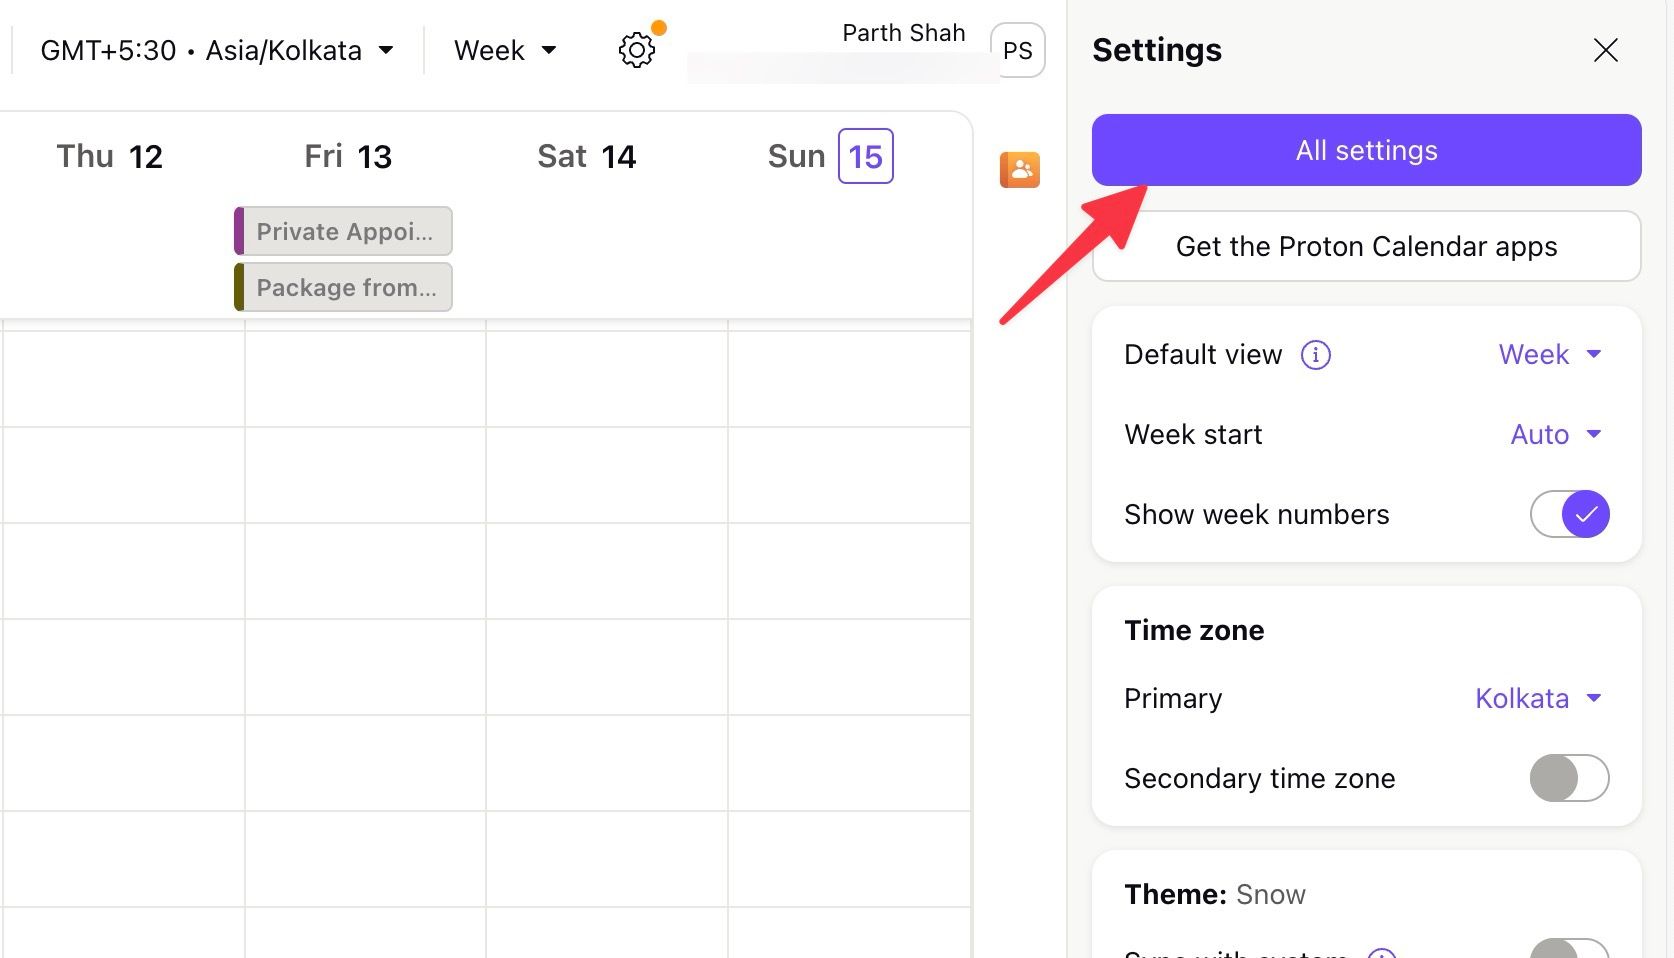
- Select the Settings gear in the upper-right corner and open All settings.
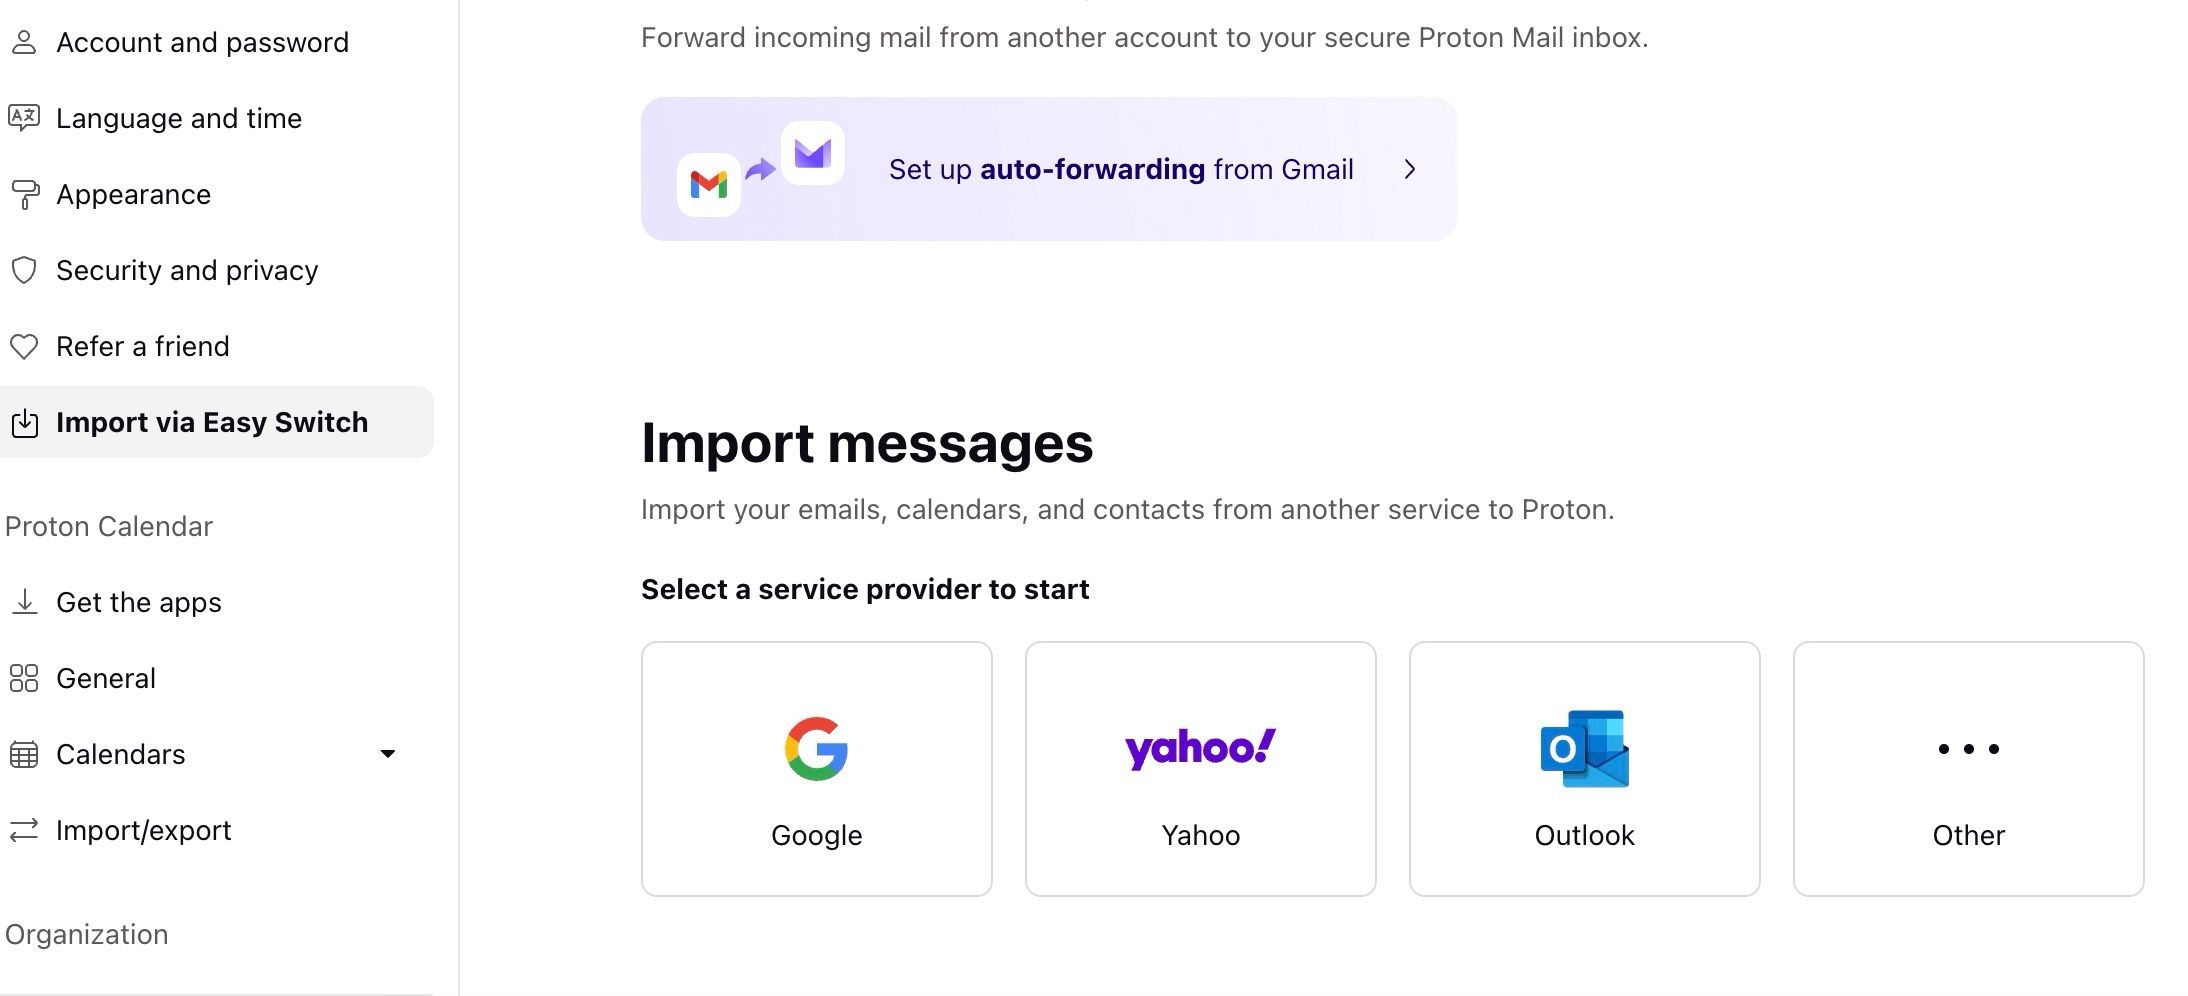
- Select Import via Easy Switch from the sidebar.
- Click Outlook under Import messages.
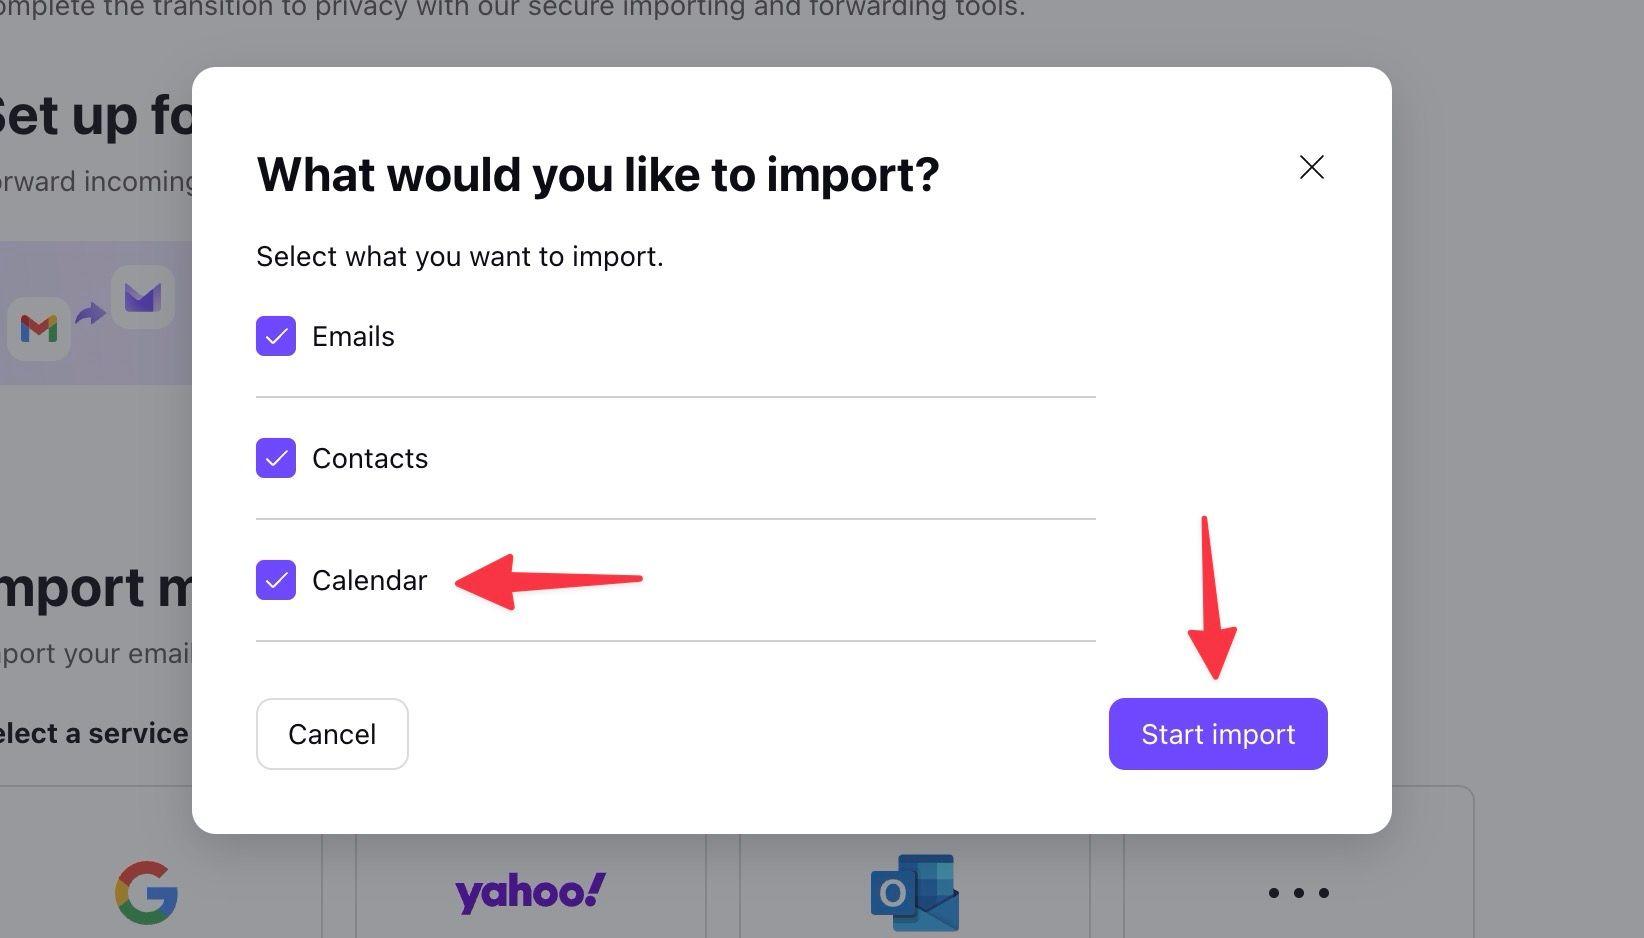
- Clear the checkbox beside Emails and Contacts.
- Select Start import.
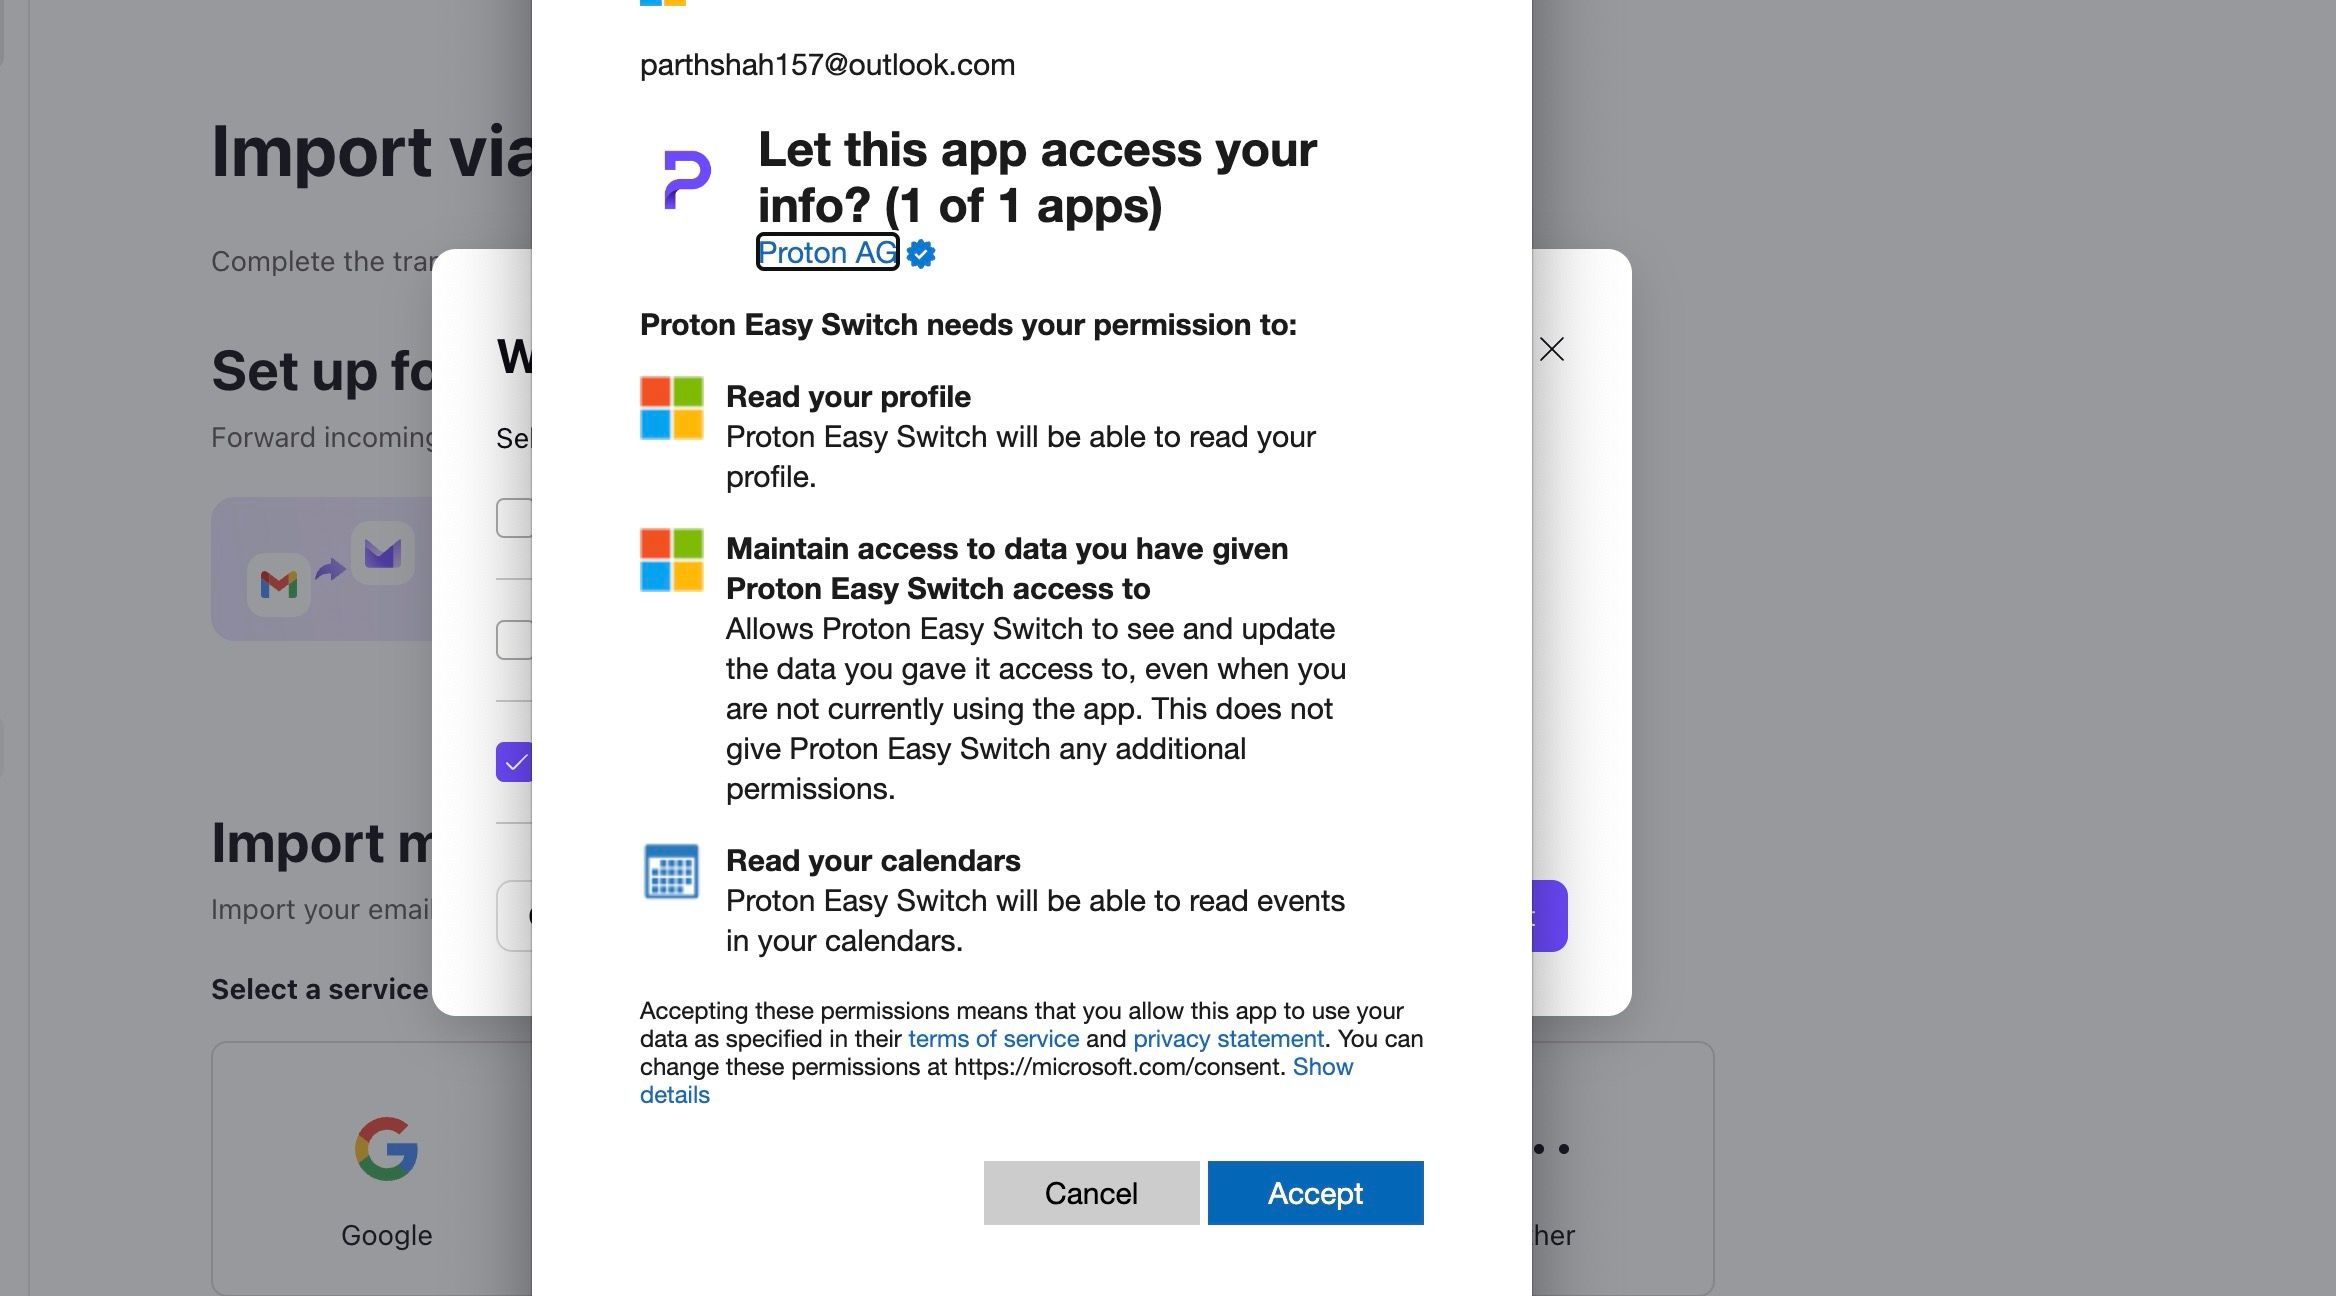
- Sign in with your Microsoft account details from a dedicated pop-up box.
- Give the required permissions and select Accept.
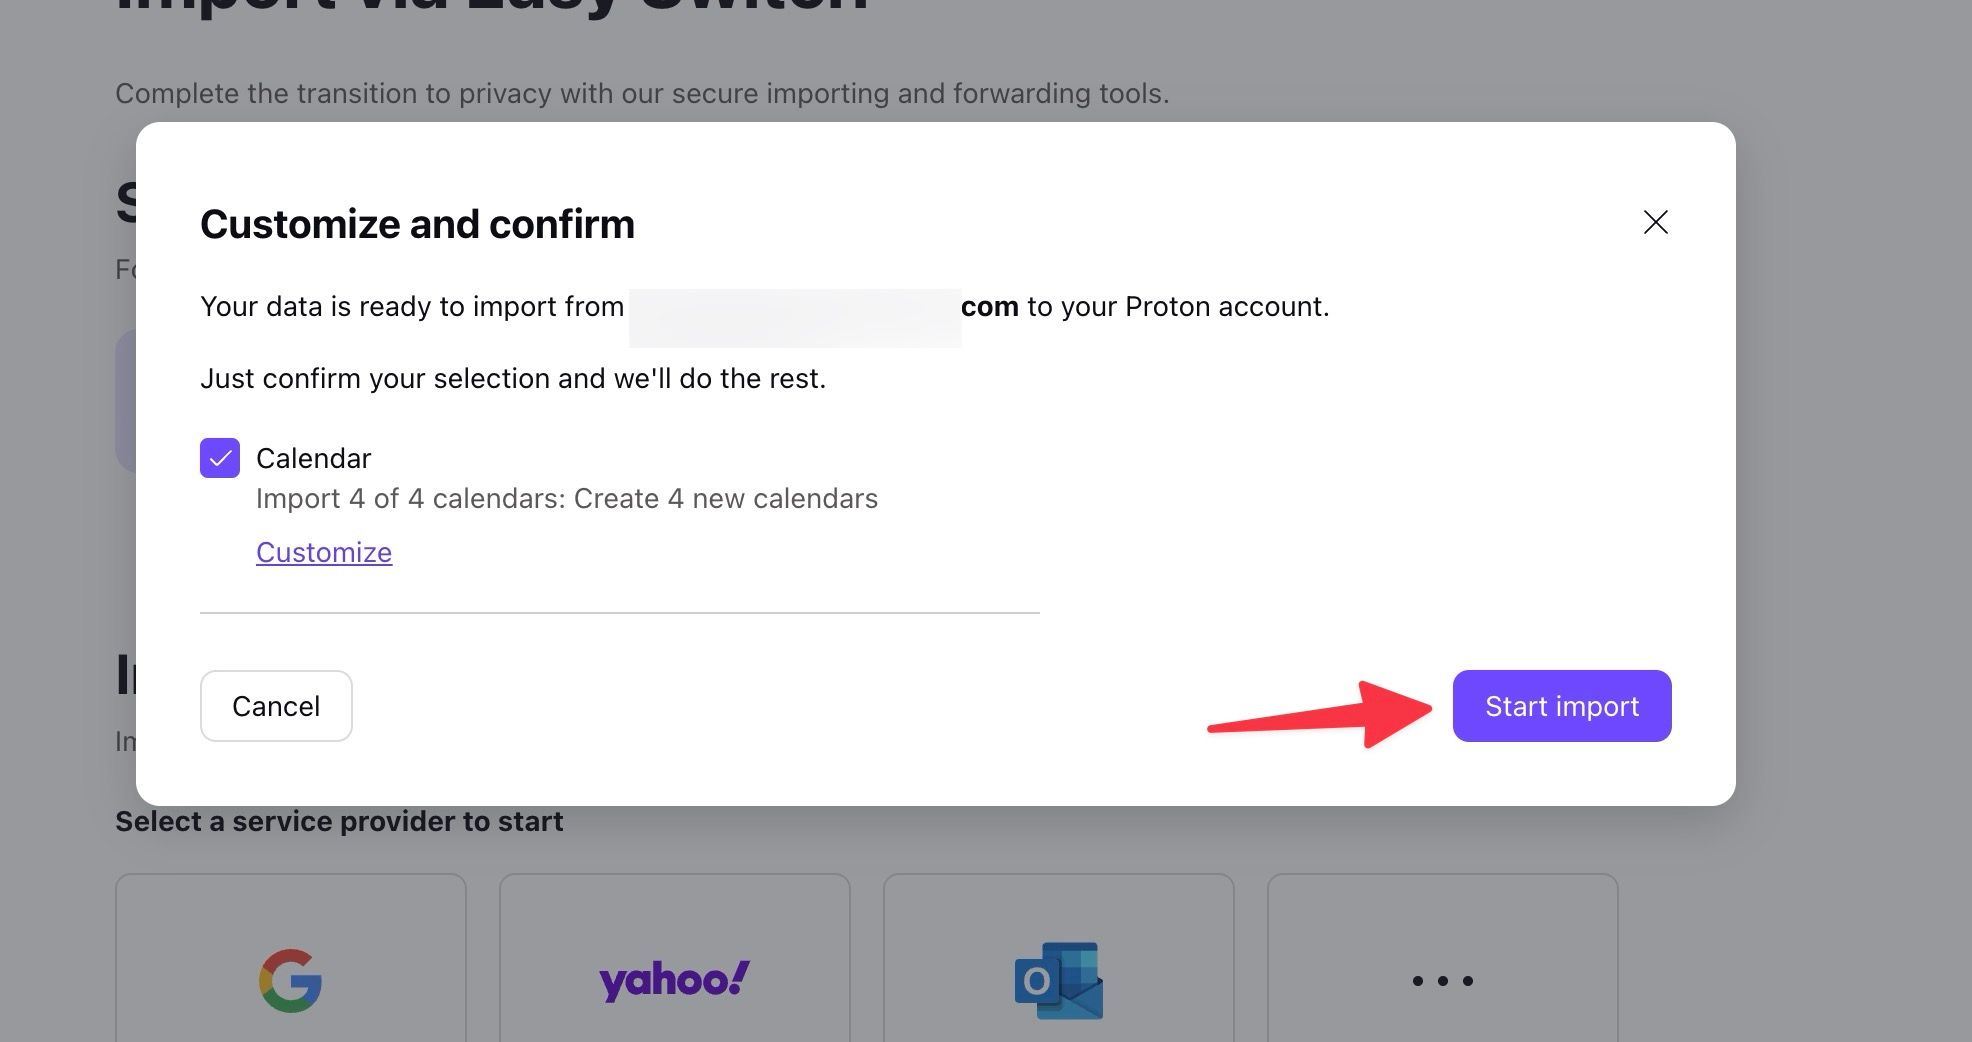
- Proton shows all your Outlook calendars. If you don’t want to import all calendars, click Customize.
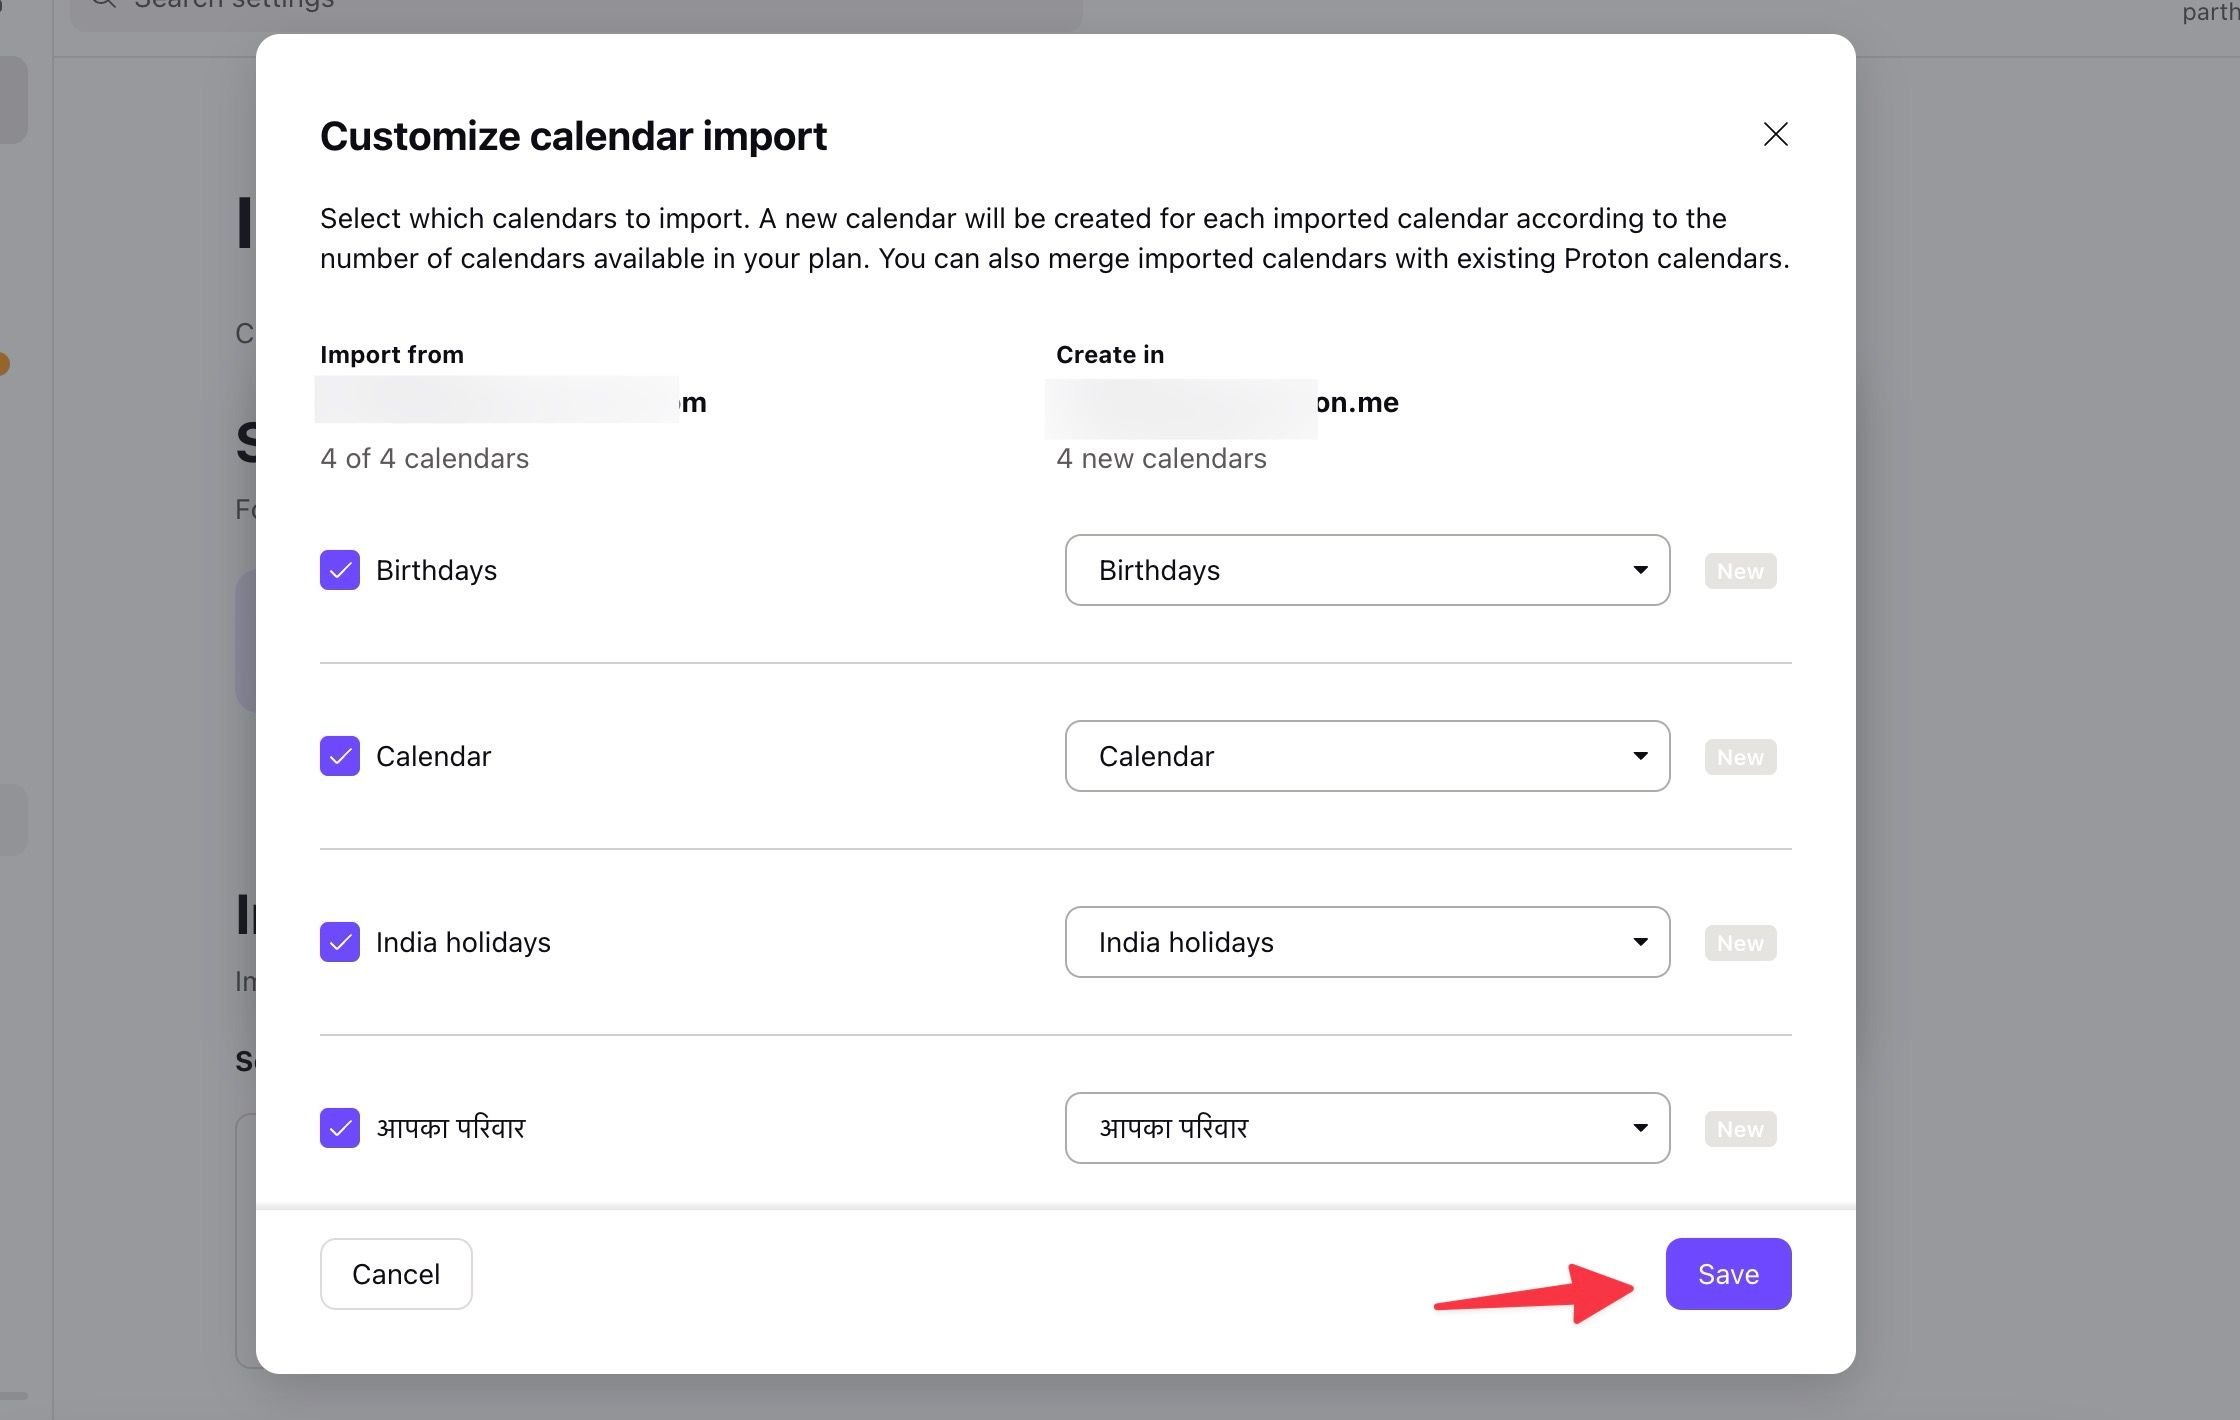
- Uncheck irrelevant calendars from the following menu. You may want to skip birthdays, holidays, and other sports calendars during the switch. Proton also shows your group calendars.
- You can merge the Outlook calendar with your Proton calendar. Expand the drop-down menu beside your Outlook calendar and select an existing Proton Calendar to merge it with.
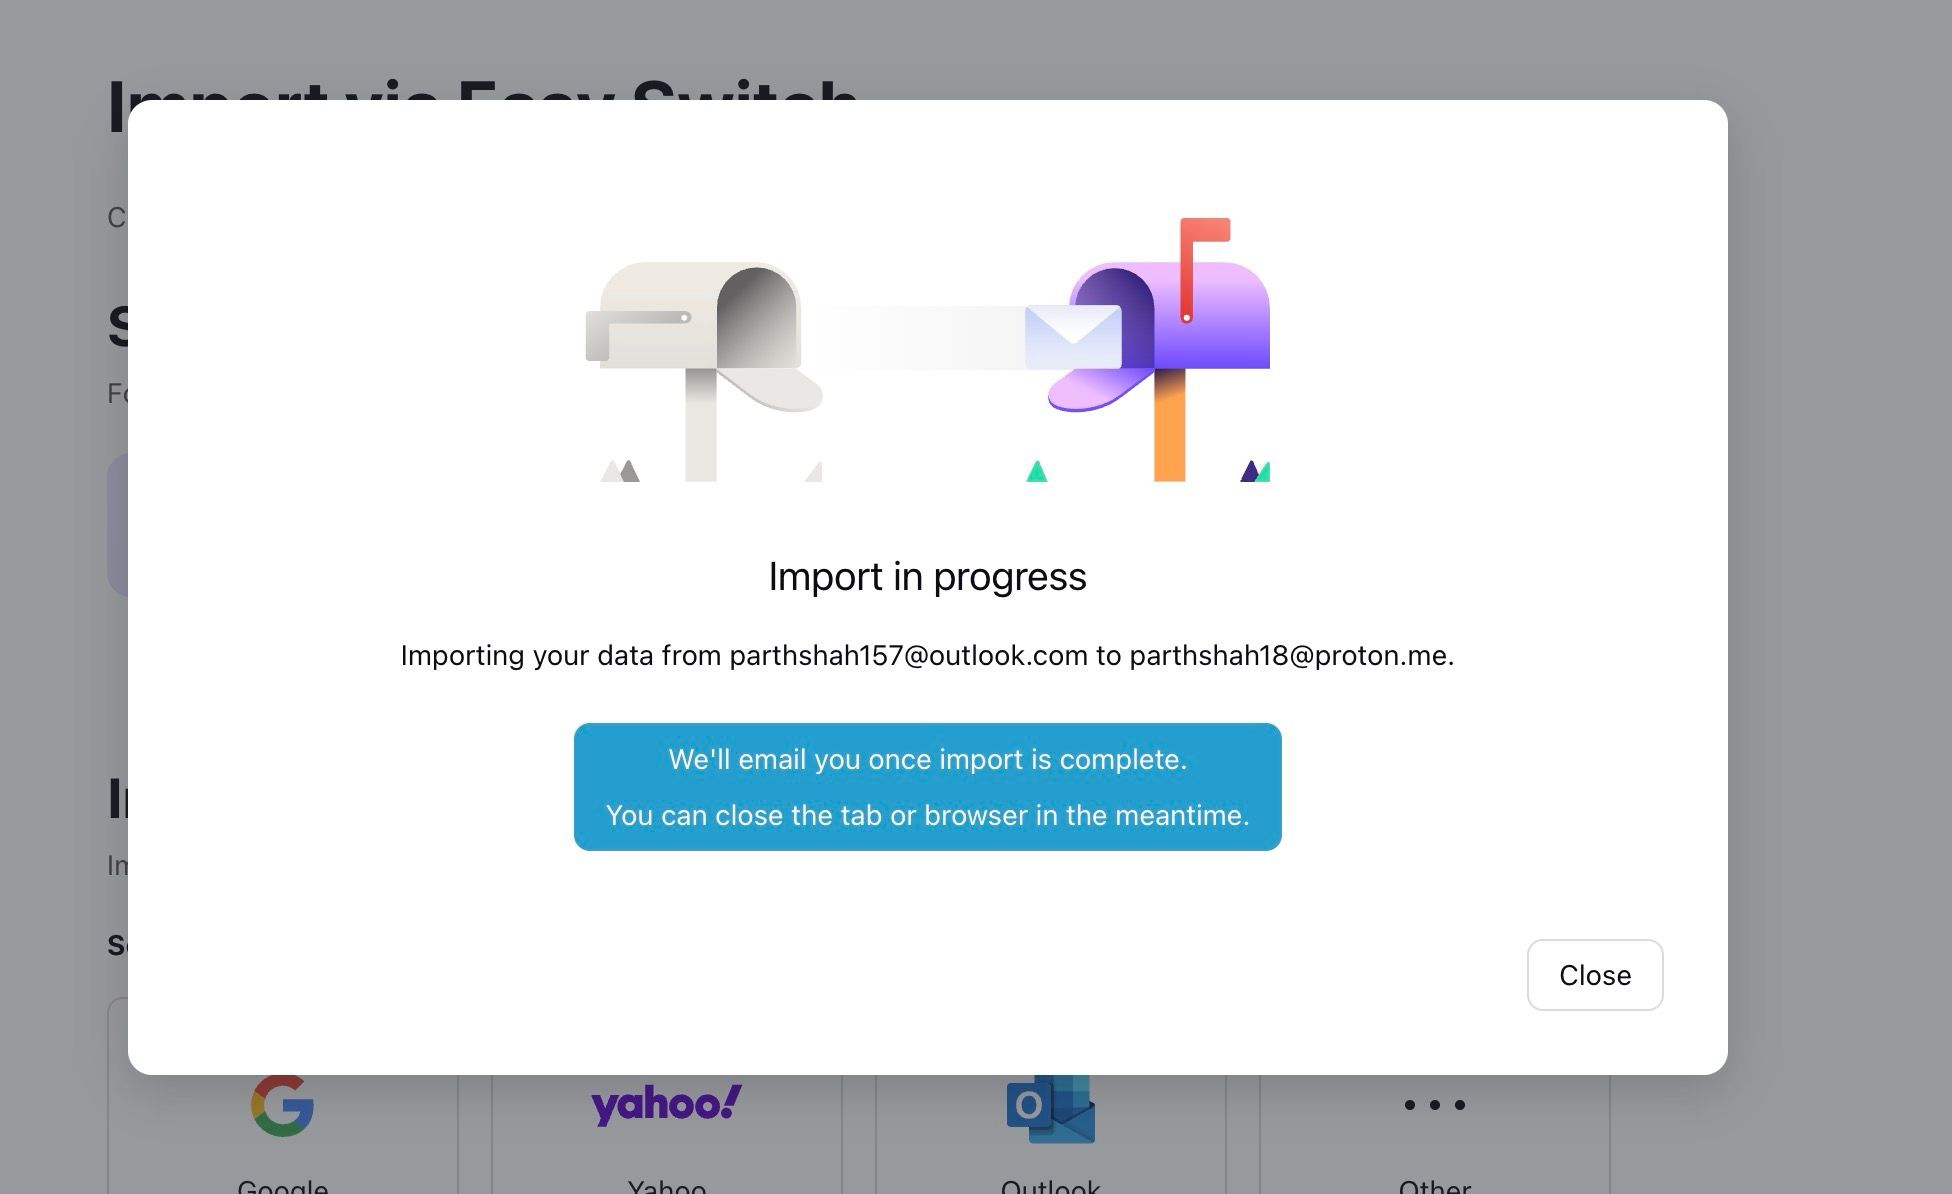
- It may take a while to complete the import process. You can close the tab. Proton alerts you via email when the import process is complete.
After a while, open the Proton Calendar and check all your events in action.
Import a calendar to Proton using an ICS file
If the trick above doesn’t work, you can move an Outlook calendar to Proton using the ICS file. To do this, you’ll download the ICE file of your Outlook Calendar and import it to Proton Calendar using the steps below.
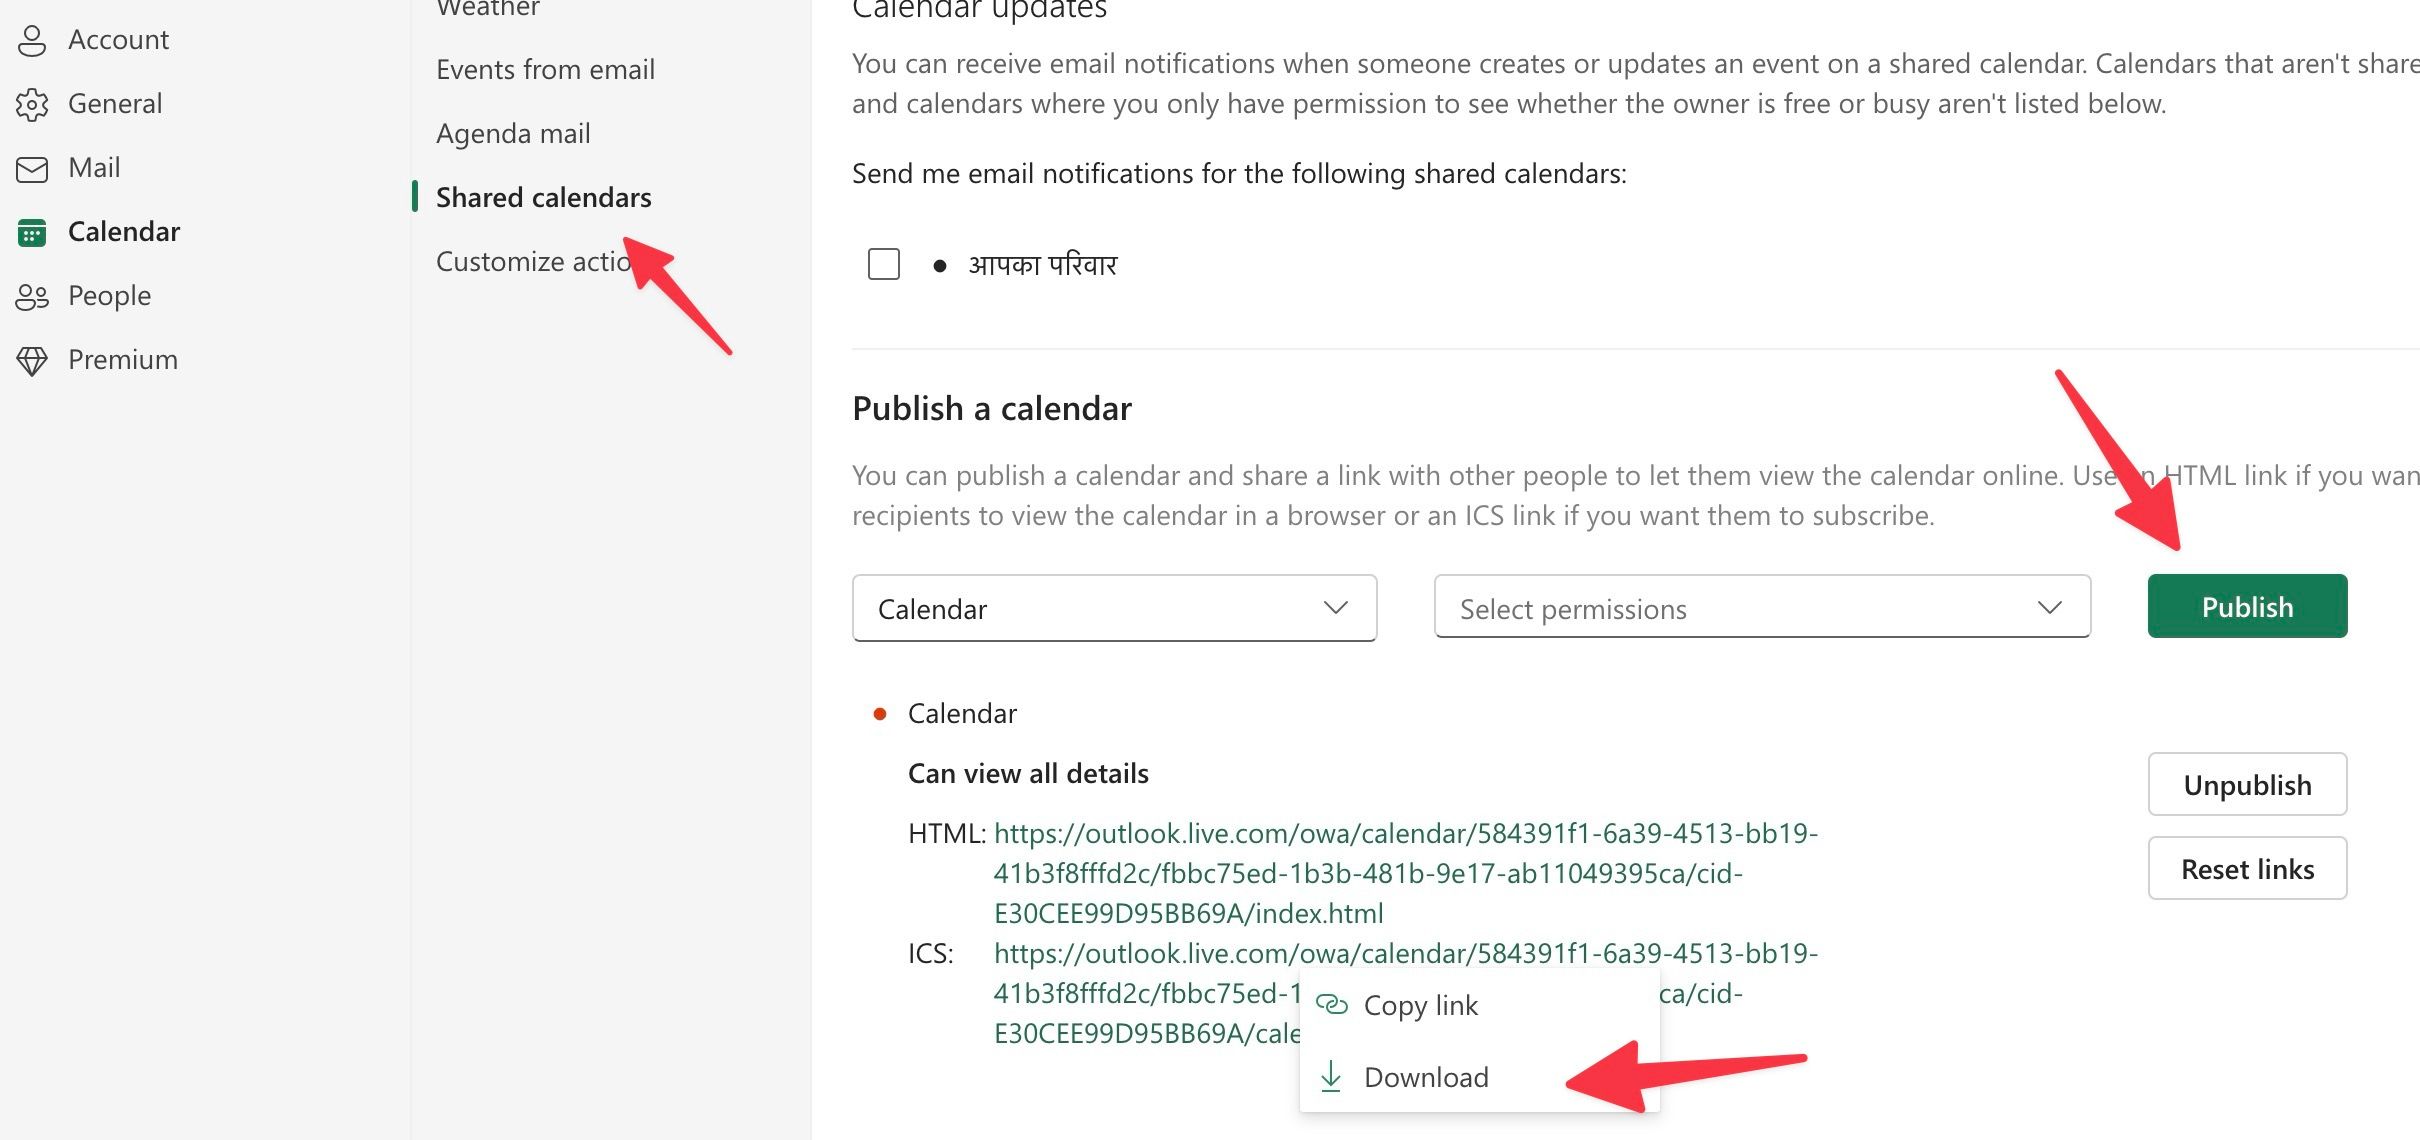
- Visit Outlook Calendar on the web and sign in with your Microsoft account details.
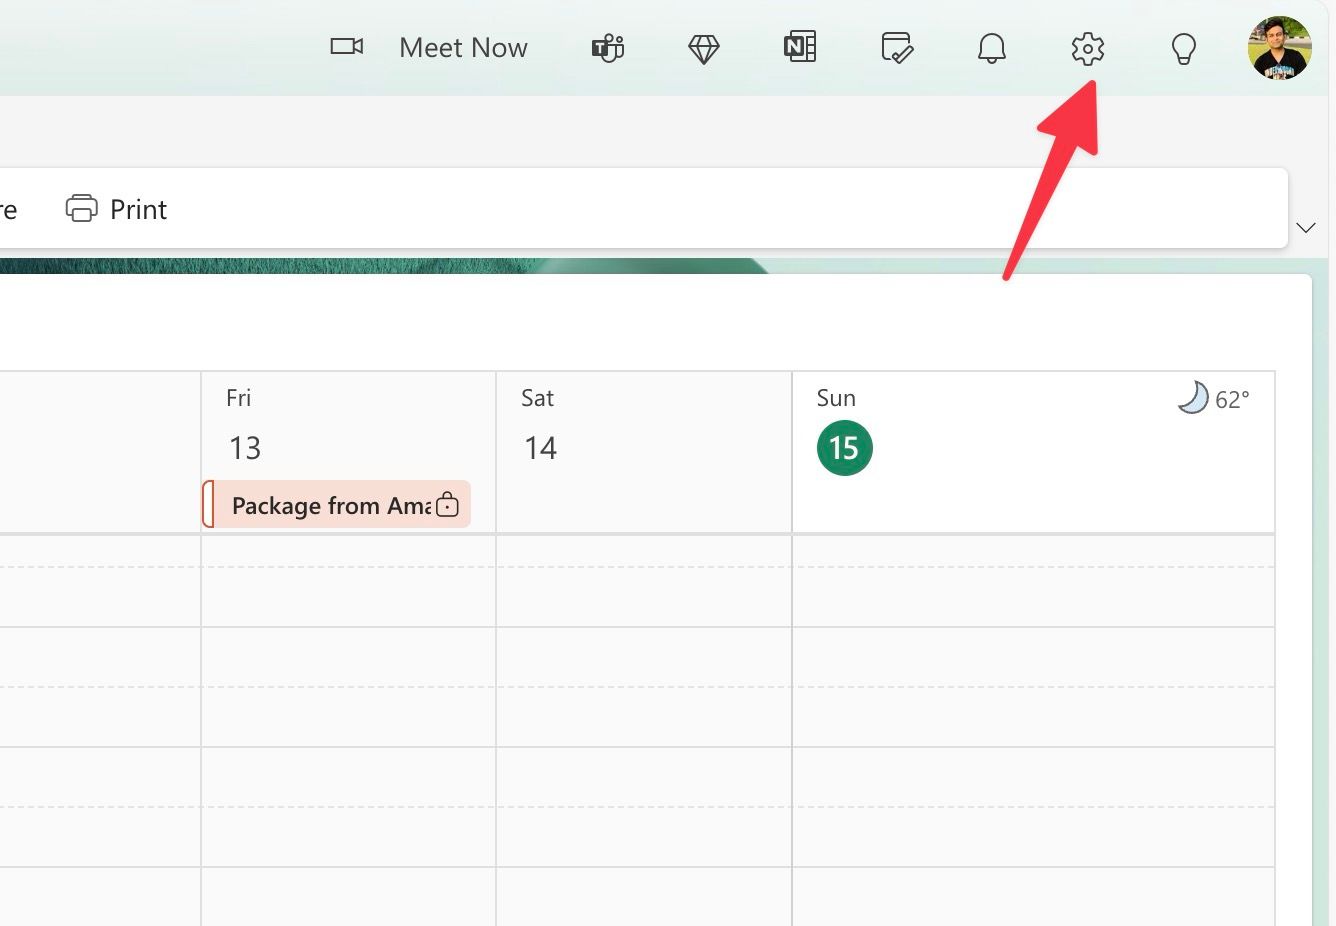
- Select the Settings gear in the upper-right corner.
- Go to Calendar and open Shared calendars.
- Select your Outlook calendar and click Publish.
- Outlook generates HTML and ICS links for your calendar.
- Click the ICS link and select Download. It downloads the ICS file to your computer. Now, it’s time to import it into Proton.
- Visit Proton Calendar and go to All Settings.
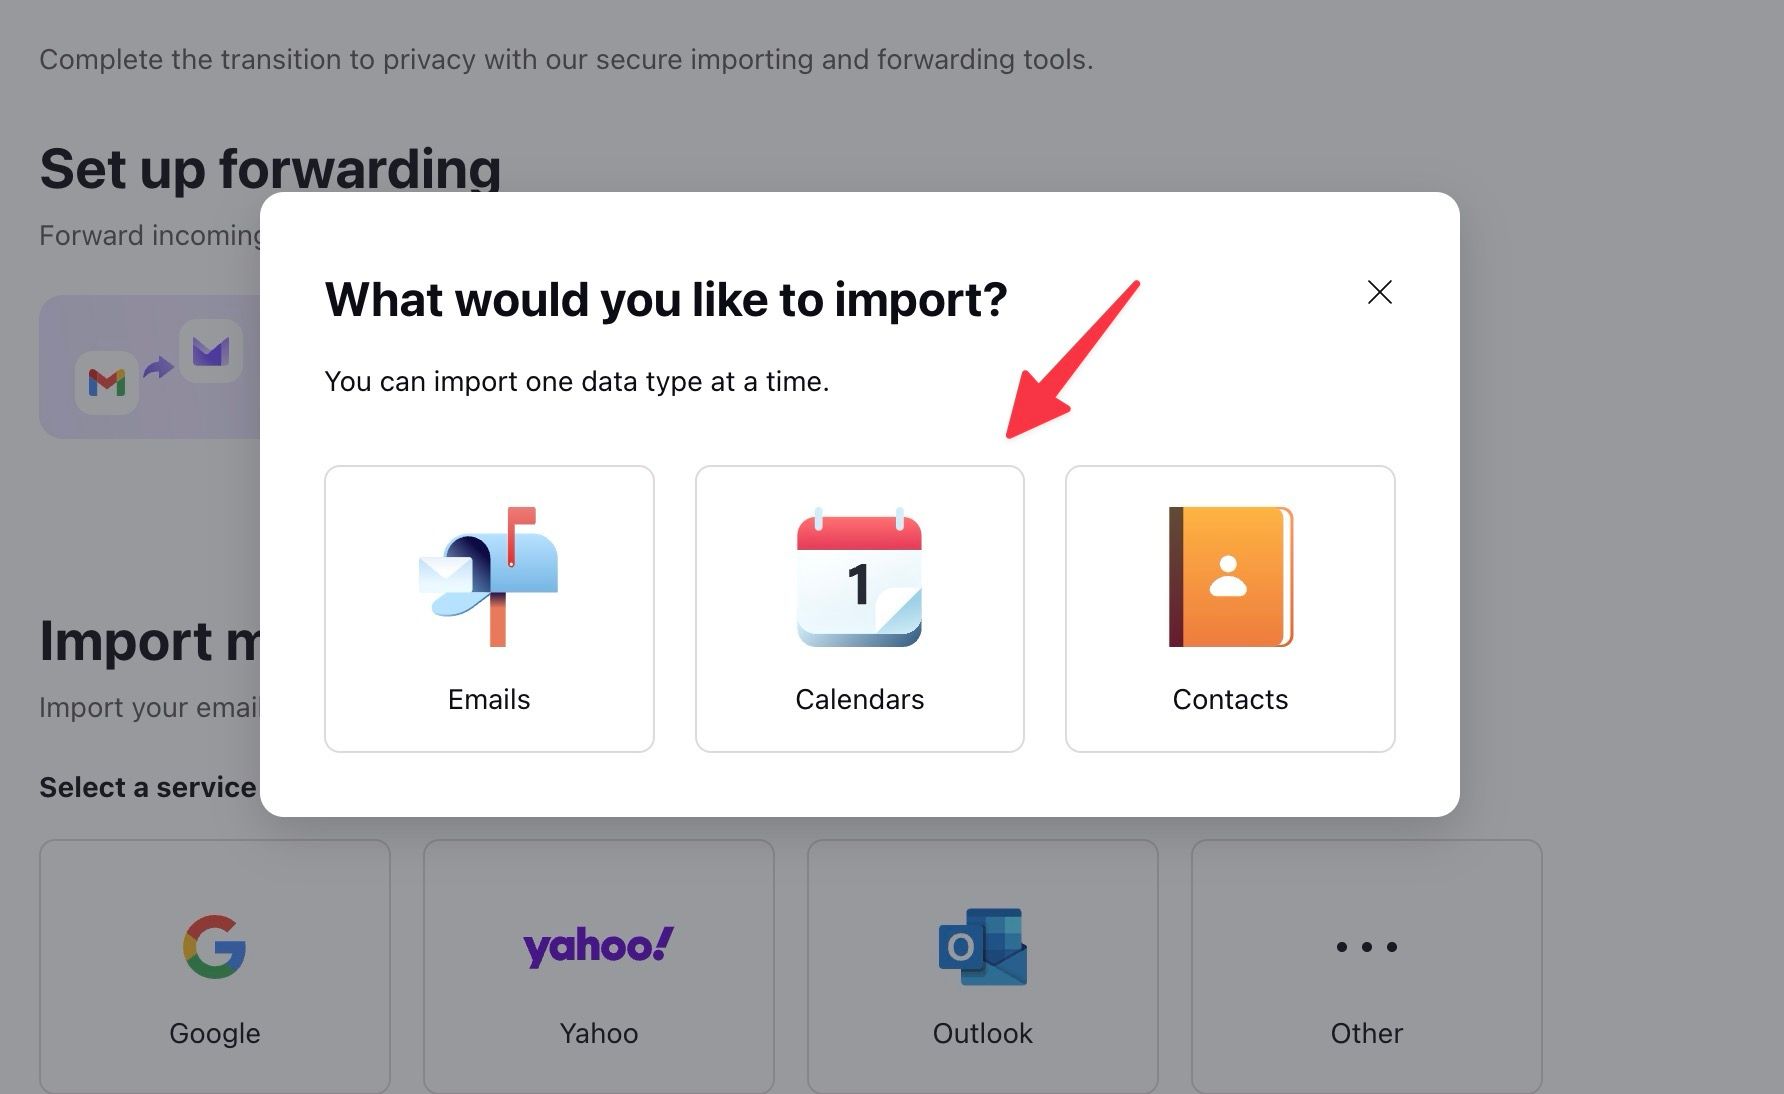
- Go to Import via Easy Switch > Import messages. Click Other.
- Select Calendars.
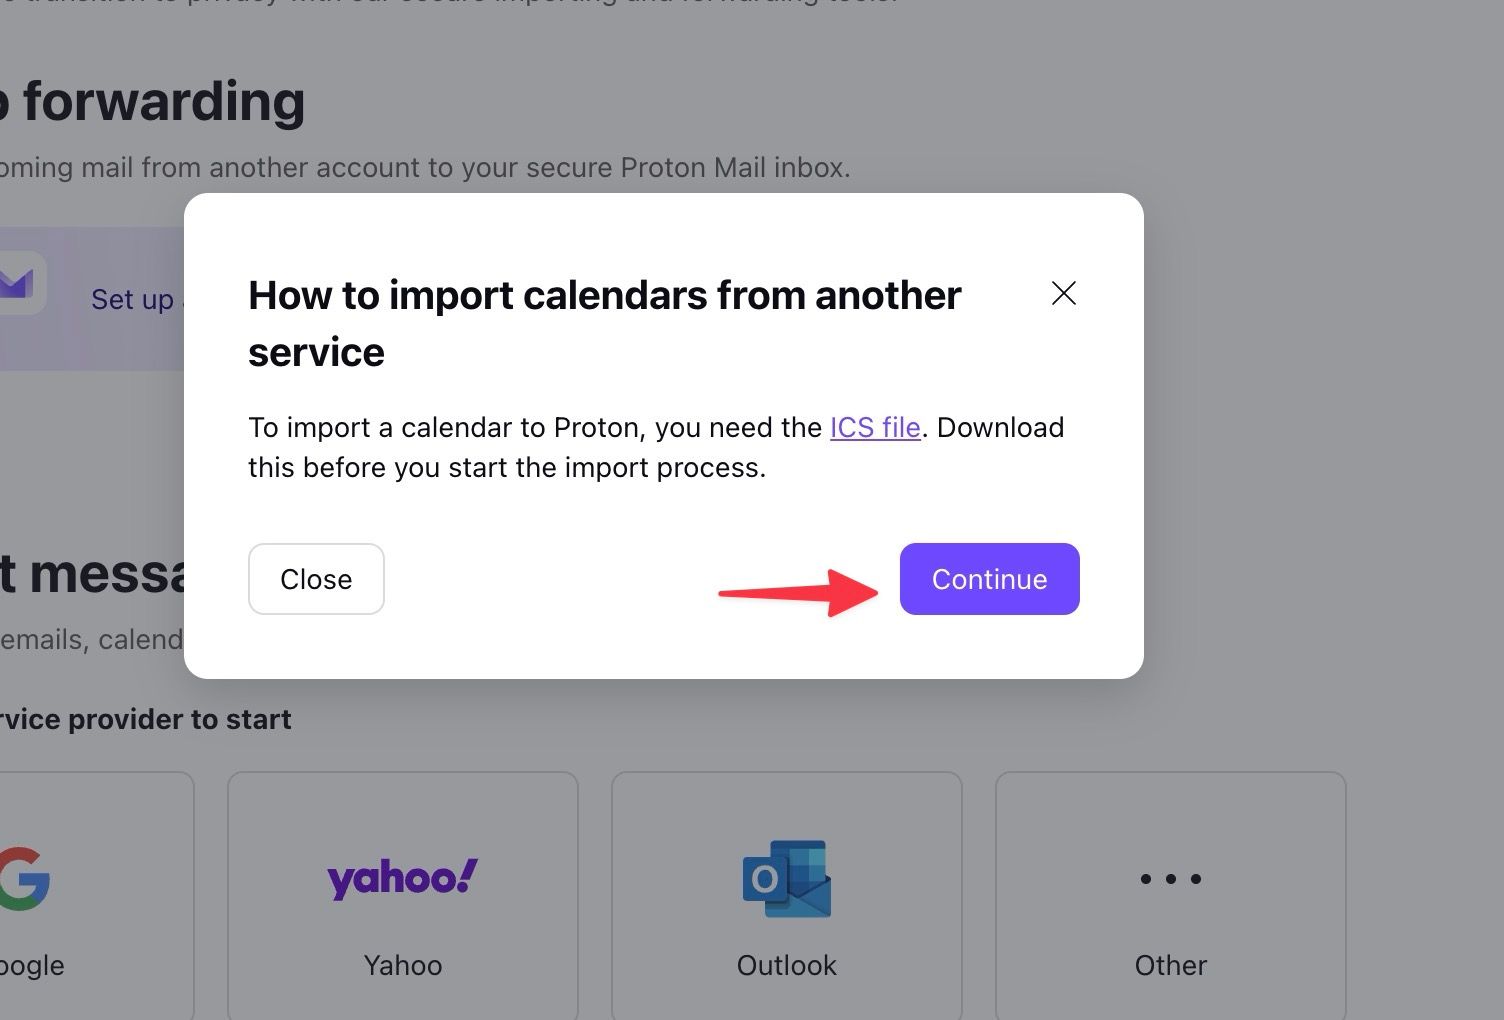
- Select Continue.
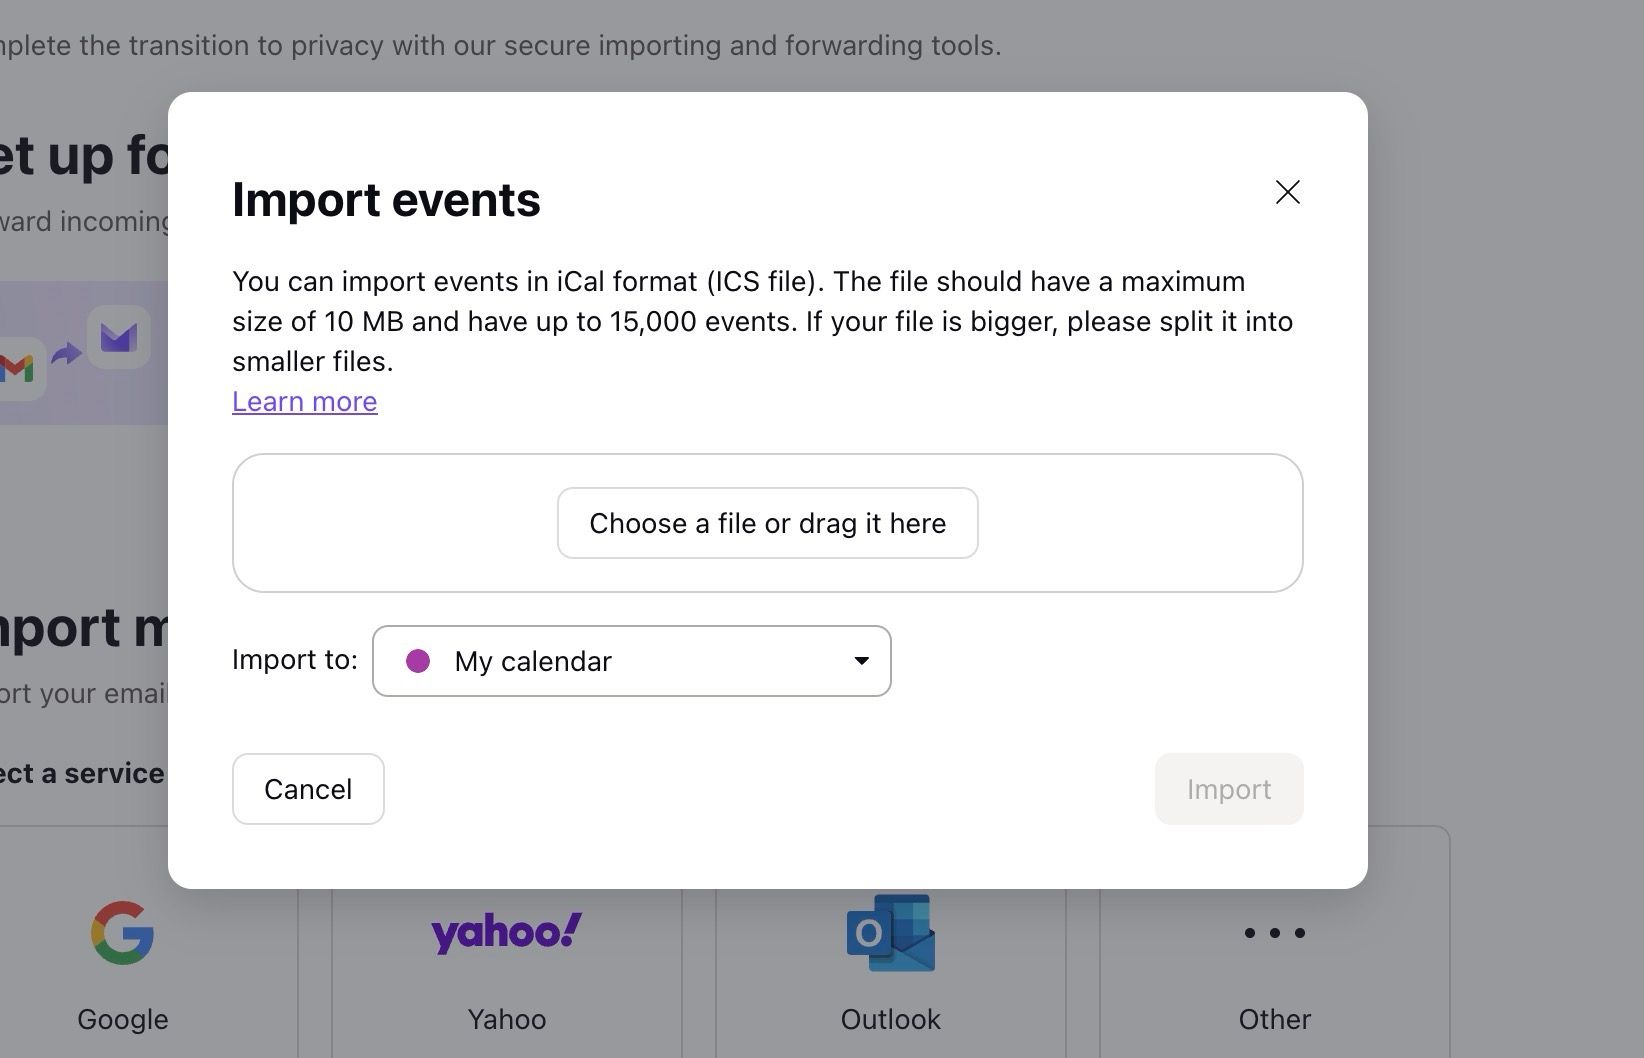
- You can choose a file or drag it and drop it into Proton. The file should be a maximum of 10MB and contain up to 15,000 events. If it’s a bigger file, split it into smaller files.
- Click Import, and you are good to go.
Proton encrypts and imports all your events to its ecosystem. You can go back to Proton Calendar and check your Outlook events.
Start using Proton Calendar
Now that you imported your Outlook calendars into Proton, explore its features and start scheduling its events like a pro. One of the best parts of the Proton ecosystem is cross-platform availability. Whether you use Proton Mail, Calendar, or VPN, its apps are available on all platforms, including Linux. Let’s check its Mac app in action.
- Download Proton Calendar for Mac from the official website.
- Find the installer file and open it.
- Go through the on-screen instructions. Like Outlook, Proton combines Mail and Calendar functionality into a single app.
- Open the app, sign in with your account details, and move to the calendar tab.
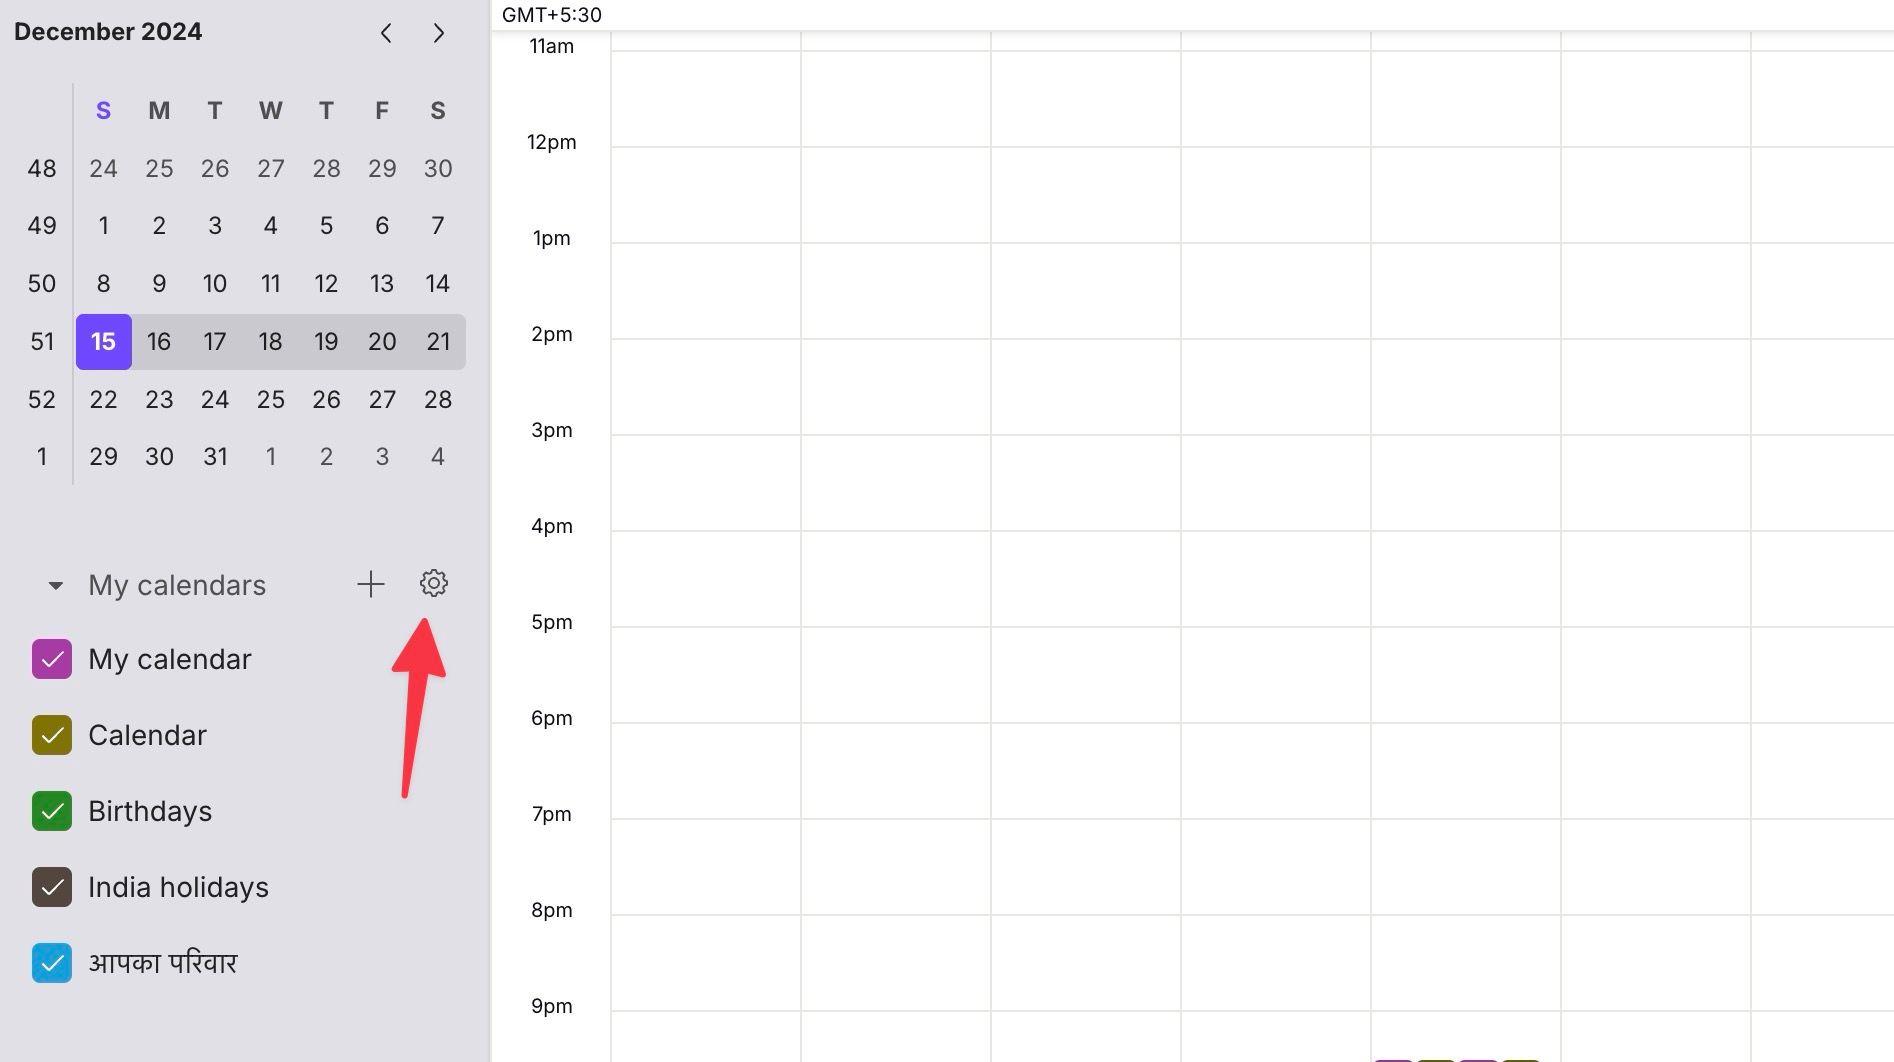
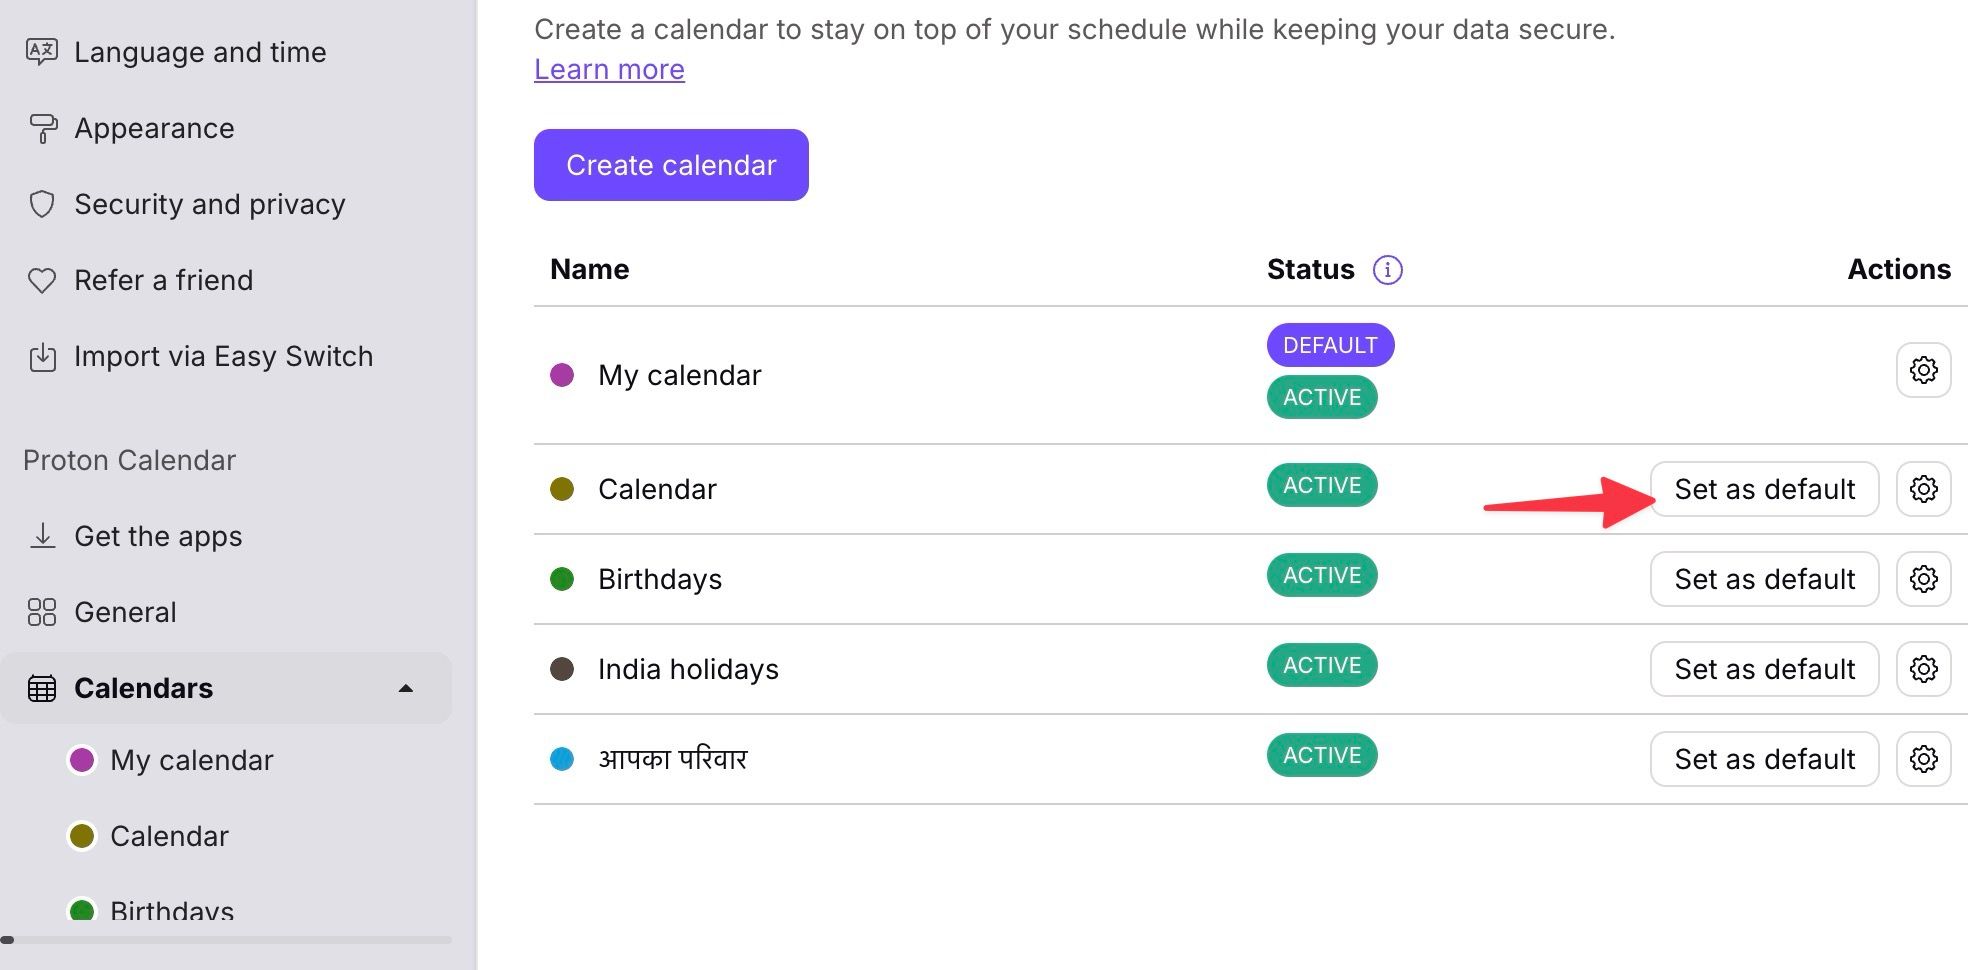
- Check all your calendars and select the Settings gear.
- Select Set as default beside a calendar and you are good to go.
Like any calendar app, Proton covers all the basics here. You can create a new event with all the required details like title, participants, location, alerts, and description.
Share a Proton Calendar
If you manage events with your team members, share your Proton Calendar with them. Here’s what you’ll do.
- Open the Proton Calendar app on your Mac or Windows.
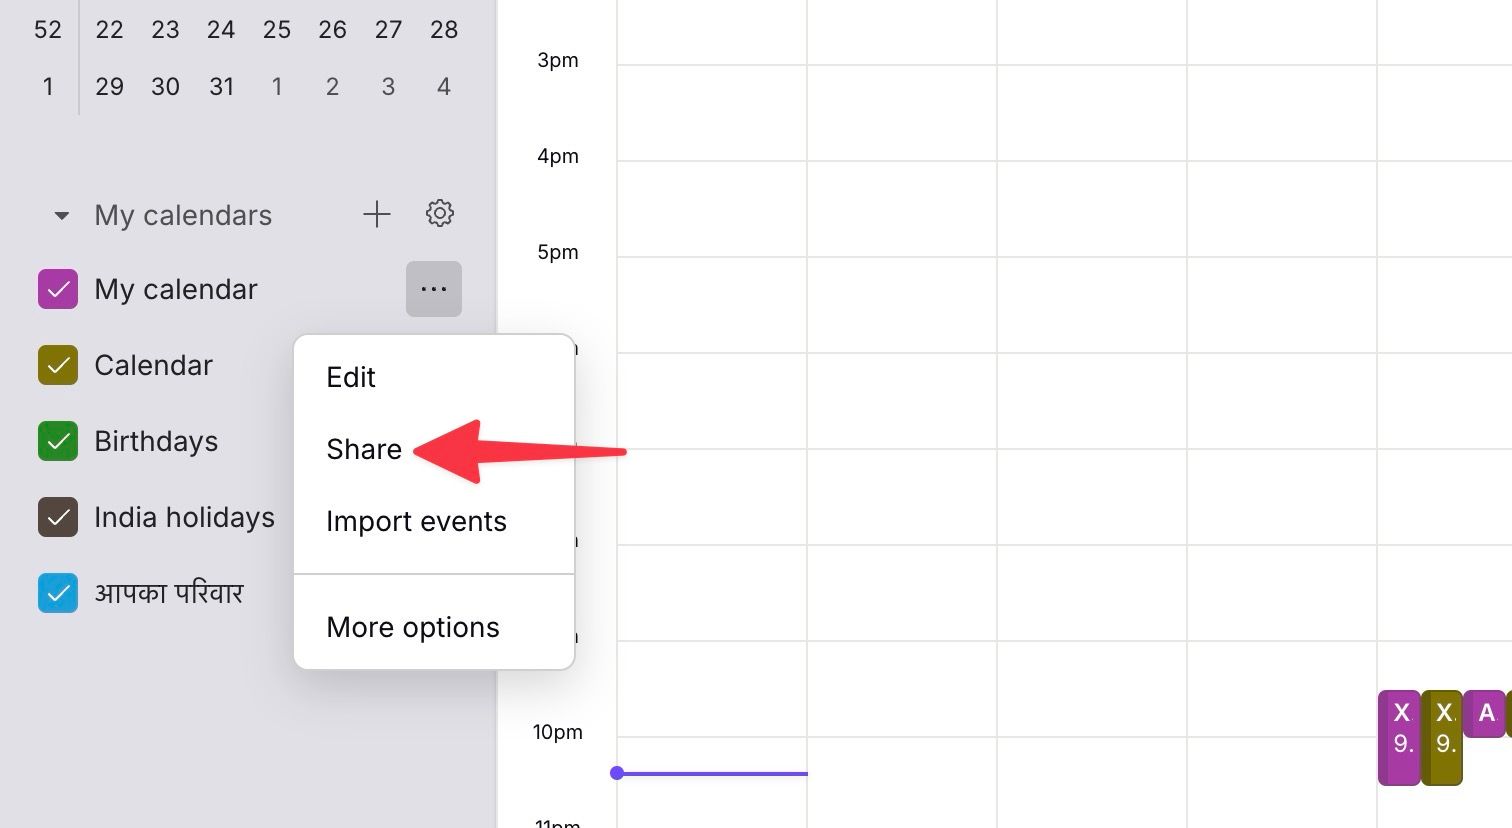
- Click the overflow menu (the three dots) beside a calendar you want to share.
- Select Share.
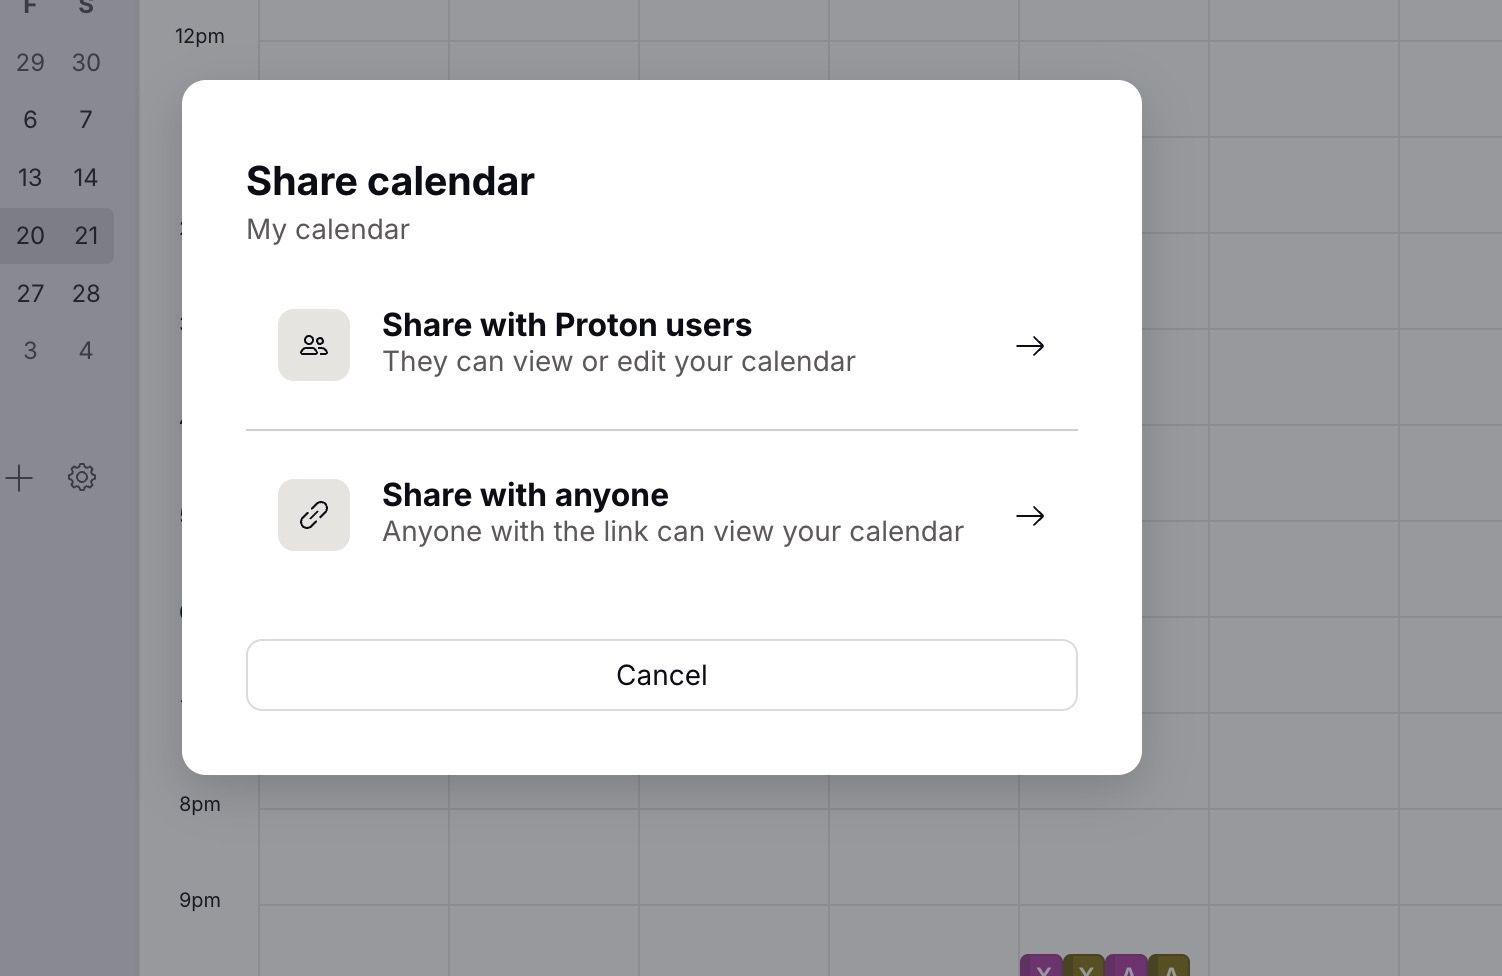
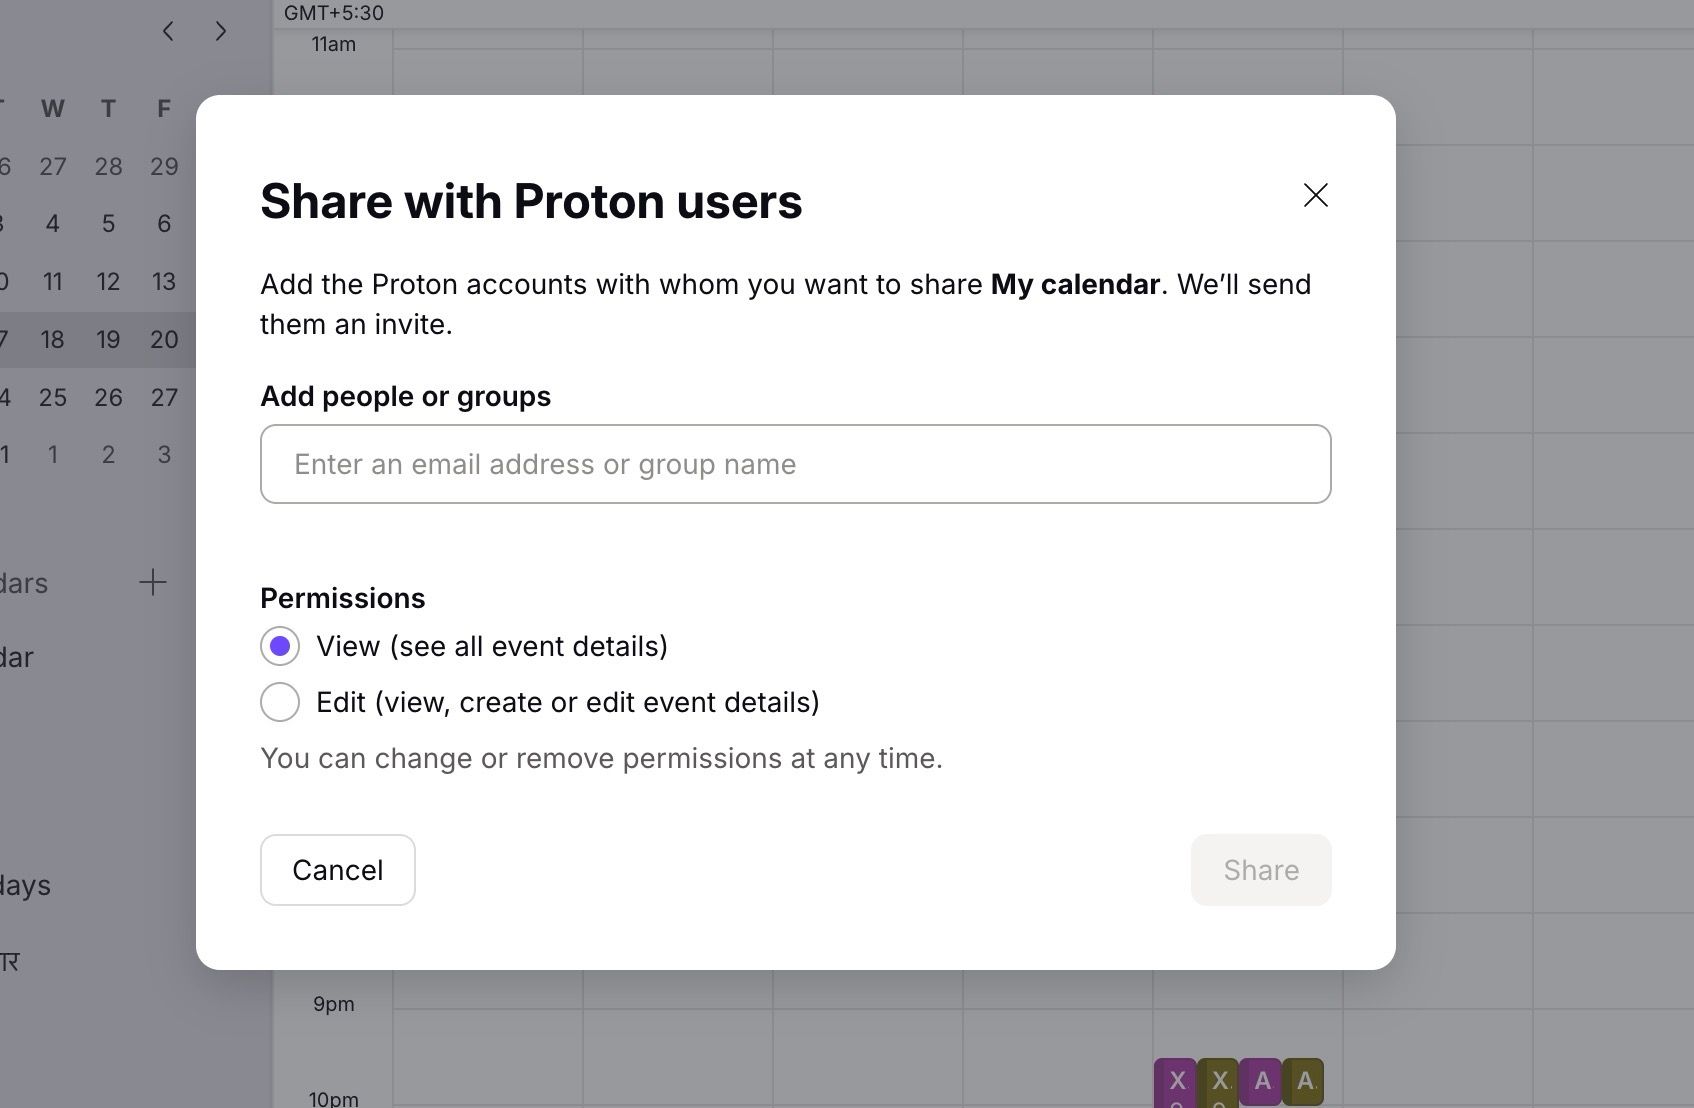
- Share it with Proton users or generate a link where anyone can view the calendar.
- If you share it with a Proton user, you can give them permission to view or edit the calendar.
Effortless migration
That’s it! You completed calendar migration from Outlook to Proton and brought your schedule into the secure environment of Proton Calendar. What are you waiting for? Explore Proton Calendar’s capabilities, customize your settings, and enjoy a more organized and secure approach to managing your time. Aside from Outlook, you should also move your Gmail calendars to Proton. Read our separate guide to complete the transition without breaking a sweat.


