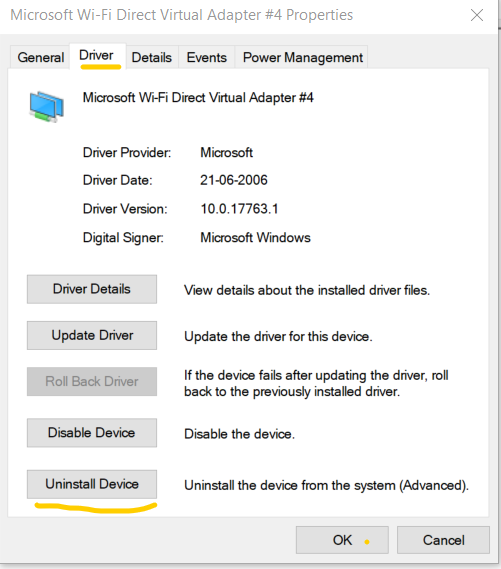
Problems related to unsuccessful connection to the internet are mainly because of an out-of-date or corrupted wireless driver. If the wireless driver is the culprit, reinstalling it will solve the issue. The steps for clean re-installation are as follows:
- Download the latest version of the driver using an Internet connection and finding the driver from the support website of the manufacturer.
- Uninstall the Driver from the device manager.
- Finally, reboot the computer and install the downloaded driver.
Reinstalling Wireless Driver in Windows (10/7/XP)
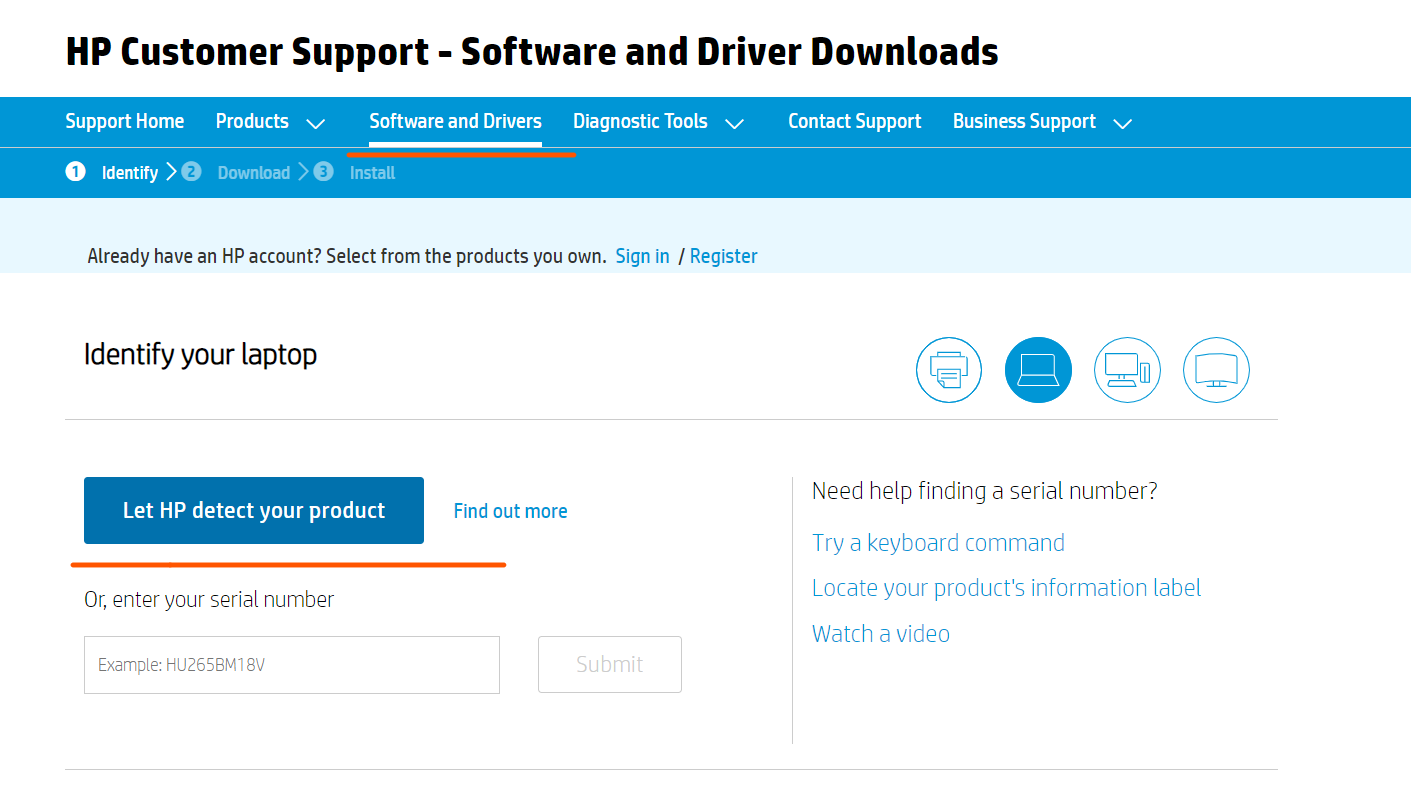
Step 1: Visit the support page of the manufacturer and enter details such as Serial Number/Product Number to correctly identify your device and view the drivers supported by your model.
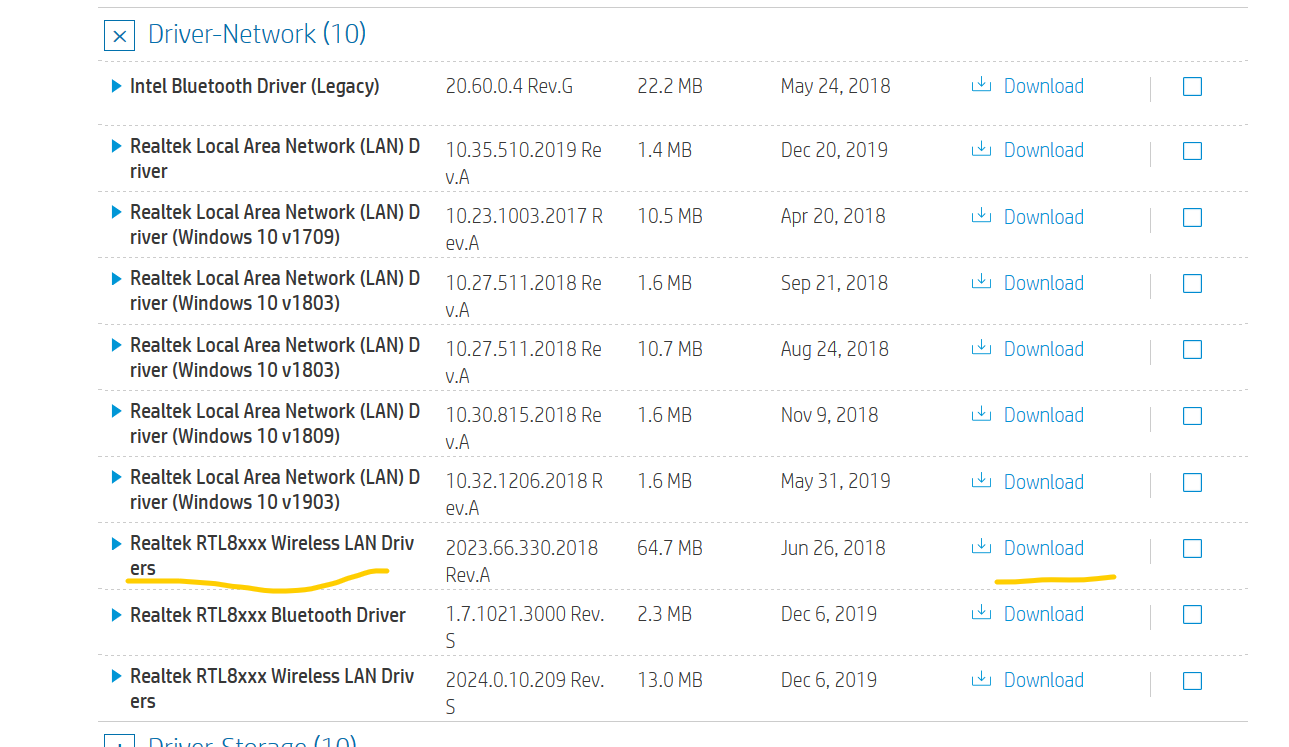
Step 2: Download the proper wireless Driver which has the word ‘Wireless‘ in it and save it. Do not run it as of now.
Uninstalling the Current Driver
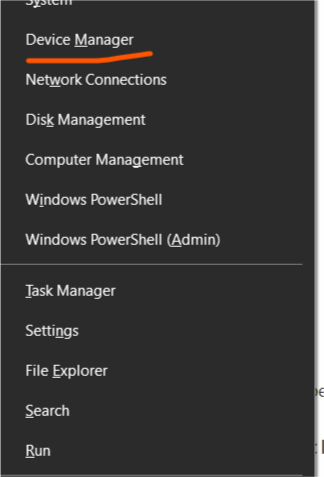
Step 1: Press Win + X simultaneously and select Device Manager. The device manager will pop up.
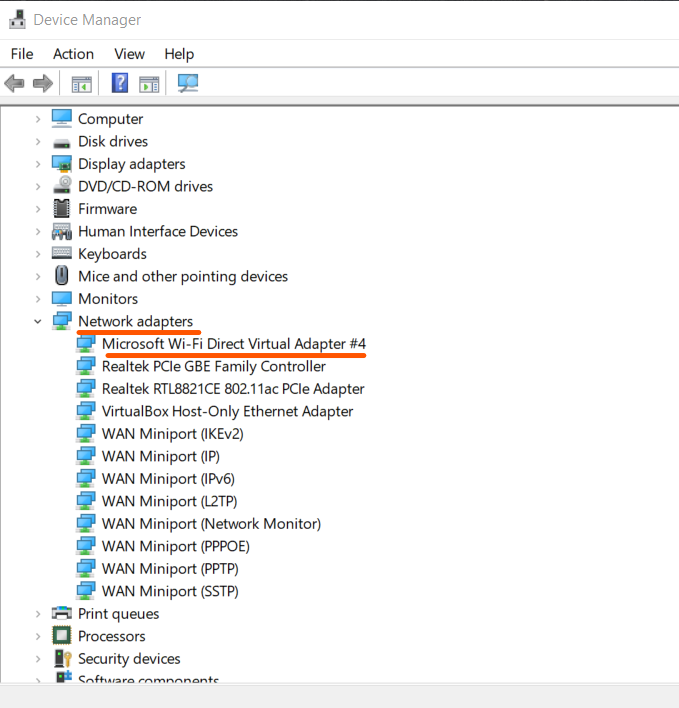
Step 2: Scroll and find Network Adapters and expand it. Find the name of the Driver which has the word ‘Wireless‘ in it and double click it.
Step 3: Under the Driver tab click on Uninstall Driver and uninstall it completely such that all files associated with the driver are deleted and it completely disappears from the Device Manager. If an option appears like Remove the installation file from the system then make sure to check it. Restart your system.
Reinstalling the Driver
- Unplug any Ethernet cable attached and browse for the Driver which was downloaded earlier.
- Unzip it and Start the Installation.
- Follow all the processes related to installation and upon finishing the driver would be reinstalled and any previously occurring issue will be resolved.
- Try connecting to the wireless connection now.
- If the issue doesn’t resolve then there is a problem somewhere else. In this case contact the Customer Support of the manufacturer and they will assist further.


