DHCP (Dynamic Host Configuration Protocol) is used to assign IP addresses to machines within any network automatically. It is also known as zeroconf protocol, as network administrators don’t need to assign IP addresses to machines manually. To assign IP addresses, DHCP makes use of DORA packets which stands for Discover message, offer message, Request message, and acknowledgment message respectively.
This article describes the DHCP Starvation Attack and how it can be implemented.
DHCP Starvation Attack:
A DHCP Starvation attack can result in a Denial of Service (DoS) attack or a Man in the Middle (MITM) attack. To perform this attack, the attacker sends tons of bogus DHCP Discover messages with spoofed source MAC addresses. The DHCP server tries to respond to all these bogus messages, and as a result, the pool of IP addresses used by the DHCP server is depleted. Hence, a legitimate user won’t be able to get an IP address via DHCP. This results in a DoS attack. Furthermore, the attacker can set up a rogue DHCP server to assign IP addresses to legitimate users. This rogue server can also provide the gateway router and DNS server to users. Now, all the network traffic can be routed via the attacker’s machine, and this is nothing but the MITM attack.

The IP address of the DHCP server is 10.10.10.1/24 with a subnet mask of 255.255.255.0. So, the DHCP server can hand out 254 unique IP addresses. However, some IP addresses are reserved for static routing, so it could be less than 254. The attacker sends N DHCP Discover packets, where N is very large compared to 254. Hence, the DHCP server can no longer hand out IP addresses.
Preventing DHCP Starvation Attack:
DHCP Starvation attack can be prevented by implementing port security, refer to Port Security in Computer Network to know more. Port security can be configured in a switch. With port security, you can limit the number of MAC addresses learned by the port. Hence, the switch would forward packets with known MAC addresses, and discard others. This would prevent bogus packets from reaching the DHCP server.
Implementation using Yersinia:
Yersinia is a tool for performing layer 2 attacks. It takes advantage of weaknesses in existing protocols to launch a variety of attacks.
Step 1: You can install Yersinia on Ubuntu 20.04 using the following command:
sudo apt-get install yersinia
Step 2: Run the following command to open Yersinia in GUI mode –
sudo yersinia -G
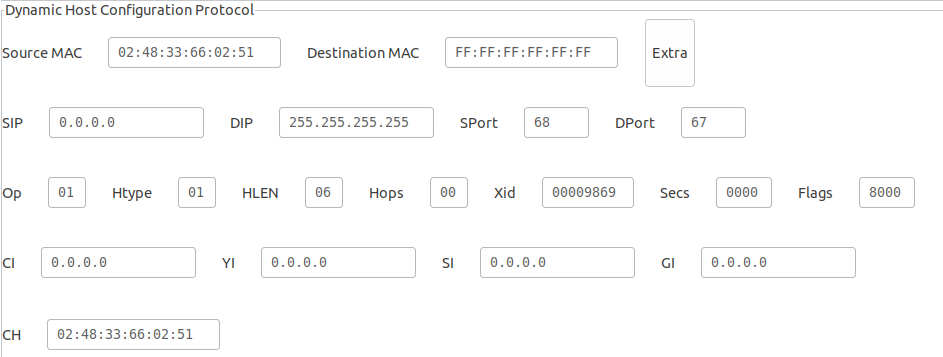
The image below shows default settings for DHCP in Yersinia

The source IP address is set to 0.0.0.0 as new users send packets using this IP address before they are assigned an IP address by the DHCP server and the destination IP address is set to 255.255.255.255 as the DHCP discover packet is broadcasted in the entire network.
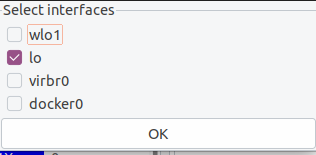
Step 3: Next, we need to select the appropriate interface. For simulation purposes, lo that is the loopback interface was selected. This setting will send DHCP to discover packets to the loopback address. In short, localhost is the DHCP server in this case.

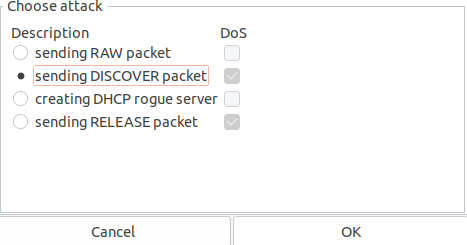
Step 4: Next, we need to select the type of attack that is “sending Discover packet”. You can observe that the DoS checkbox next to it is checked since it is a type of DoS.

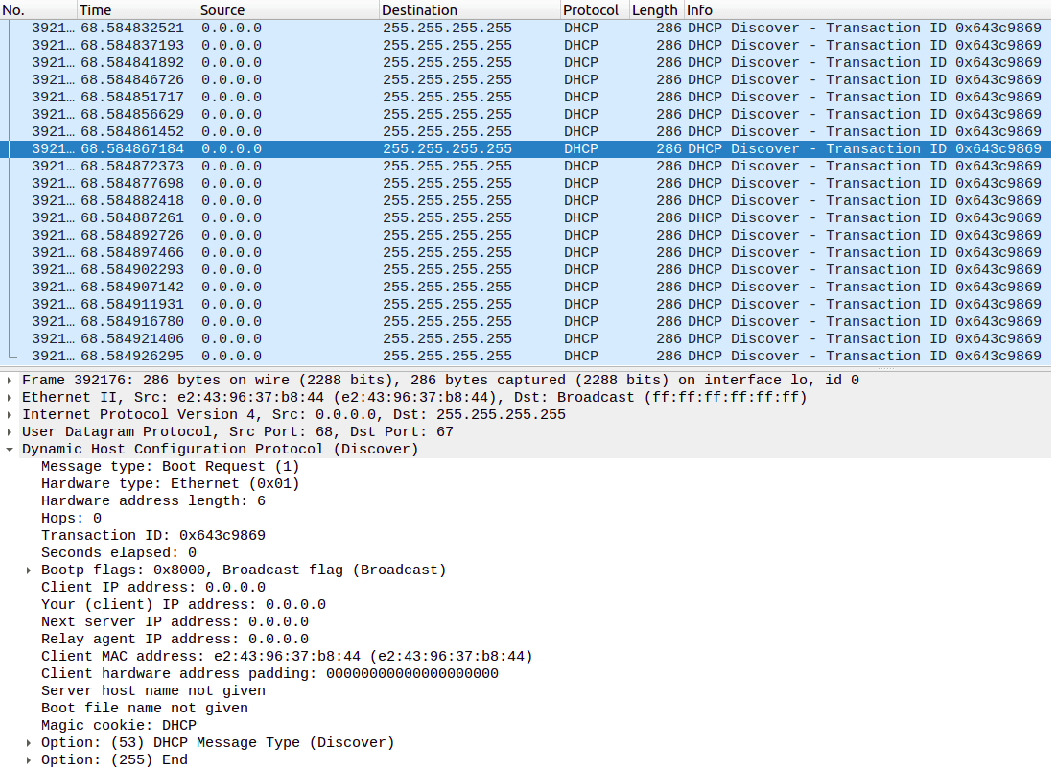
Step 5: After launching the attack, many DHCP Discover packets were captured using Wireshark on the loopback interface. We can see one of the packets in the image below. You can get an idea of the number of packets sent by looking at the frame number. We can also see the made-up source MAC address. All these packets have different source MAC addresses.


