
You may have seen my report on the CoolBooter updates, in which I mentioned that both the app and the command line versions had seen changes. Whilst using the CoolBooter app is self-explanatory and will satisfy the needs of most, it does not currently support iOS 5 as the secondary OS, which may lead some to want to try out the command line utility instead. I will therefore be walking you through using CoolBooter CLI 0.3 to dual-boot your device.
Before we begin, let’s get the standard disclaimer out of the way.
This is BETA software and a COMMAND LINE TOOL, not a finished app for end users. Test only on non-essential devices, which you are happy to completely restore if something goes wrong. Back up your data before beginning.
Next up, make sure that you have an eligible device, and understand CoolBooter’s restrictions. That information can be found in my previous article, but consists mainly of:
- An eligible 32-bit device.
- An eligible, and jailbroken, source firmware.
- tfp0.
- At least 6GB of free space.
- The larger capacity device the better, especially when using the CLI version.
- Blobs not needed.
In addition, for this guide you will need:
- A computer to run the commands to your connected device.
- CoolBooter CLI and its dependencies installed on your iOS device from Cydia.
- OpenSSH and its dependencies installed on your iOS device from Cydia.
How to dual-boot with CoolBooter CLI
1) Open Cydia on your iOS device and add the following source:
https://coolbooter.com
2) Install CoolBooter CLI (and any dependencies it requires).
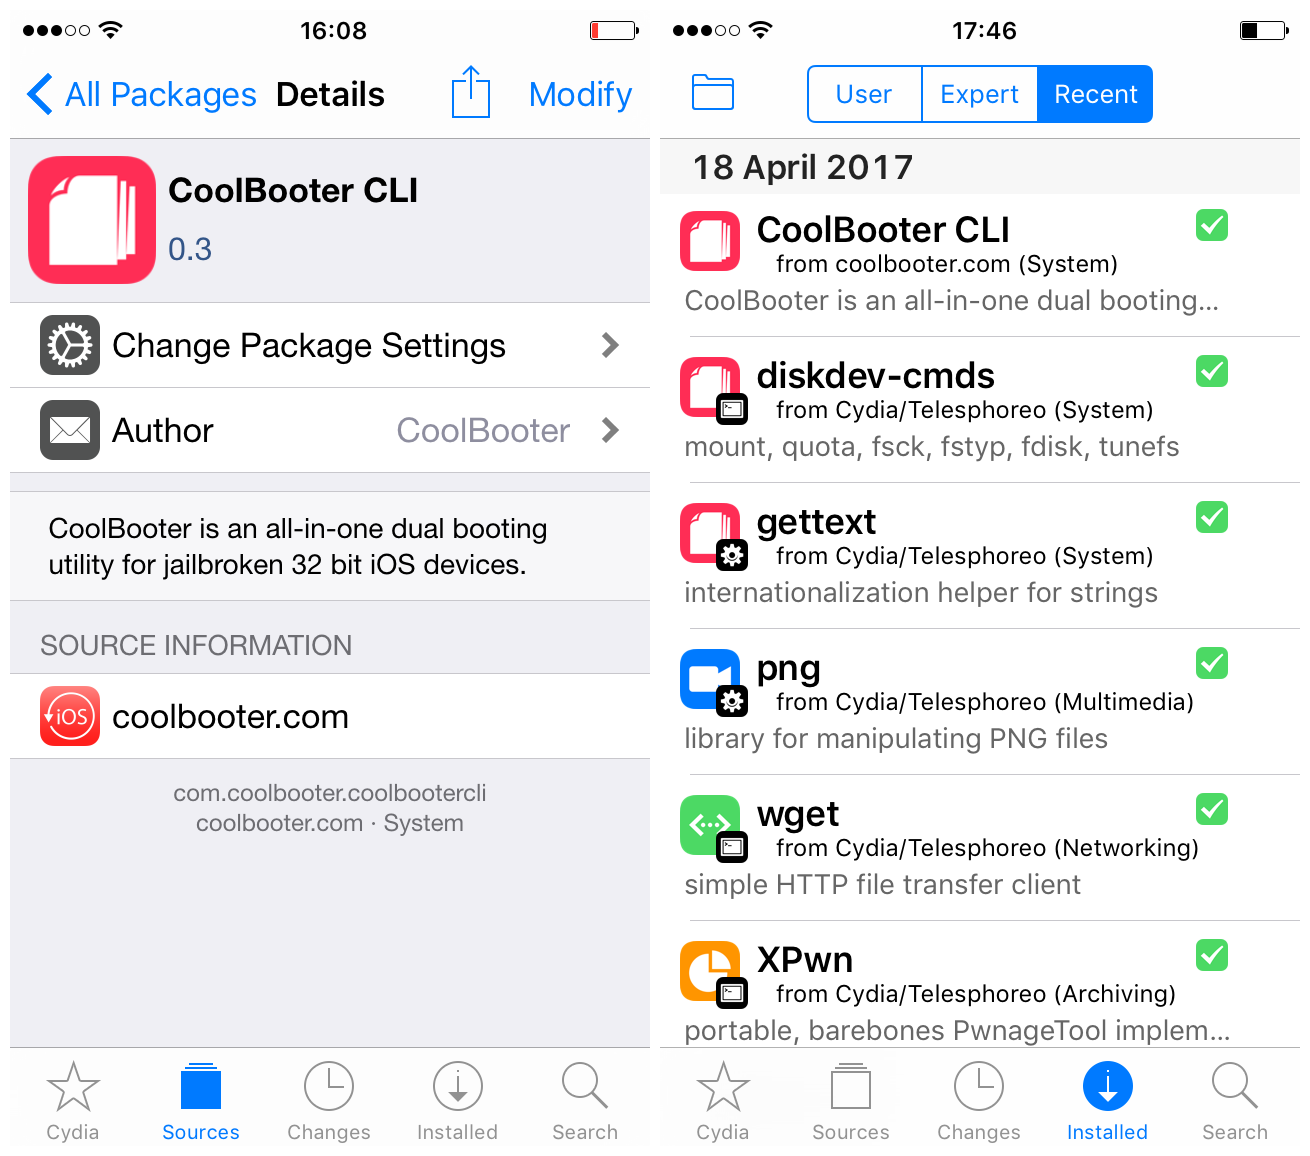
3) If you haven’t already installed and set up OpenSSH (and any dependencies it requires) do so now.
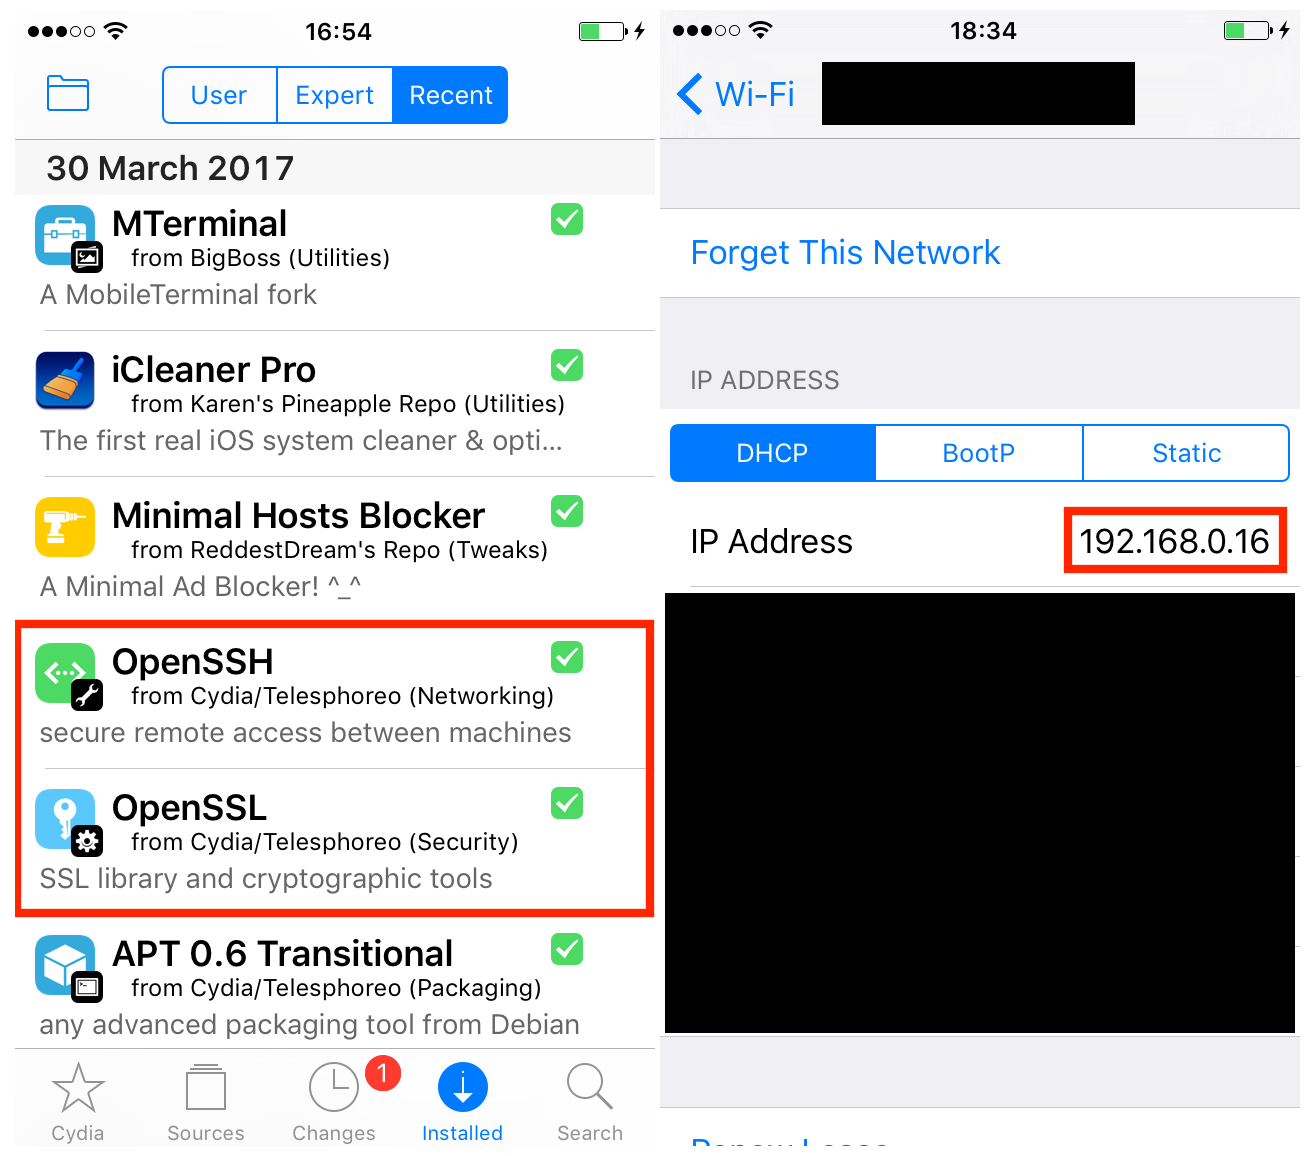
4) Open Settings on your iOS device and take note of your IP address, as seen above.
If you don’t know how to configure OpenSSH or find your IP address, follow our guide on the topic to get started.
CHANGE YOUR DEFAULT PASSWORDS AFTER INSTALLING OPENSSH.
The linked article will help you do this too.
5) Connect your device to your computer. On your computer, launch Terminal from /Applications/Utilities, or via Spotlight.
This guide assumes you are using a Mac, though Windows and Linux should work fine too using their own Terminal equivalent, provided they support OpenSSH.
6) SSH into your device from the Terminal window on your computer. Use the instructions linked in the guide in Step 4 to do this if necessary.
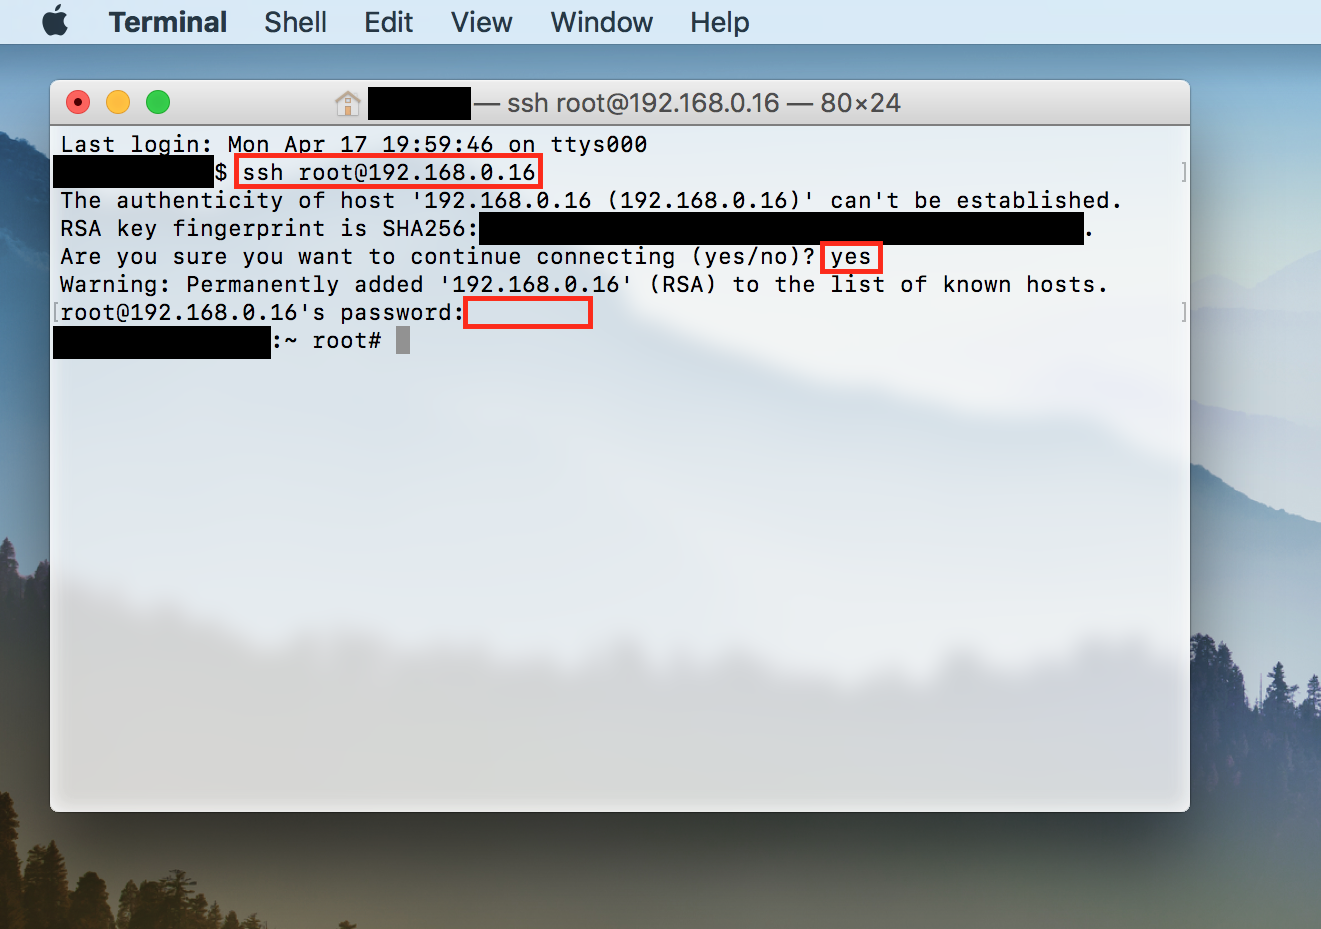
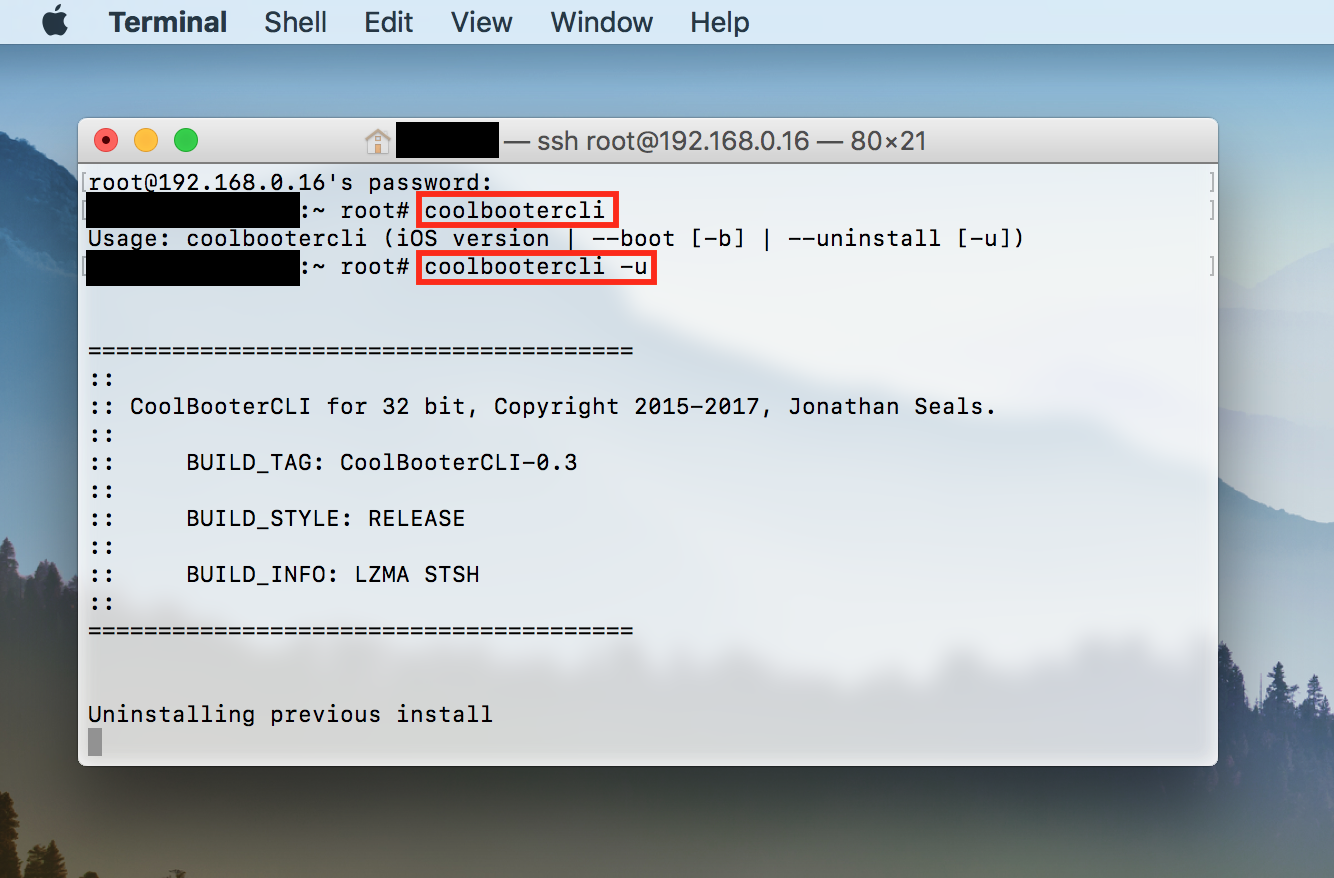
7) Once you’ve connected via SSH and are root on your iOS device, type the following command into Terminal to view CoolBooter CLI’s options:
coolbootercli
8) As can be seen from the readout, the command we need is:
coolbootercli iOS_version_here
Replace iOS_version_here with a compatible destination firmware of your choice. Depending on your device, it could be anything from iOS 5.0-7.1.2. On my example device I wanted to dual-boot with iOS 7.1.2, so my command looked like this:
coolbootercli 7.1.2
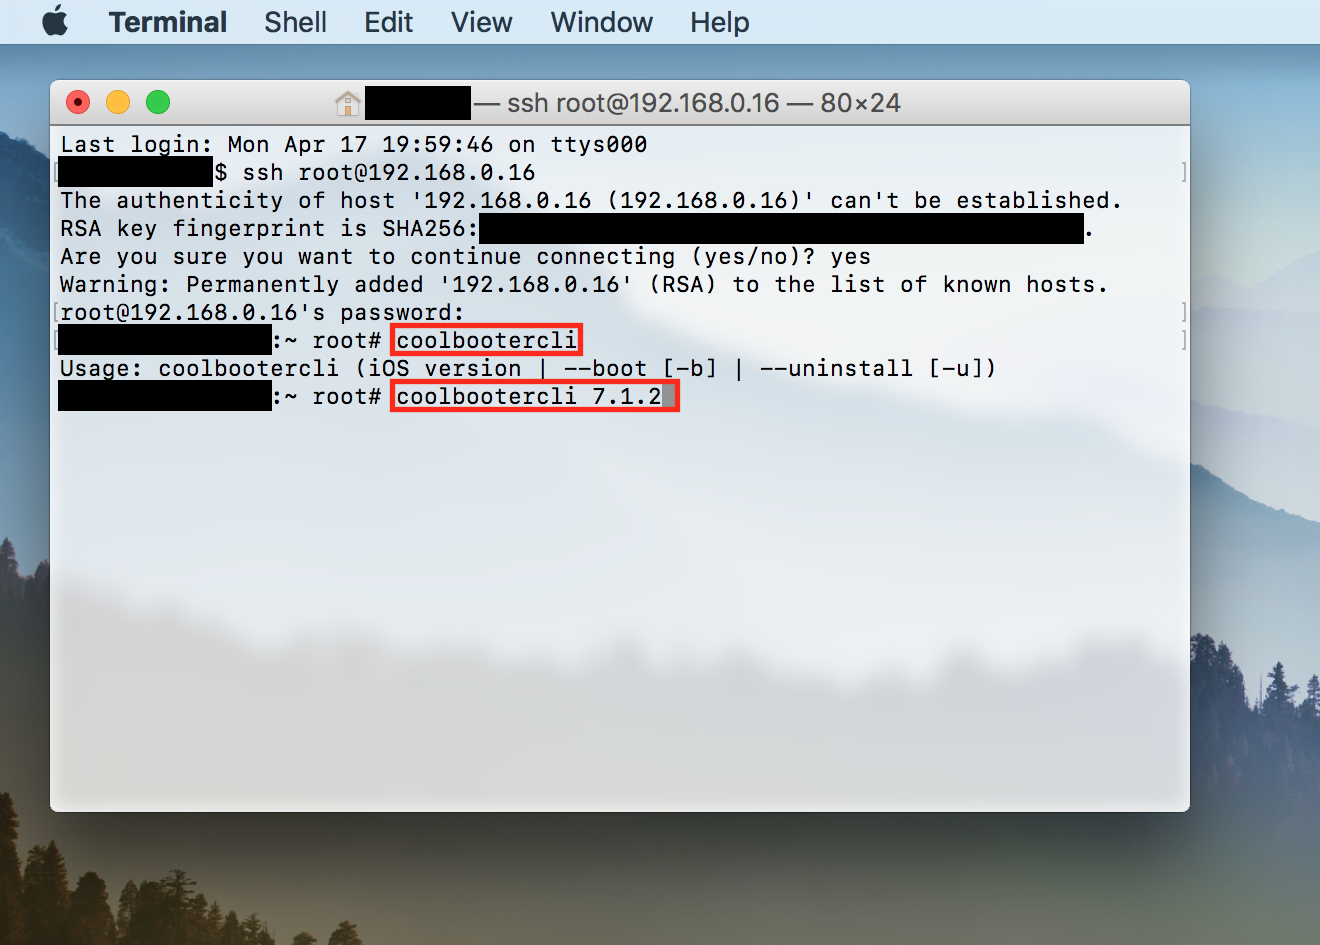
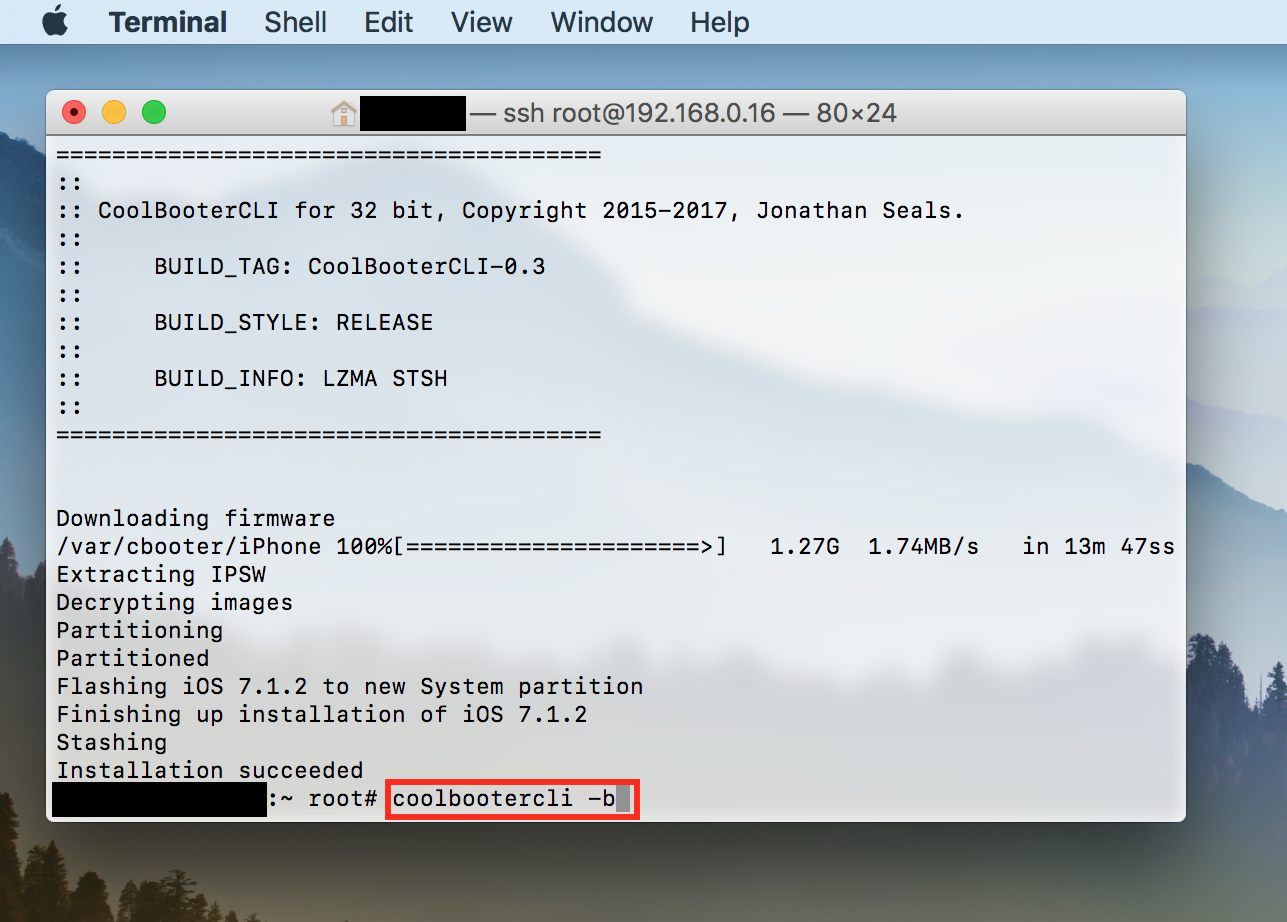
9) Hit Enter to issue the command, and let CoolBooter CLI work its magic. This can take a while as it includes downloading the IPSW, pushing it to the device, partitioning the device, and stashing.
10) When it’s complete, it should say Installation succeeded. Now enter the following command into your Terminal SSH session to reboot your device to its new secondary OS:
coolbootercli -b
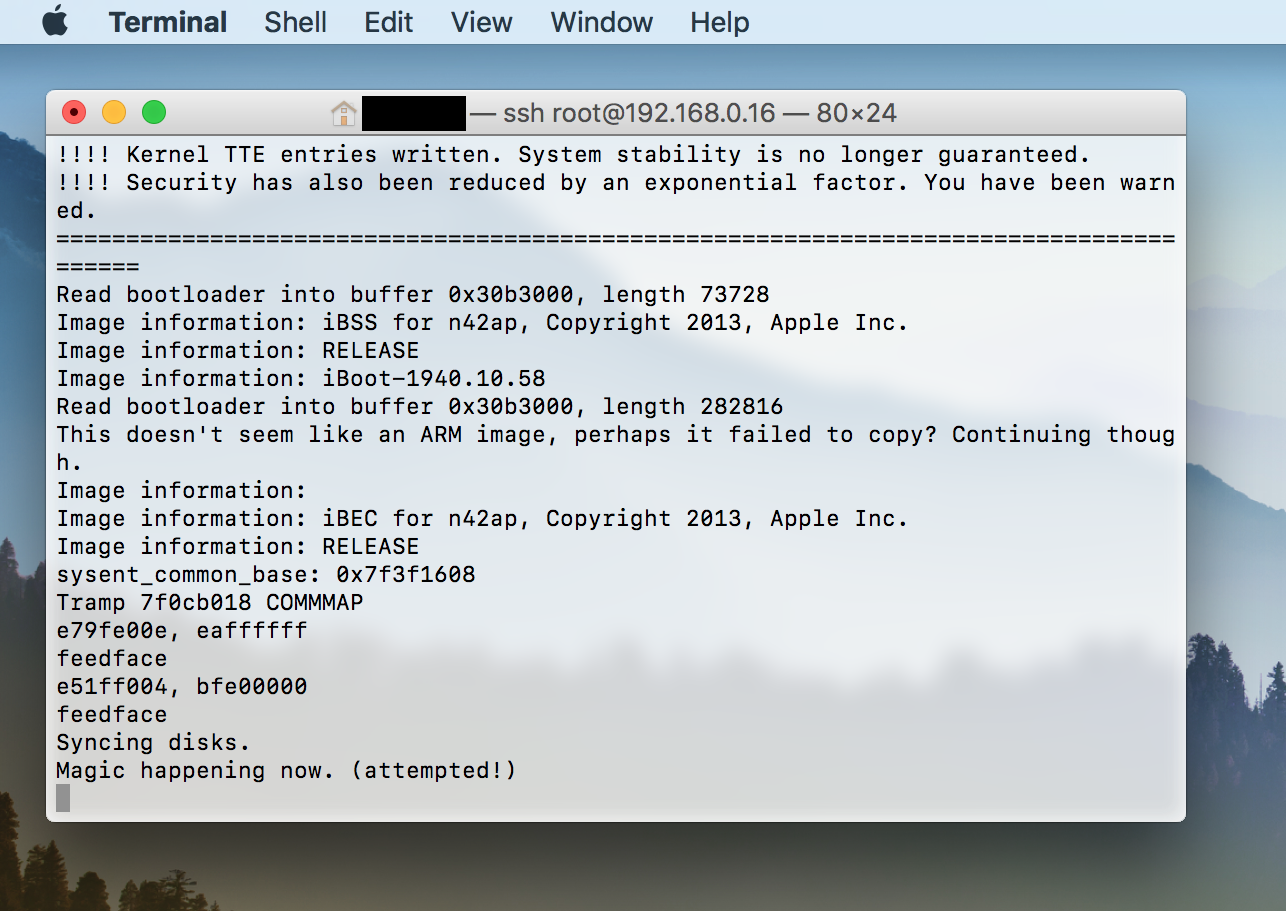
11) You may need to lock your device after issuing the command. When the output reaches the stage shown below, you may need to attempt to unlock your device again to allow it to continue. This may not be necessary however.
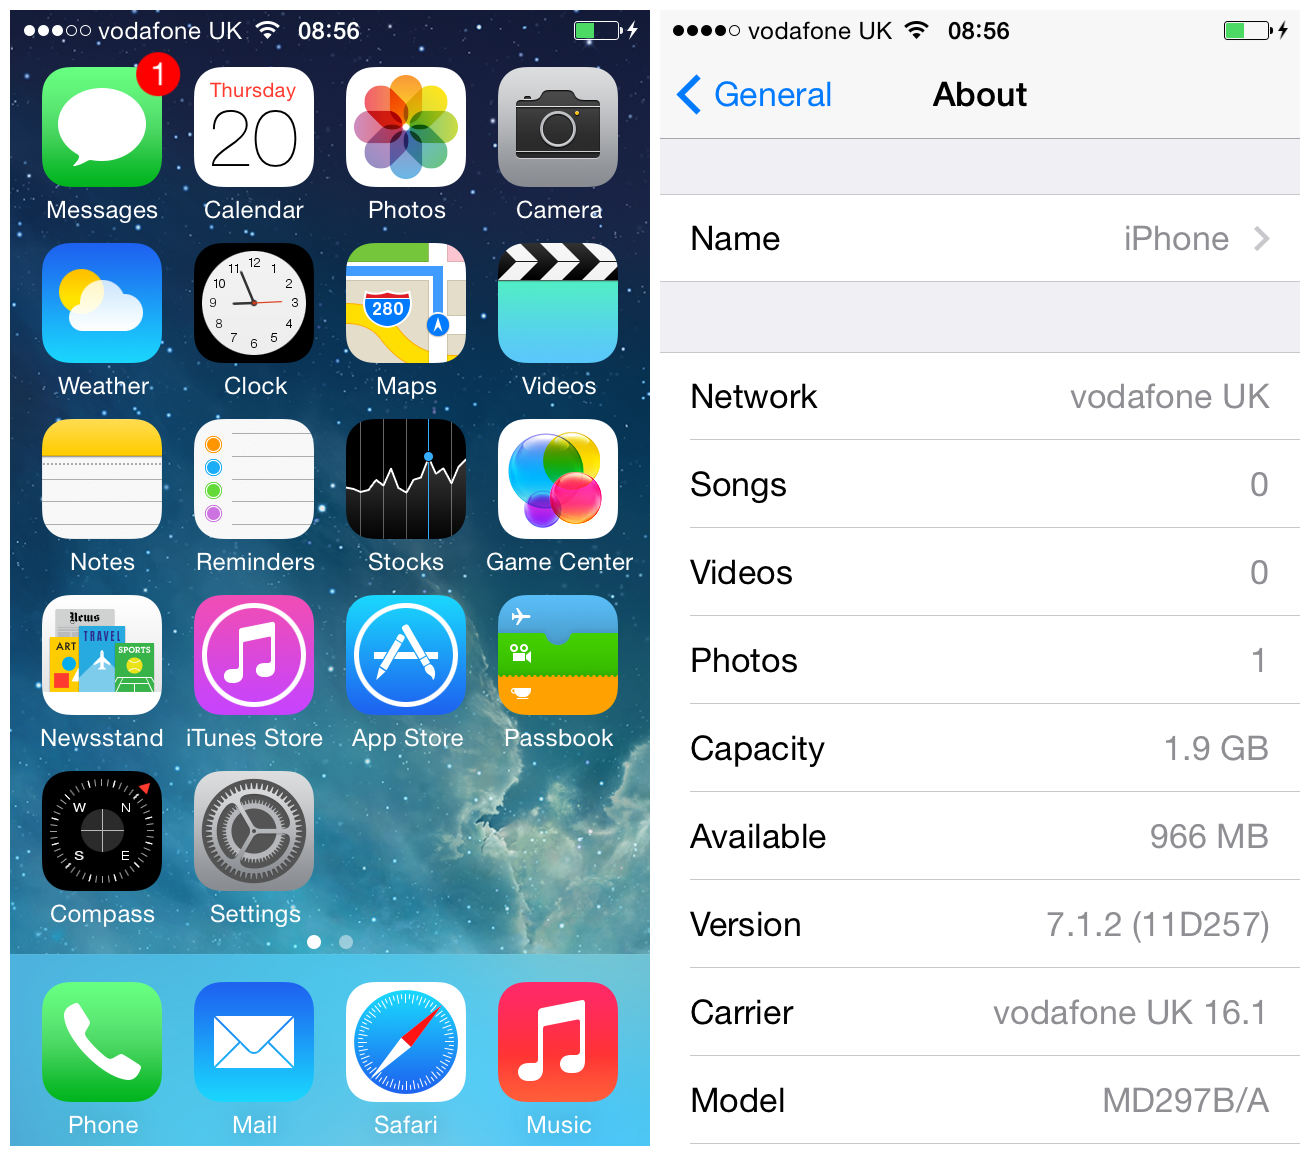
12) And this should be the glorious result! Rebooting from iOS 9.0.2 straight into iOS 7.1.2.
13) Please note, if you had no password set on the source firmware, do not set one on the destination firmware. It’s also not recommended to sign into iCloud on the secondary OS.
14) To get back to the source firmware, simply turn off your device manually and then boot it again.
Removing CoolBooter CLI
If the music’s stopped and the fun’s over, or if this doesn’t work for you and you want to revert your changes, follow the instructions below.
1) Boot to the primary OS and connect to your device via SSH from your computer, as detailed in Steps 4-6 of the installation process.
2) Once connected to your device, enter the following command to uninstall CoolBooter and repartition your device back to a single-boot system:
coolbootercli -u
Wait for Terminal to report that the uninstallation is complete.
3) You can now open Cydia, and uninstall CoolBooter CLI and its dependencies. You can remove the source repository too. This step is optional, and just tidies up for those who are scrupulous about these things.
That’s about it. In general, I recommend using the CoolBooter application instead of the CLI version if it supports your desired destination firmware. This is because it offers better error reporting and can be done on-device, without a computer and SSH. However, sometimes the CLI version runs ahead of the app, for example at present with its support for iOS 5. At these times, curious users and developers may want to give the CLI version a go.
If you get into trouble or a boot loop, think about your options before blindly restoring. Do you have blobs? Remember the iOS 9 re-restore bug, and the iOS 5 re-restore bug, and consider whether they can help you out, and prevent you from having to restore to an unsigned, unjailbroken firmware.
Have you tried out CoolBooter CLI, or even the normal CoolBooter app? Which device and firmwares did you test on, and how did it go?


