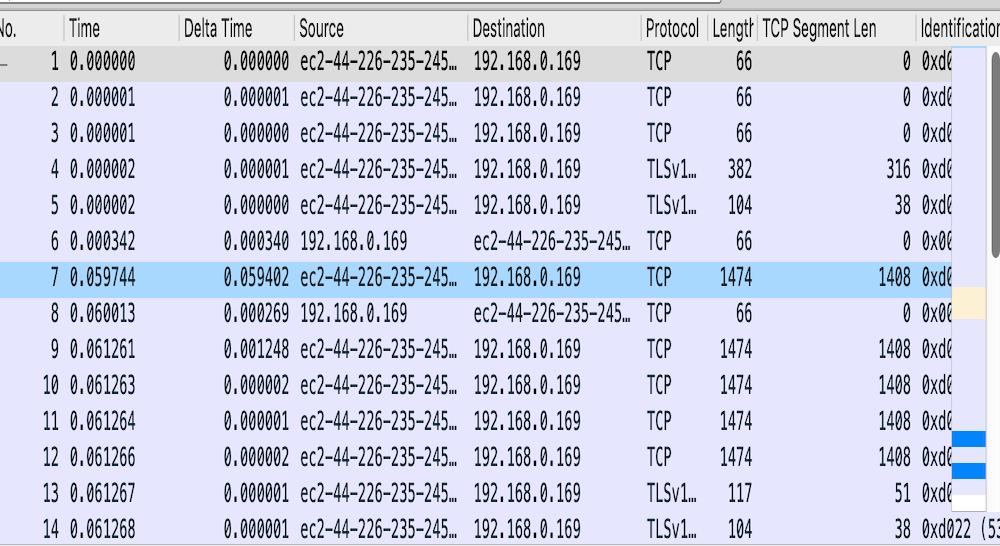
Wireshark is the network analyzer tool, where you can check the traffic incoming and outgoing. It is an amazing tool where you can analyze each and every packet and analyze further. Every protocol has a different way of working. The Wireshark divides into 3 parts in GUI.
1. Traffic Pane:
The traffic pane is not changeable but for the other two panes, you can manage their layout. The traffic pane consist of the flow that is flowing from in and out of your connected devices such as Wi-Fi, or any ISP. The columns in the traffic pane are completely customizable as per the needs of the troubleshooting. In this section you would be able to see the packet details, the source,the destination,protocol, and this is also customizable. The traffic pane just shows the traffic which is on your network .

2. Packet Detail and Diagram Pane:
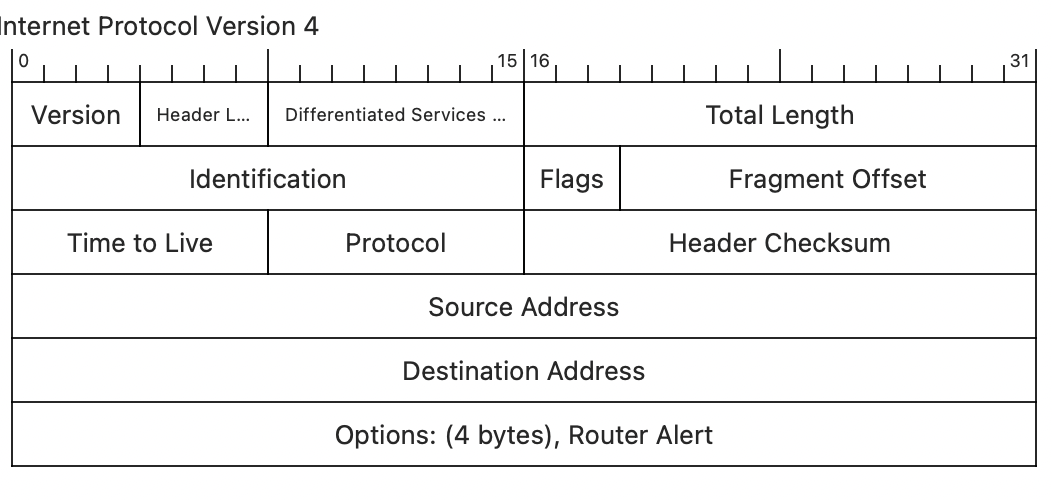
The Packet Diagram Pane Function is the same as the packet bytes, when you change the layout from the Wireshark →preference →layout. you can customize the Panes and select the packet diagram pane as layout 3 or 2. The main function of the packet pane diagram is you can see how a packet looks like. For example there is an HTTP packet, so it would look like a packet and the wireshark will also show what are the information that is being carried out by that packet.
It will be used just to ease the functions and understanding and if you are dealing with any sort of bytes then I would suggest work with the packet bytes so that you can see what are the section contains amount of bytes. To enable the Packet Diagram function you need to go to Wireshark → Preferences →Layout. you can select the PACKET DIAGRAM option.
Below is the image for the IPV4 protocol:

Here, the above protocol is Ipv4 , as you can see clearly that it is showing the packet format so that you can relate the information in the form of packets. It will be useful if you are changing the packet fields and tampering the data. But this is a great way to look into the packet and see the related information. The packet details panel shows the Fields which that protocol contains and the same that is being mapped with the packet Bytes section. The packet details section is arranged in such a way that whatever the protocols fields contains it mapped and shows in a systematic manner so that it can be easily cross-check with the packet bytes. Packet details panel is such amazing panel where you can also learn about the protocol fields that are contained by each of them, and you can understand it much clearer. The wireshark made it so simple to read that one can understand the aspects of the protocol and what are the data that packet is containing is being filled up according to the fields of each protocol.

3. Packet Bytes:
The Packet bytes have its own significance which can help in analyzing the data which is based on the Bytes level. The Packet bytes are useful whenever we are trying to figure it out is the real data that what we have captured because sometimes the bytes can also be modified. The packet bytes panel also represent the number which is similar to such a type of mapping that will map with the packet details panel. With the help of the packet bytes one can narrow down the search/investigation if he/she is into the development of the signature development such IPS signature.

In this article we have seen about the Traffic Panel, Packet diagram and packet details, Packet Bytes.


