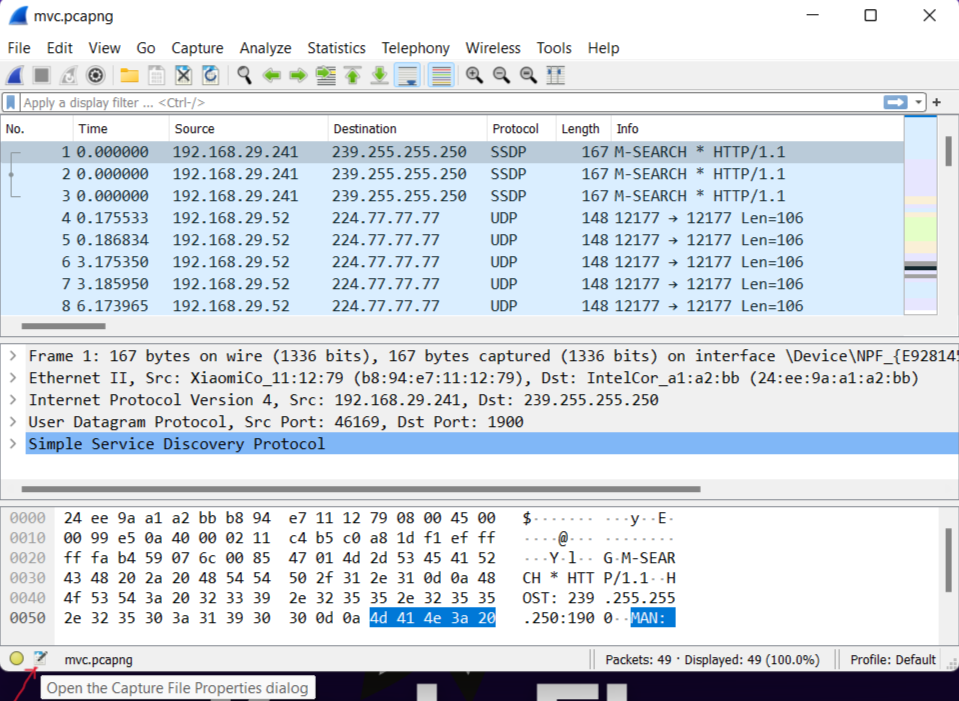
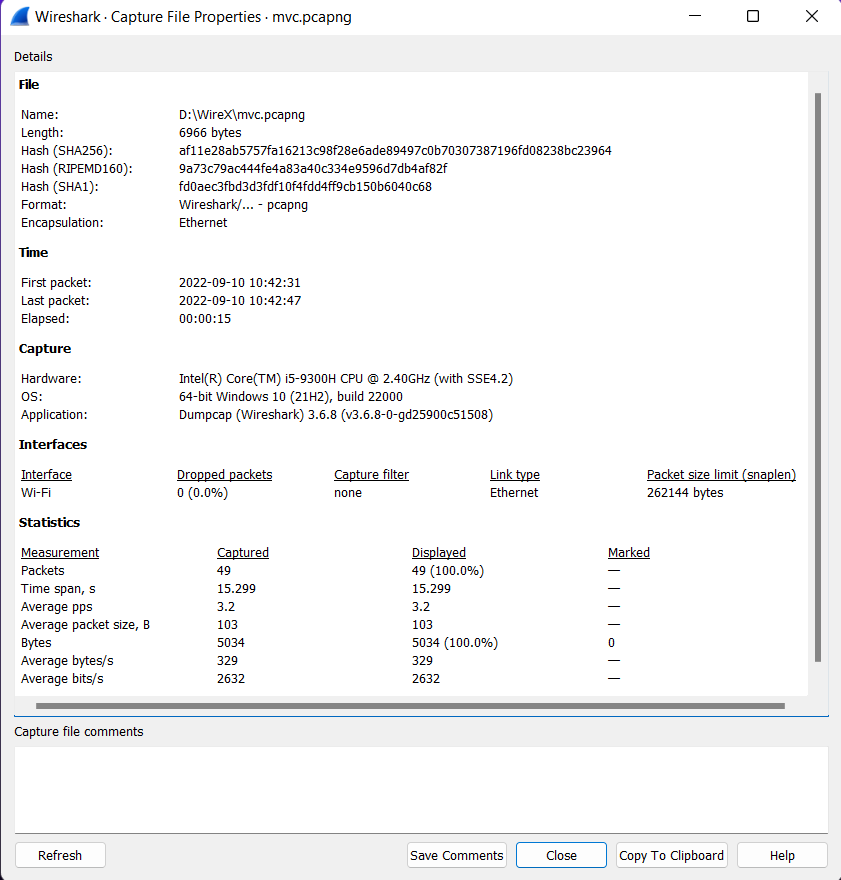
In Wireshark, after capturing some traffic of a network we can save the capture file on our local device so that it can be analyzed thoroughly in the future. We can save captured packets by using the File → Save or File → Save As… menu items. Sometimes we need the details and properties of the captured file. The general information about any saved capture file will be displayed in the “Capture File Properties” dialogue.
Steps to Open “Capture File Properties” Dialogue:
- Start the Wireshark by opening any previously saved captured file.
- In the bottom left corner of Wireshark’s main window, there is a small file icon after which the name of the loaded file is written.
- Click on that small file icon.

- This will then bring up the “Capture File Properties” window.

Properties:
- File: Displays the general information about the capture file like its full path, size in bytes, cryptographic hash values, file format, and encapsulation.
- Time: Displays the timestamps of the first and the last packet in the file along with the time duration during which the capture is ongoing.
- Capture: Displays information about the capture environment including the hardware, OS, and application. Only the “.pcapng” format has this information, while the “.pcap” doesn’t.
- Interfaces: Displays information about the capture interface or interfaces.
- Statistics: It displays the statistical summary of the saved capture file. We will see values in the Captured column only if the filter primitive is already set. We will see values in the Marked column if any packets are marked.
- Capture file comments: We can write a text comment for the entire file and can also view and edit this comment here.
Control of Capture File Properties:
- Refresh: It updates the information in the dialogue.
- Save Comments: It saves the comments written in the “Capture file comments” box.
- Close: It closes the dialogue
- Copy To Clipboard: It Copies the information to the clipboard.
- Help: It opens the User’s Guide.


