The World of Object Detection
I love working in the deep learning space. It is, quite frankly, a vast field with a plethora of techniques and frameworks to pour over and learn. And the real thrill of building deep learning and computer vision models comes when I watch real-world applications like facial recognition and ball tracking in cricket, among other things.
And one of my favorite computer vision and deep learning concepts is object detection. The ability to build a model that can go through images and tell me what objects are present – it’s a priceless feeling!
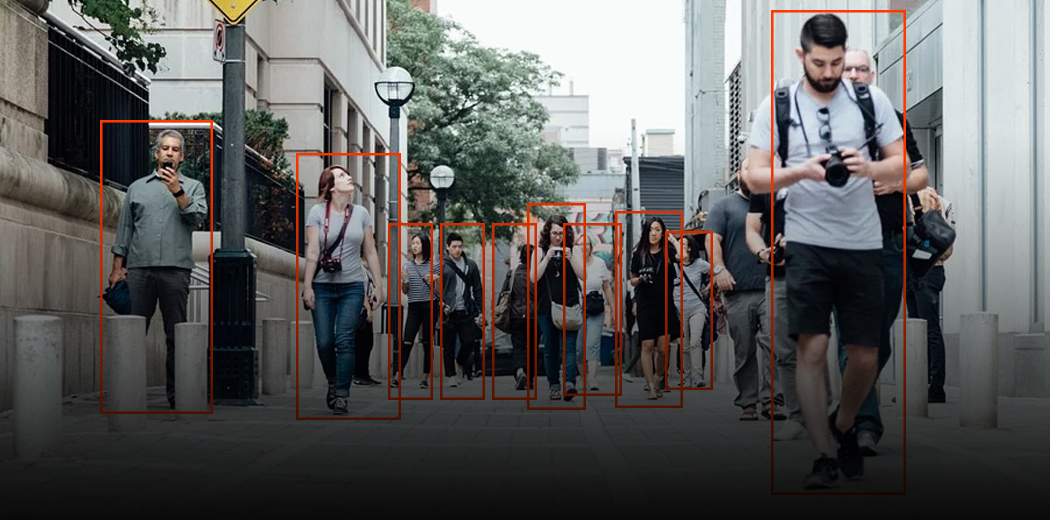
When humans look at an image, we recognize the object of interest in a matter of seconds. This is not the case with machines. Hence, object detection is a computer vision problem of locating instances of objects in an image.
Here’s the good news – object detection applications are easier to develop than ever before. The current approaches today focus on the end-to-end pipeline which has significantly improved the performance and also helped to develop real-time use cases.
In this article, I will walk you through how to build an object detection model using the popular TensorFlow API. If you are a newcomer to deep learning, computer vision and the world of object detection, I recommend going through the below resources:
- A Step-by-Step Introduction to the Basic Object Detection Algorithms
- Fundamentals of Deep Learning
- Computer Vision using Deep Learning
Table of contents
A General Framework for Object Detection
Typically, we follow three steps when building an object detection framework:
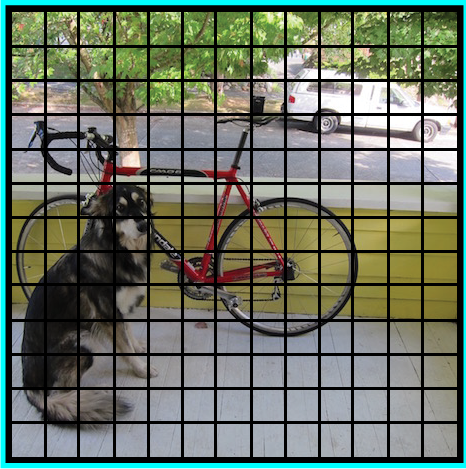
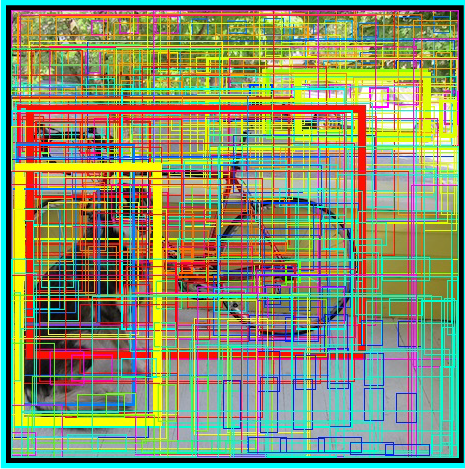
- First, a deep learning model or algorithm is used to generate a large set of bounding boxes spanning the full image (that is, an object localization component)
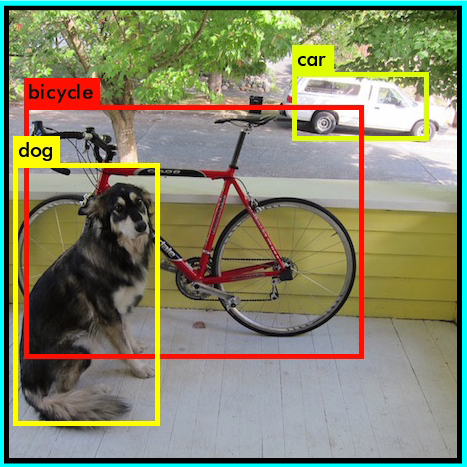
- Next, visual features are extracted for each of the bounding boxes. They are evaluated and it is determined whether and which objects are present in the boxes based on visual features (i.e. an object classification component)
- In the final post-processing step, overlapping boxes are combined into a single bounding box (that is, non-maximum suppression)
That’s it – you’re ready with your first object detection framework!
What is an API? Why do we need an API?
API stands for Application Programming Interface. An API provides developers a set of common operations so that they don’t have to write code from scratch.
Think of an API like the menu in a restaurant that provides a list of dishes along with a description for each dish. When we specify what dish we want, the restaurant does the work and provides us finished dishes. We don’t know exactly how the restaurant prepares that food, and we don’t really need to.
In one sense, APIs are great time savers. They also offer users convenience in many cases. Think about it – Facebook users (including myself!) appreciate the ability to sign into many apps and sites using their Facebook ID. How do you think this works? Using Facebook’s APIs of course!
So in this article, we will look at the TensorFlow API developed for the task of object detection.
TensorFlow Object Detection API
The TensorFlow object detection API is the framework for creating a deep learning network that solves object detection problems.
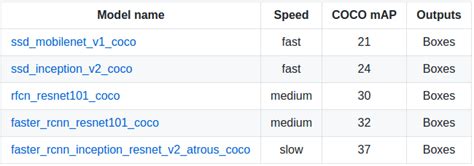
There are already pretrained models in their framework which they refer to as Model Zoo. This includes a collection of pretrained models trained on the COCO dataset, the KITTI dataset, and the Open Images Dataset. These models can be used for inference if we are interested in categories only in this dataset.
They are also useful for initializing your models when training on the novel dataset. The various architectures used in the pretrained model are described in this table:
MobileNet-SSD
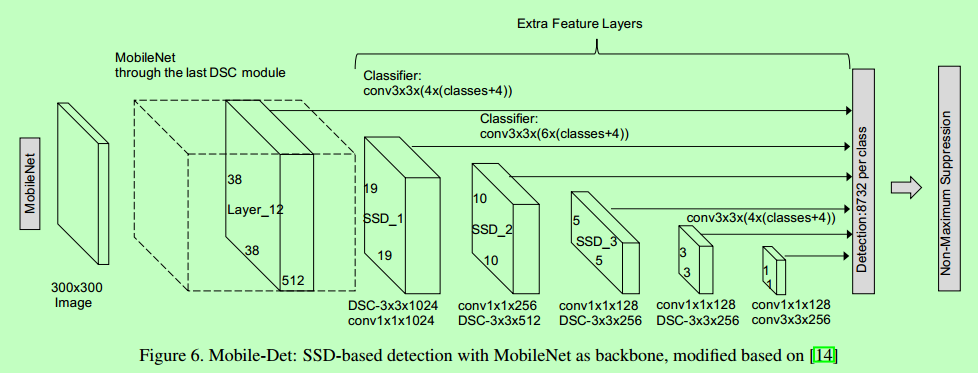
The SSD architecture is a single convolution network that learns to predict bounding box locations and classify these locations in one pass. Hence, SSD can be trained end-to-end. The SSD network consists of base architecture (MobileNet in this case) followed by several convolution layers:
SSD operates on feature maps to detect the location of bounding boxes. Remember – a feature map is of the size Df * Df * M. For each feature map location, k bounding boxes are predicted. Each bounding box carries with it the following information:
- 4 corner bounding box offset locations (cx, cy, w, h)
- C class probabilities (c1, c2, …cp)
SSD does not predict the shape of the box, rather just where the box is. The k bounding boxes each have a predetermined shape. The shapes are set prior to actual training. For example, in the figure above, there are 4 boxes, meaning k=4.
Loss in MobileNet-SSD
With the final set of matched boxes, we can compute the loss like this:
L = 1/N (L class + L box)
Here, N is the total number of matched boxes. L class is the softmax loss for classification and ‘L box’ is the L1 smooth loss representing the error of matched boxes. L1 smooth loss is a modification of L1 loss which is more robust to outliers. In the event that N is 0, the loss is set to 0 as well.
MobileNet
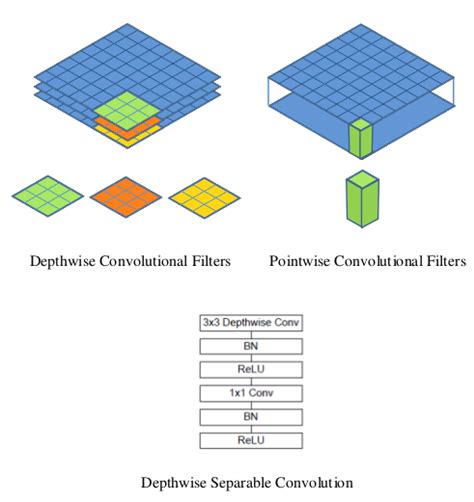
The MobileNet model is based on depthwise separable convolutions which are a form of factorized convolutions. These factorize a standard convolution into a depthwise convolution and a 1 × 1 convolution called a pointwise convolution.
For MobileNets, the depthwise convolution applies a single filter to each input channel. The pointwise convolution then applies a 1 × 1 convolution to combine the outputs of the depthwise convolution.
A standard convolution both filters and combines inputs into a new set of outputs in one step. The depthwise separable convolution splits this into two layers – a separate layer for filtering and a separate layer for combining. This factorization has the effect of drastically reducing computation and model size.
How to load the model?
Below is the step-by-step process to follow on Google Colab for you to just visualize object detection easily. You can follow along with the code as well.
Install the Model
Make sure you have pycocotools installed:
Get tensorflow/models or cd to parent directory of the repository:
Compile protobufs and install the object_detection package:
Import the Required Libraries
Import the object detection module:
Model Preparation
Loader
Loading label map
Label maps map indices to category names so that when our convolution network predicts 5, we know that this corresponds to an airplane:
For the sake of simplicity, we will test on 2 images:
Object Detection Model using TensorFlow API
Load an object detection model:
Check the model’s input signature (it expects a batch of 3-color images of type int8):
Add a wrapper function to call the model and cleanup the outputs:
Run it on each test image and show the results:
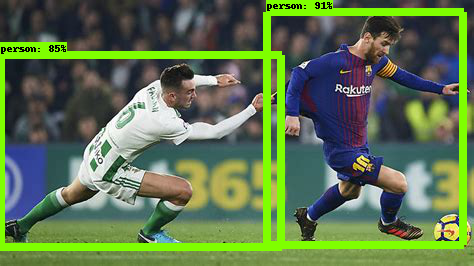
Below is the example image tested on ssd_mobilenet_v1_coco (MobileNet-SSD trained on the COCO dataset):
Inception-SSD
The architecture of the Inception-SSD model is similar to that of the above MobileNet-SSD one. The difference is that the base architecture here is the Inception model. To know more about the inception network, go here – Understanding the Inception Network from Scratch.
How to load the model?
Just change the model name in the Detection part of the API:
Then make the prediction using the steps we followed earlier. Voila!
Faster RCNN
State-of-the-art object detection networks depend on region proposal algorithms to hypothesize object locations. Advances like SPPnet and Fast R-CNN have reduced the running time of these detection networks, exposing region proposal computation as a bottleneck.
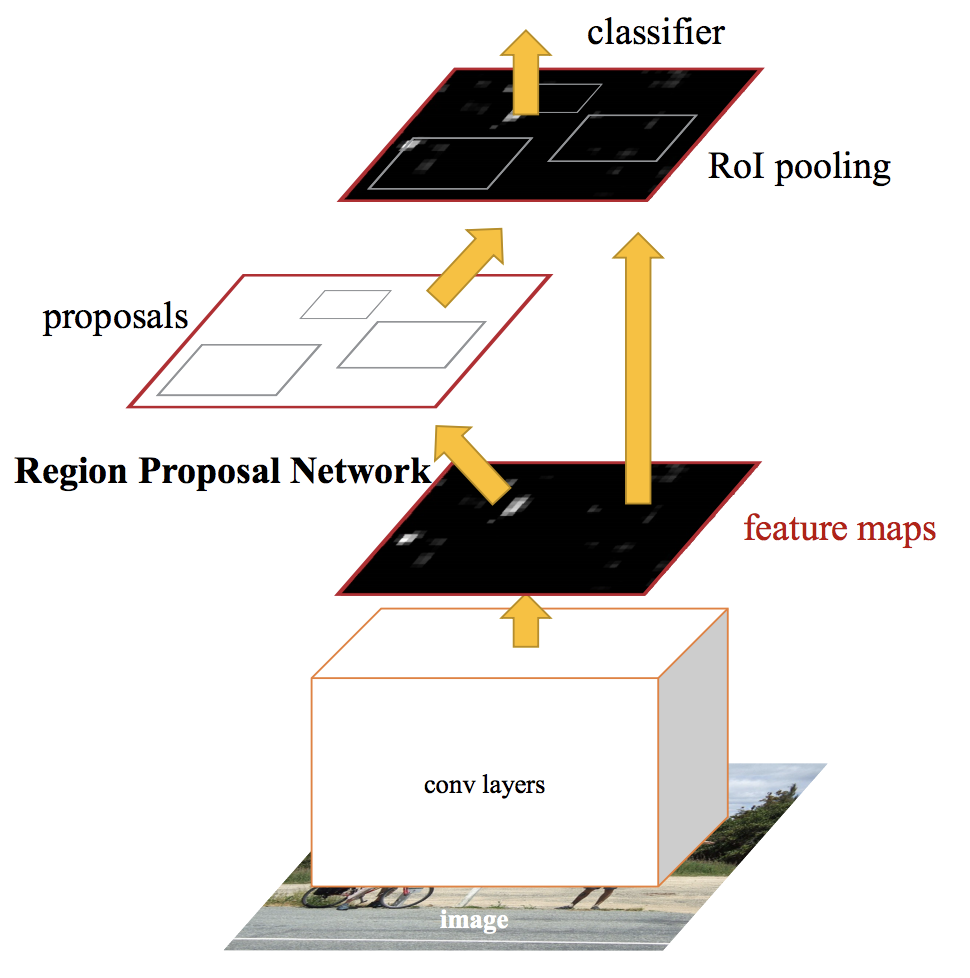
In Faster RCNN, we feed the input image to the convolutional neural network to generate a convolutional feature map. From the convolutional feature map, we identify the region of proposals and warp them into squares. And by using an RoI (Region Of Interest layer) pooling layer, we reshape them into a fixed size so that it can be fed into a fully connected layer.
From the RoI feature vector, we use a softmax layer to predict the class of the proposed region and also the offset values for the bounding box.
To read in more in-depth about Faster RCNN, read this amazing article – A Practical Implementation of the Faster R-CNN Algorithm for Object Detection (Part 2 – with Python codes).
How to load the model?
Just change the model name in the Detection part of the API again:
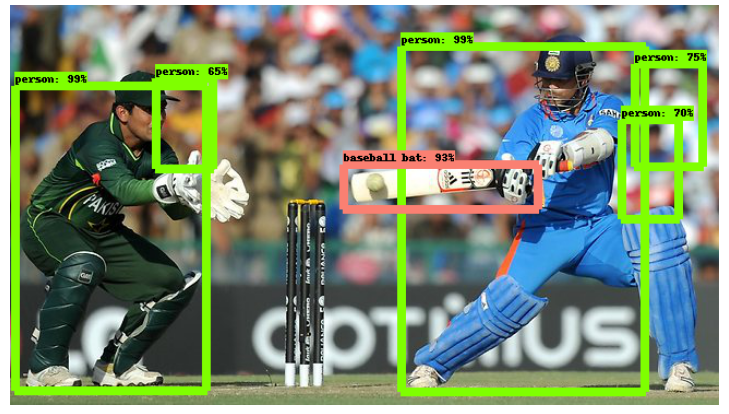
Then make the prediction using the same steps as we followed above. Below is the example image when given to a Faster RCNN model:
As you can see, this is much better than the SSD-Mobilenet model. But it comes with a tradeoff – it is much slower than the previous model. These are the kind of decisions you’ll need to make when you’re picking the right object detection model for your deep learning and computer vision project.
Frequently Asked Questions
A. TensorFlow is an open-source machine learning framework that includes a comprehensive library of tools and algorithms for building and training machine learning models. TensorFlow’s object detection API provides pre-trained models and tools for training custom object detection models, allowing developers to quickly build and deploy applications for identifying and tracking objects in images and videos.
A. To train an object detection model with TensorFlow, the following steps can be taken:
1. Collect and label a dataset of images.
2. Choose a pre-trained model or create a custom model architecture.
3. Configure and train the model using TensorFlow’s object detection API.
4. Evaluate the model’s performance and fine-tune it as needed.
5. Export the trained model for deployment in a production environment.
Tools such as TensorFlow’s object detection API and libraries like OpenCV can simplify and streamline the process of training object detection models.
Which Object Detection Model Should you Choose?
Depending on your specific requirement, you can choose the right model from the TensorFlow API. If we want a high-speed model that can work on detecting video feed at a high fps, the single-shot detection (SSD) network works best. As its name suggests, the SSD network determines all bounding box probabilities in one go; hence, it is a vastly faster model.
However, with single-shot detection, you gain speed at the cost of accuracy. With FasterRCNN, we’ll get high accuracy but slow speed. So explore and in the process, you’ll realize how powerful this TensorFlow API can be!


