


Overview
- A hands-on tutorial to build your own convolutional neural network (CNN) in PyTorch
- We will be working on an image classification problem – a classic and widely used application of CNNs
- This is part of Analytics Vidhya’s series on PyTorch where we introduce deep learning concepts in a practical format
Introduction
I’m enthralled by the power and capability of neural networks. Almost every breakthrough happening in the machine learning and deep learning space right now has neural network models at its core.
This is especially prevalent in the field of computer vision. Neural networks have opened up possibilities of working with image data – whether that’s simple image classification or something more advanced like object detection. In short, it’s a goldmine for a data scientist like me!

Simple neural networks are always a good starting point when we’re solving an image classification problem using deep learning. But they do have limitations and the model’s performance fails to improve after a certain point.
This is where convolutional neural networks (CNNs) have changed the playing field. They are ubiquitous in computer vision applications. And it’s honestly a concept I feel every computer vision enthusiast should pick up quickly.
This article is a continuation of my new series where I introduce you to new deep learning concepts using the popular PyTorch framework. In this article, we will understand how convolutional neural networks are helpful and how they can help us to improve our model’s performance. We will also look at the implementation of CNNs in PyTorch.
If you want to comprehensively learn about CNNs, you can enrol in this free course: Convolutional Neural Networks from Scratch
This is the second article of this series and I highly recommend to go through the first part before moving forward with this article.
Also, the third article of this series is live now where you can learn how to use pre-trained models and apply transfer learning using PyTorch:
Table of contents
A Brief Overview of PyTorch, Tensors and NumPy
Let’s quickly recap what we covered in the first article. We discussed the basics of PyTorch and tensors, and also looked at how PyTorch is similar to NumPy.
PyTorch is a Python-based library that provides functionalities such as:
- TorchScript for creating serializable and optimizable models
- Distributed training to parallelize computations
- Dynamic Computation graphs which enable to make the computation graphs on the go, and many more

Tensors in PyTorch are similar to NumPy’s n-dimensional arrays which can also be used with GPUs. Performing operations on these tensors is almost similar to performing operations on NumPy arrays. This makes PyTorch very user-friendly and easy to learn.
In part 1 of this series, we built a simple neural network to solve a case study. We got a benchmark accuracy of around 65% on the test set using our simple model. Now, we will try to improve this score using Convolutional Neural Networks.
Why Convolutional Neural Networks (CNNs)?
Before we get to the implementation part, let’s quickly look at why we need CNNs in the first place and how they are helpful.
We can consider Convolutional Neural Networks, or CNNs, as feature extractors that help to extract features from images.
In a simple neural network, we convert a 3-dimensional image to a single dimension, right? Let’s look at an example to understand this:

Can you identify the above image? Doesn’t seem to make a lot of sense. Now, let’s look at the below image:
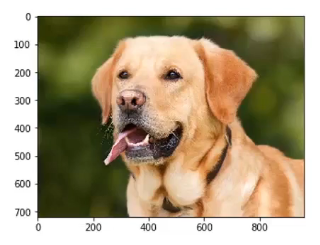
We can now easily say that it is an image of a dog. What if I tell you that both these images are the same? Believe me, they are! The only difference is that the first image is a 1-D representation whereas the second one is a 2-D representation of the same image.
Spatial Orientation
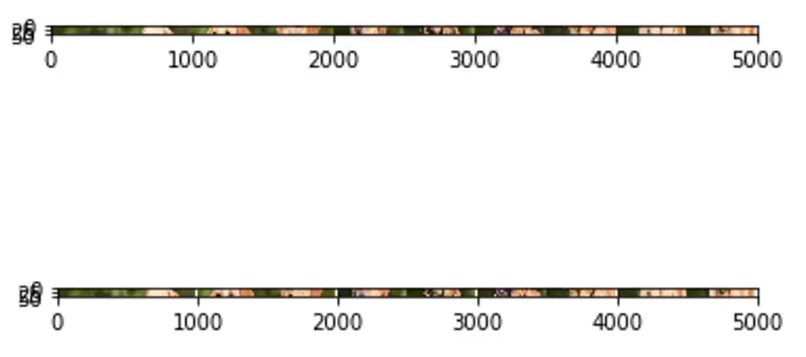
Artificial neural networks (ANNs) also lose the spatial orientation of the images. Let’s again take an example and understand it:
Can you identify the difference between these two images? Well, at least I cannot. It is very difficult to identify the difference since this is a 1-D representation. Now, let’s look at the 2-D representation of these images:
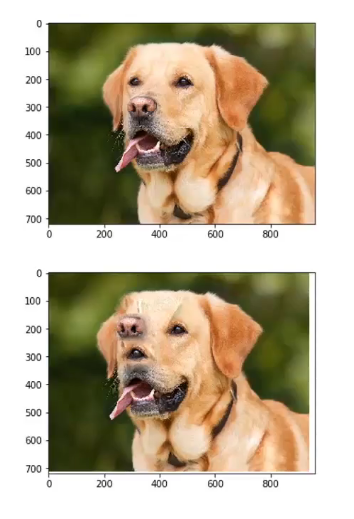
Don’t you love how different the same image looks by simply changing it’s representation? Here, the orientation of the images has been changed but we were unable to identify it by looking at the 1-D representation.
This is the problem with artificial neural networks – they lose spatial orientation.
Large number of parameters
Another problem with neural networks is the large number of parameters at play. Let’s say our image has a size of 28*28*3 – so the parameters here will be 2,352. What if we have an image of size 224*224*3? The number of parameters here will be 150,528.
And these parameters will only increase as we increase the number of hidden layers. So, the two major disadvantages of using artificial neural networks are:
- Loses spatial orientation of the image
- The number of parameters increases drastically
So how do we deal with this problem? How can we preserve the spatial orientation as well as reduce the learnable parameters?
This is where convolutional neural networks can be really helpful. CNNs help to extract features from the images which may be helpful in classifying the objects in that image. It starts by extracting low dimensional features (like edges) from the image, and then some high dimensional features like the shapes.
We use filters to extract features from the images and Pooling techniques to reduce the number of learnable parameters.
We will not be diving into the details of these topics in this article. If you wish to understand how filters help to extract features and how pooling works, I highly recommend you go through A Comprehensive Tutorial to learn Convolutional Neural Networks from Scratch.
Understanding the Problem Statement: Identify the Apparels
Enough theory – let’s get coding! We’ll be taking up the same problem statement we covered in the first article. This is because we can directly compare our CNN model’s performance to the simple neural network we built there.
You can download the dataset for this ‘Identify’ the Apparels’ problem from here.
Let me quickly summarize the problem statement. Our task is to identify the type of apparel by looking at a variety of apparel images. There are a total of 10 classes in which we can classify the images of apparels:
| Label | Description |
| 0 | T-shirt/top |
| 1 | Trouser |
| 2 | Pullover |
| 3 | Dress |
| 4 | Coat |
| 5 | Sandal |
| 6 | Shirt |
| 7 | Sneaker |
| 8 | Bag |
| 9 | Ankle boot |
The dataset contains a total of 70,000 images. 60,000 of these images belong to the training set and the remaining 10,000 are in the test set. All the images are grayscale images of size (28*28). The dataset contains two folders – one each for the training set and the test set. In each folder, there is a .csv file that has the id of the image and its corresponding label, and a folder containing the images for that particular set.
Ready to begin? We will start by importing the required libraries:
Loading the dataset
Now, let’s load the dataset, including the train, test and sample submission file:
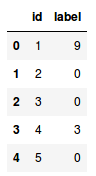
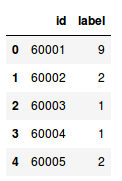
- The train file contains the id of each image and its corresponding label
- The test file, on the other hand, only has the ids and we have to predict their corresponding labels
- The sample submission file will tell us the format in which we have to submit the predictions
We will read all the images one by one and stack them one over the other in an array. We will also divide the pixels of images by 255 so that the pixel values of images comes in the range [0,1]. This step helps in optimizing the performance of our model.
So, let’s go ahead and load the images:
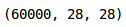
As you can see, we have 60,000 images, each of size (28,28), in the training set. Since the images are in grayscale format, we only have a single-channel and hence the shape (28,28).
Let’s now explore the data and visualize a few images:
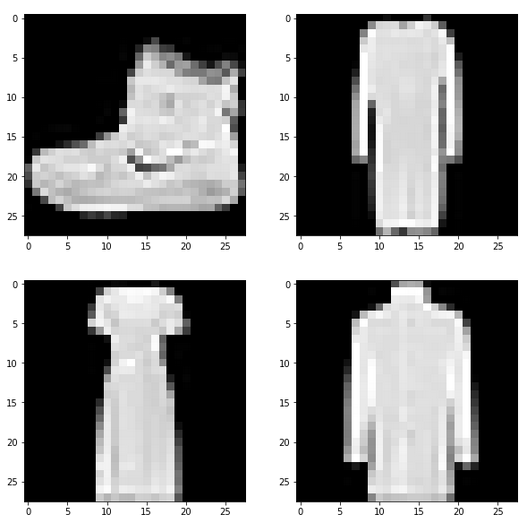
These are a few examples from the dataset. I encourage you to explore more and visualize other images. Next, we will divide our images into a training and validation set.
Creating a validation set and preprocessing the images

We have kept 10% data in the validation set and the remaining in the training set. Next, let’s convert the images and the targets into torch format:

Similarly, we will convert the validation images:

Our data is now ready. Finally, it’s time to create our CNN model!
Implementing CNNs using PyTorch
We will use a very simple CNN architecture with just 2 convolutional layers to extract features from the images. We’ll then use a fully connected dense layer to classify those features into their respective categories.
Let’s define the architecture:
Let’s now call this model, and define the optimizer and the loss function for the model:
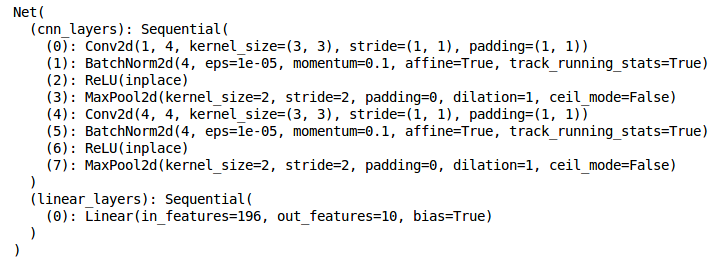
This is the architecture of the model. We have two Conv2d layers and a Linear layer. Next, we will define a function to train the model:
Finally, we will train the model for 25 epochs and store the training and validation losses:
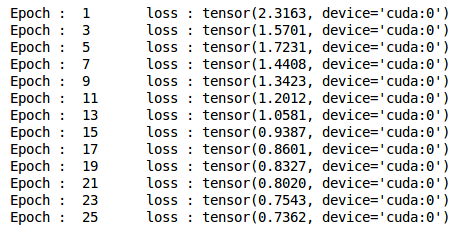
We can see that the validation loss is decreasing as the epochs are increasing. Let’s visualize the training and validation losses by plotting them:
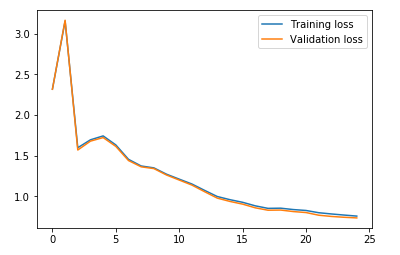
Ah, I love the power of visualization. We can clearly see that the training and validation losses are in sync. It is a good sign as the model is generalizing well on the validation set.
Let’s check the accuracy of the model on the training and validation set:

An accuracy of ~72% accuracy on the training set is pretty good. Let’s check the accuracy for the validation set as well:

As we saw with the losses, the accuracy is also in sync here – we got ~72% on the validation set as well.
Generating predictions for the test set
It’s finally time to generate predictions for the test set. We will load all the images in the test set, do the same pre-processing steps as we did for the training set and finally generate predictions.
So, let’s start by loading the test images:

Now, we will do the pre-processing steps on these images similar to what we did for the training images earlier:

Finally, we will generate predictions for the test set:
Replace the labels in the sample submission file with the predictions and finally save the file and submit it on the leaderboard:
You will see a file named submission.csv in your current directory. You just have to upload it on the solution checker of the problem page which will generate the score.
Our CNN model gave us an accuracy of around 71% on the test set. That is quite an improvement on the 65% we got using a simple neural network in our previous article.
Frequently Asked Questions
A. PyTorch is a popular open-source machine learning framework used for building and training deep learning models. It provides a dynamic computational graph, allowing for efficient model development and experimentation. PyTorch offers a wide range of tools and libraries for tasks such as neural networks, natural language processing, computer vision, and reinforcement learning, making it versatile for various machine learning applications.
A. PyTorch is an open-source machine learning library and deep learning framework primarily developed by Facebook’s AI Research (FAIR) team. It provides a Python interface for tensor computation with GPU acceleration and offers a dynamic computational graph, allowing for flexible and efficient deep learning model development. PyTorch supports various neural network architectures, automatic differentiation, and a rich ecosystem of libraries and tools for tasks like computer vision, natural language processing, and more.
End Notes
In this article, we looked at how CNNs can be useful for extracting features from images. They helped us to improve the accuracy of our previous neural network model from 65% to 71% – a significant upgrade.
You can play around with the hyperparameters of the CNN model and try to improve accuracy even further. Some of the hyperparameters to tune can be the number of convolutional layers, number of filters in each convolutional layer, number of epochs, number of dense layers, number of hidden units in each dense layer, etc.
In the next article of this series, we will learn how to use pre-trained models like VGG-16 and model checkpointing steps in PyTorch. And as always, if you have any doubts related to this article, feel free to post them in the comments section below!