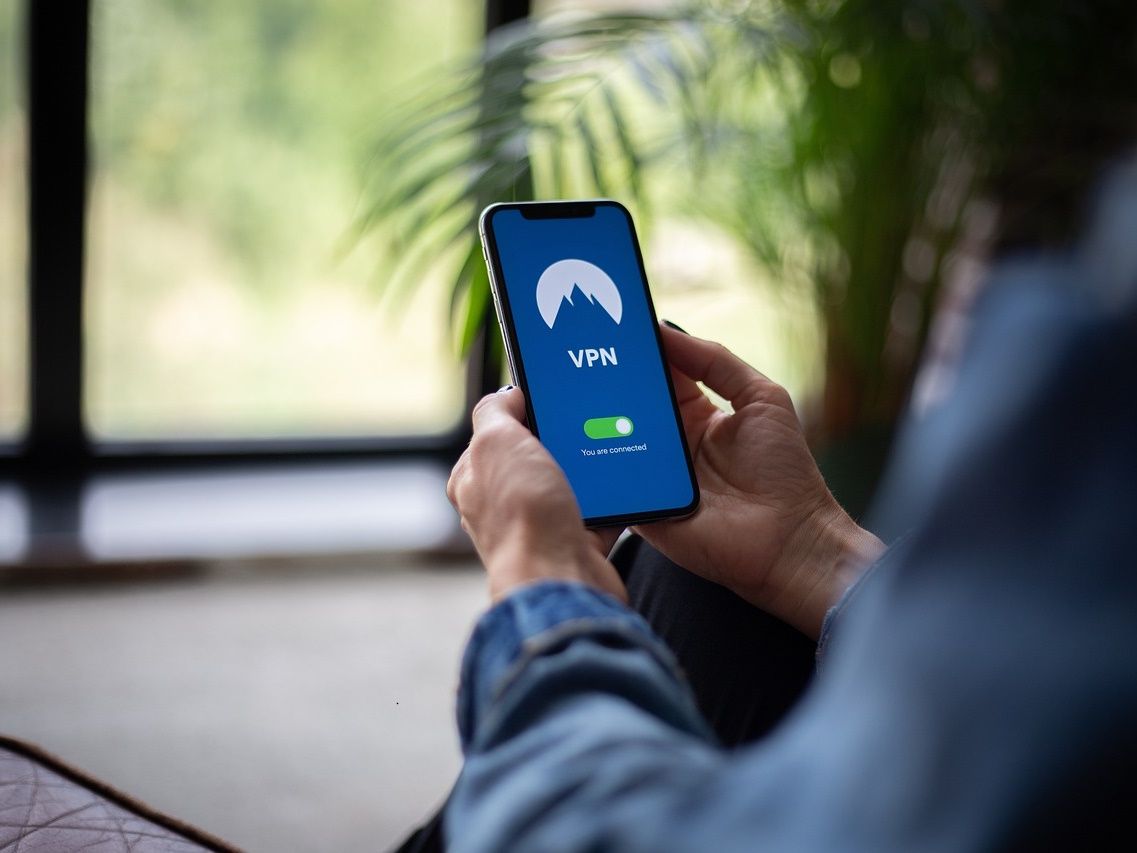
You may require a virtual private network (VPN) for various reasons. A VPN is useful for accessing a region-locked beta through the PlayStation Store, watching Netflix from another country, and avoiding distributed denial-of-service (DDoS) attacks while online. However, adding a VPN connection to your Sony PlayStation 5 (PS5) may seem tricky if not set up correctly. This guide explains how to connect your PS5 through a VPN.
Use a trustworthy VPN.
Free VPNs often provide weaker security
and may track your data compared to subscription-based options.
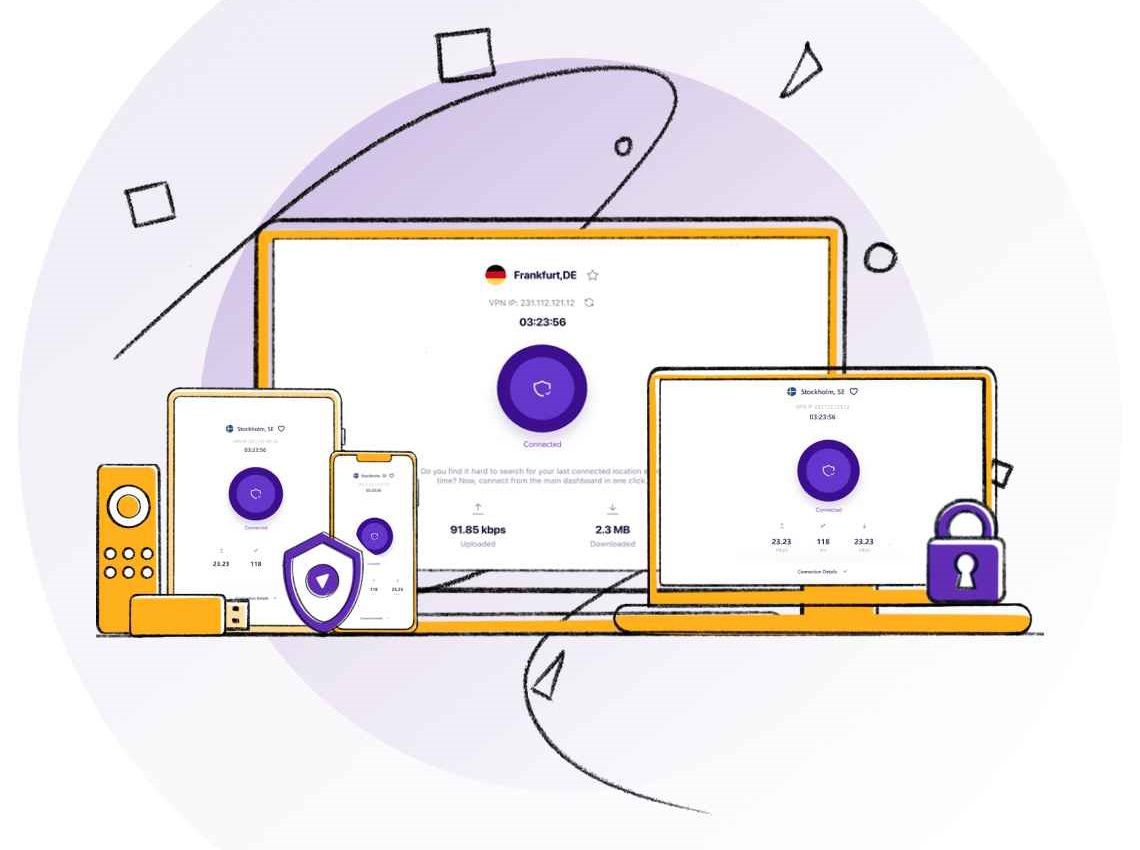
Best VPNs for multiple devices in 2024
It only takes one of these VPN subscriptions to cover your whole fleet of computers, mobile devices, and streamers
How to set up a VPN using a Windows PC
You can connect your PS5 to a computer and use it as a proxy for the installed VPN. However, for this to work, your computer requires a working Ethernet port (preferably two, but the second is optional). One port connects your computer to your PS5. The other port connects from your computer to your router.
1. Sign up and install a trusted VPN on your computer.
2. Plug in an Ethernet cable connecting to your PC (with the installed VPN software) and PS5.
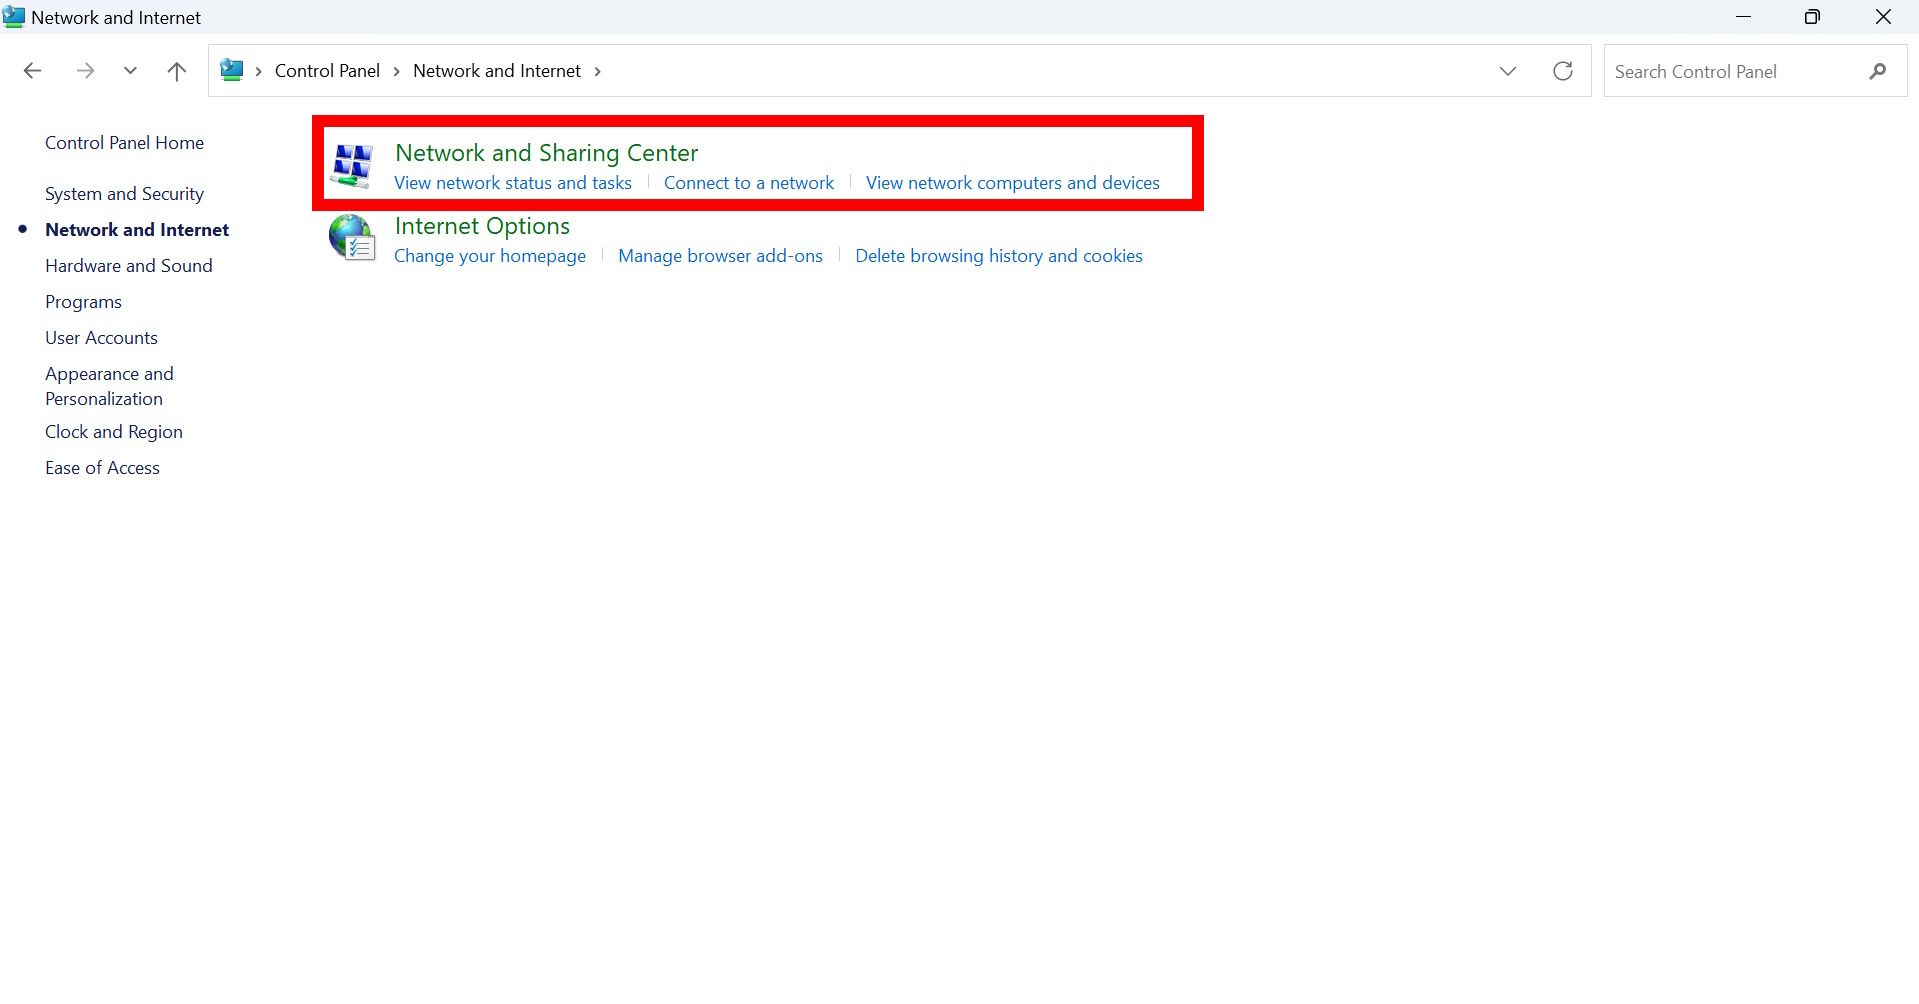
3. Navigate to Control Panel > Network and Internet > Network and Sharing Center.
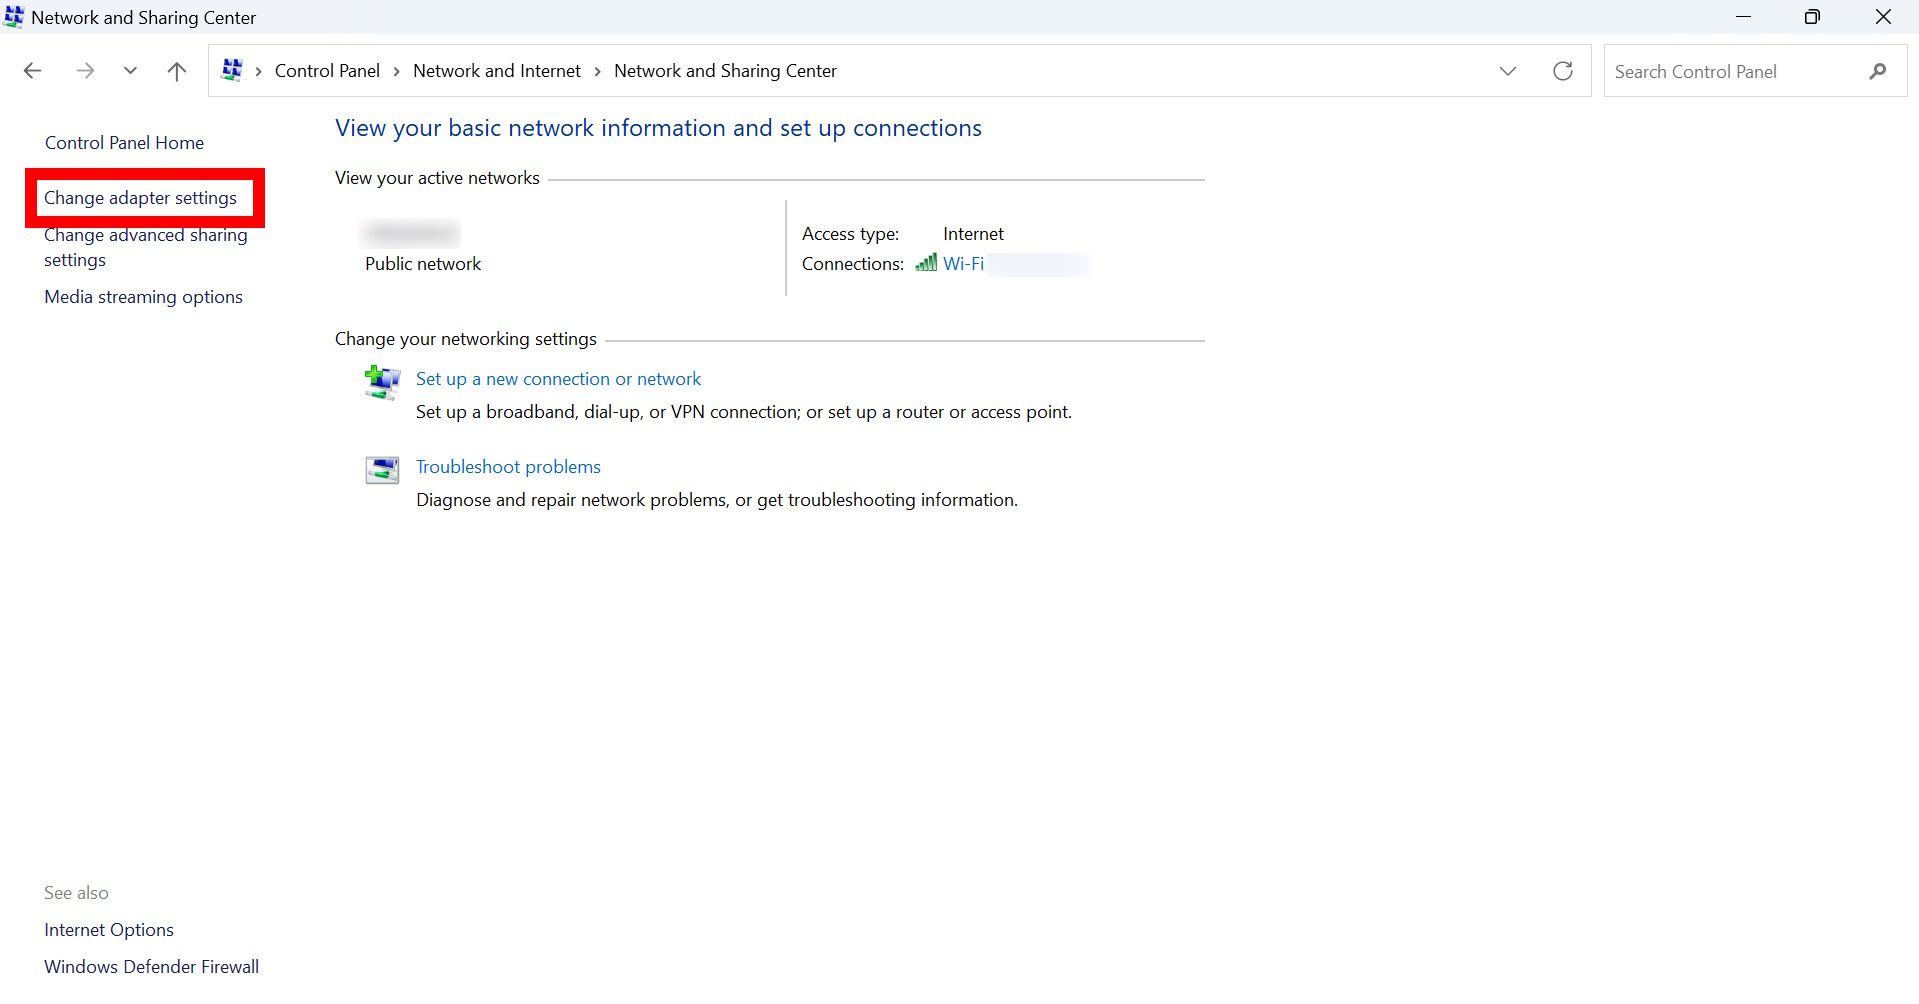
4. On the left side, select Change adapter settings.
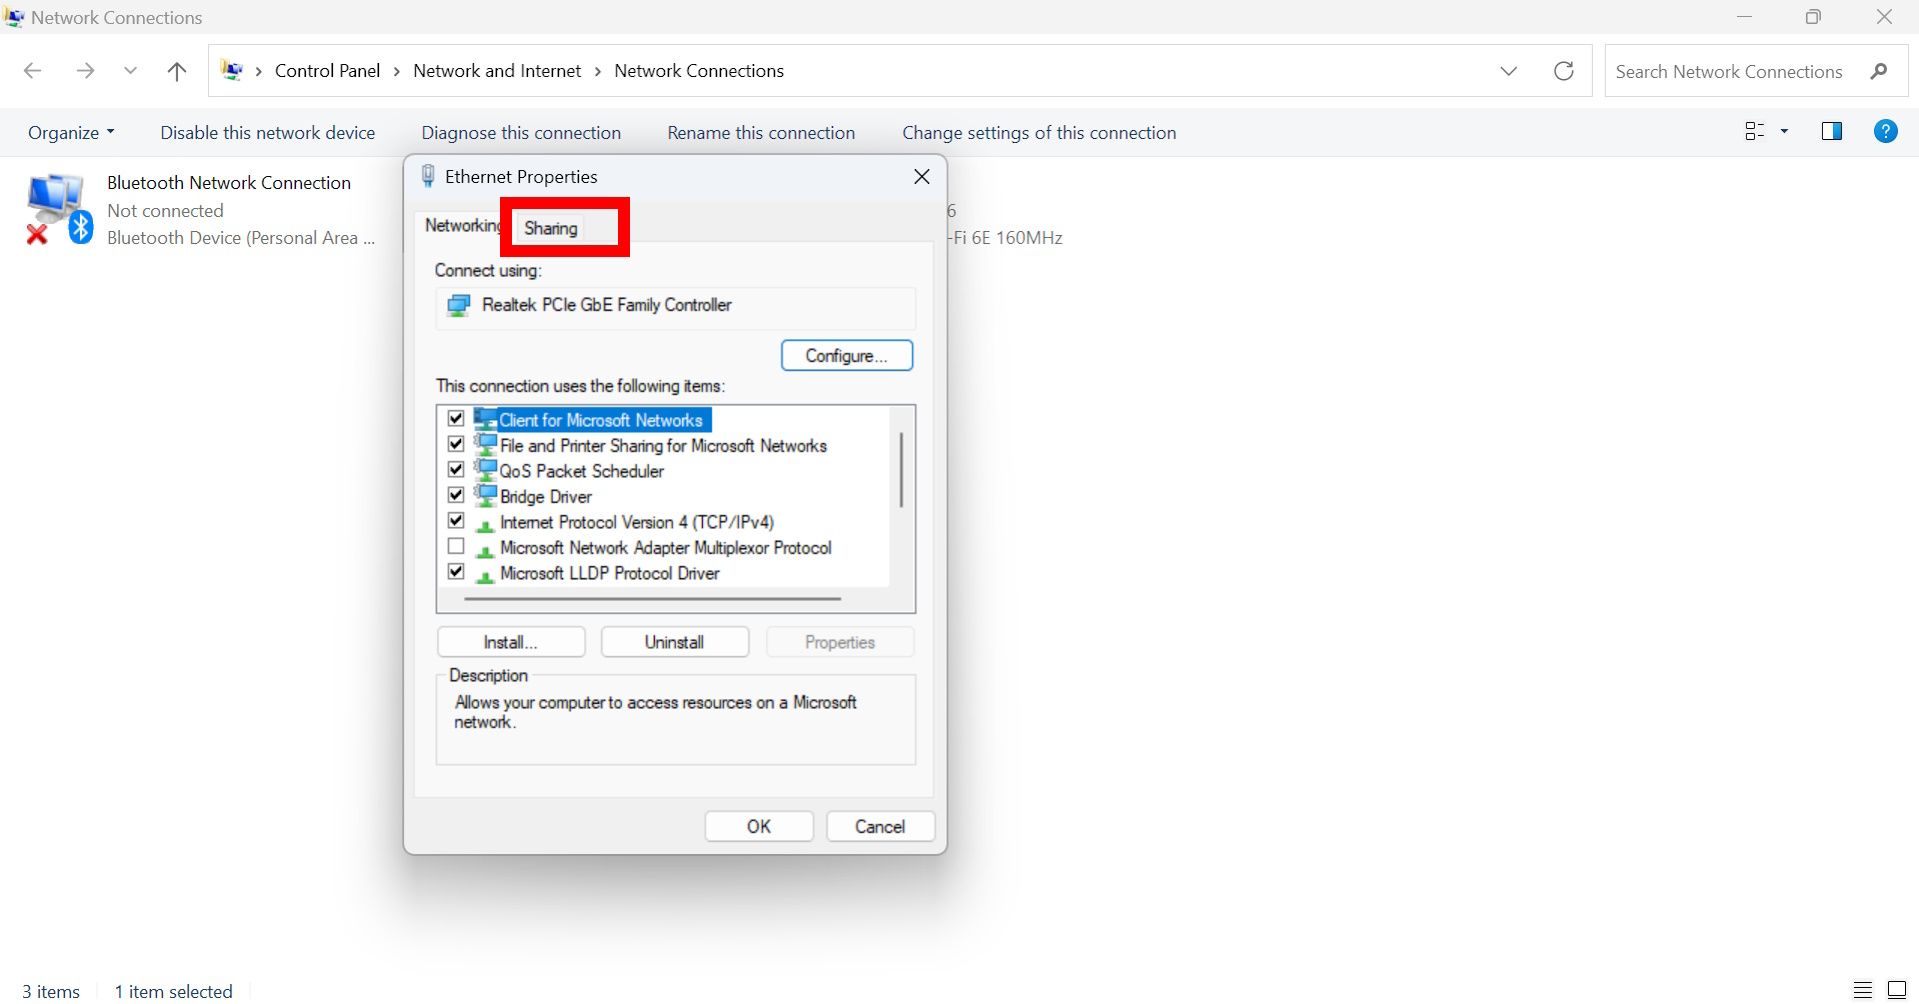
5. Right-click the internet source connected to your VPN, choose Properties, and then navigate to the Sharing tab.
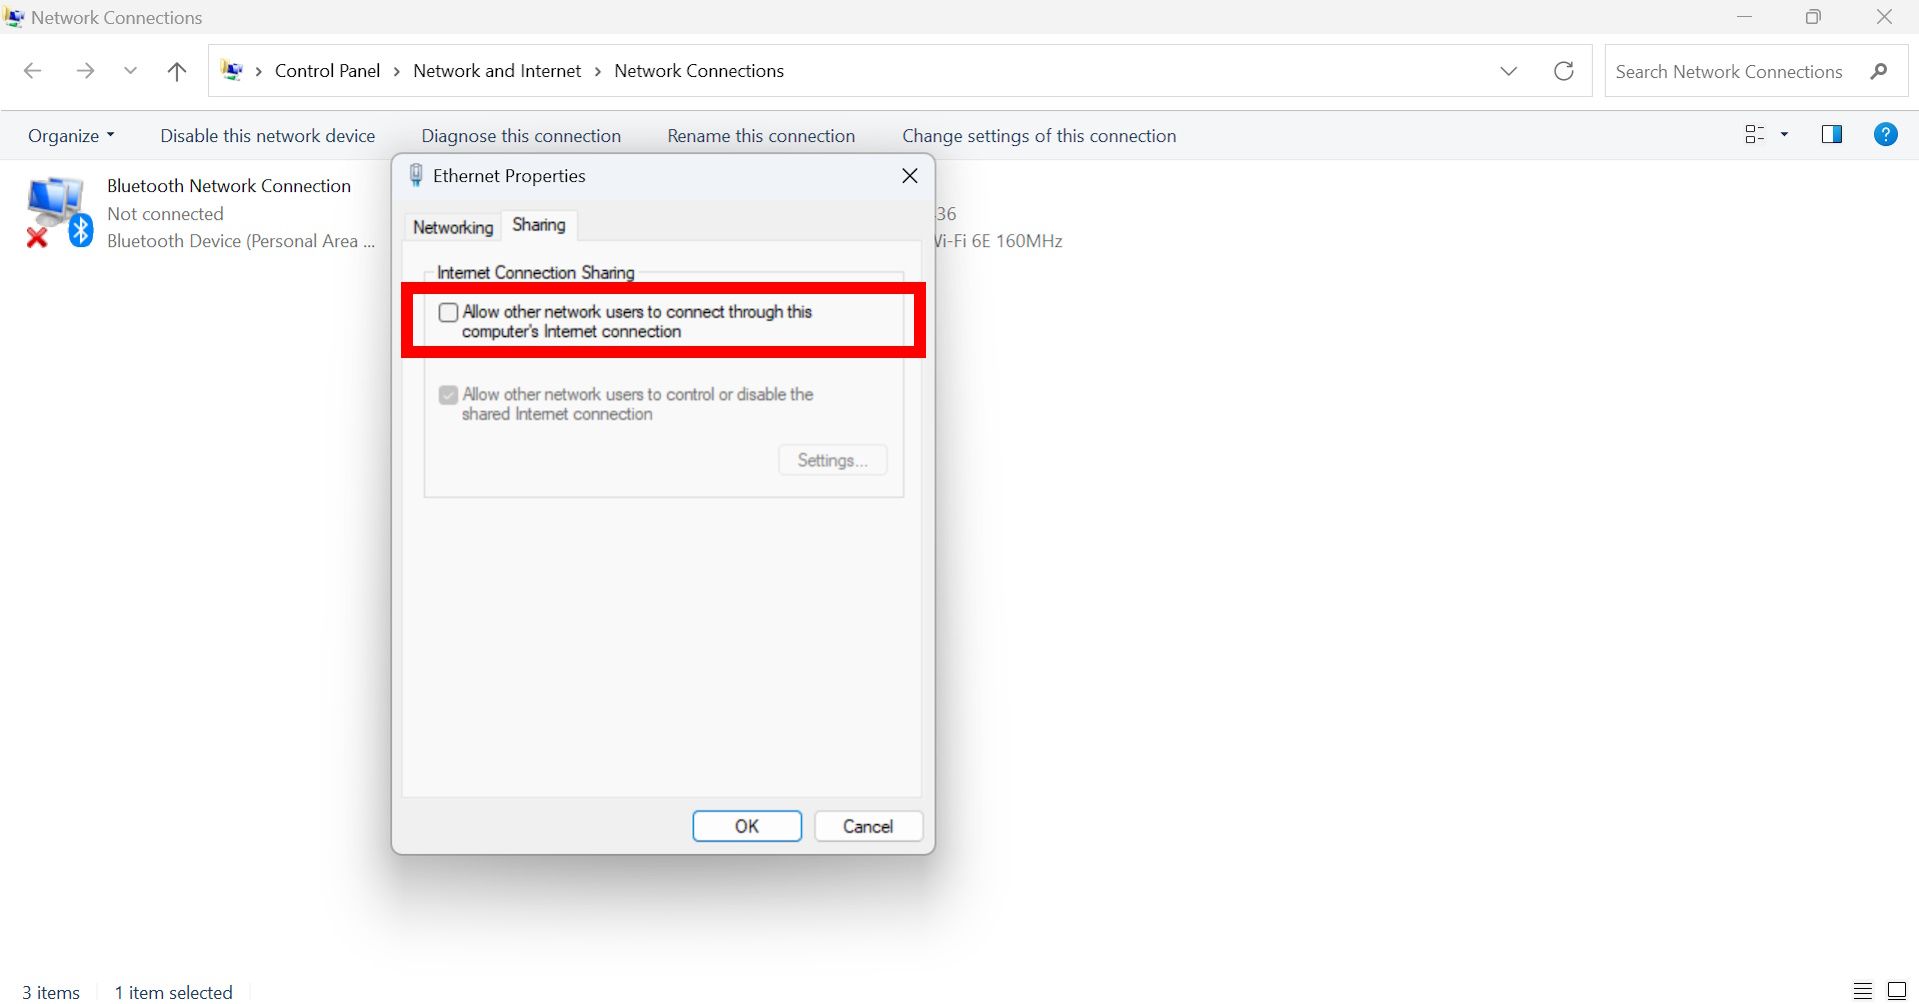
6. Select Allow other network users to connect through this computer’s internet connection.
7. Choose WiFi or Ethernet under Home Networking Connection and click OK.
On your PS5
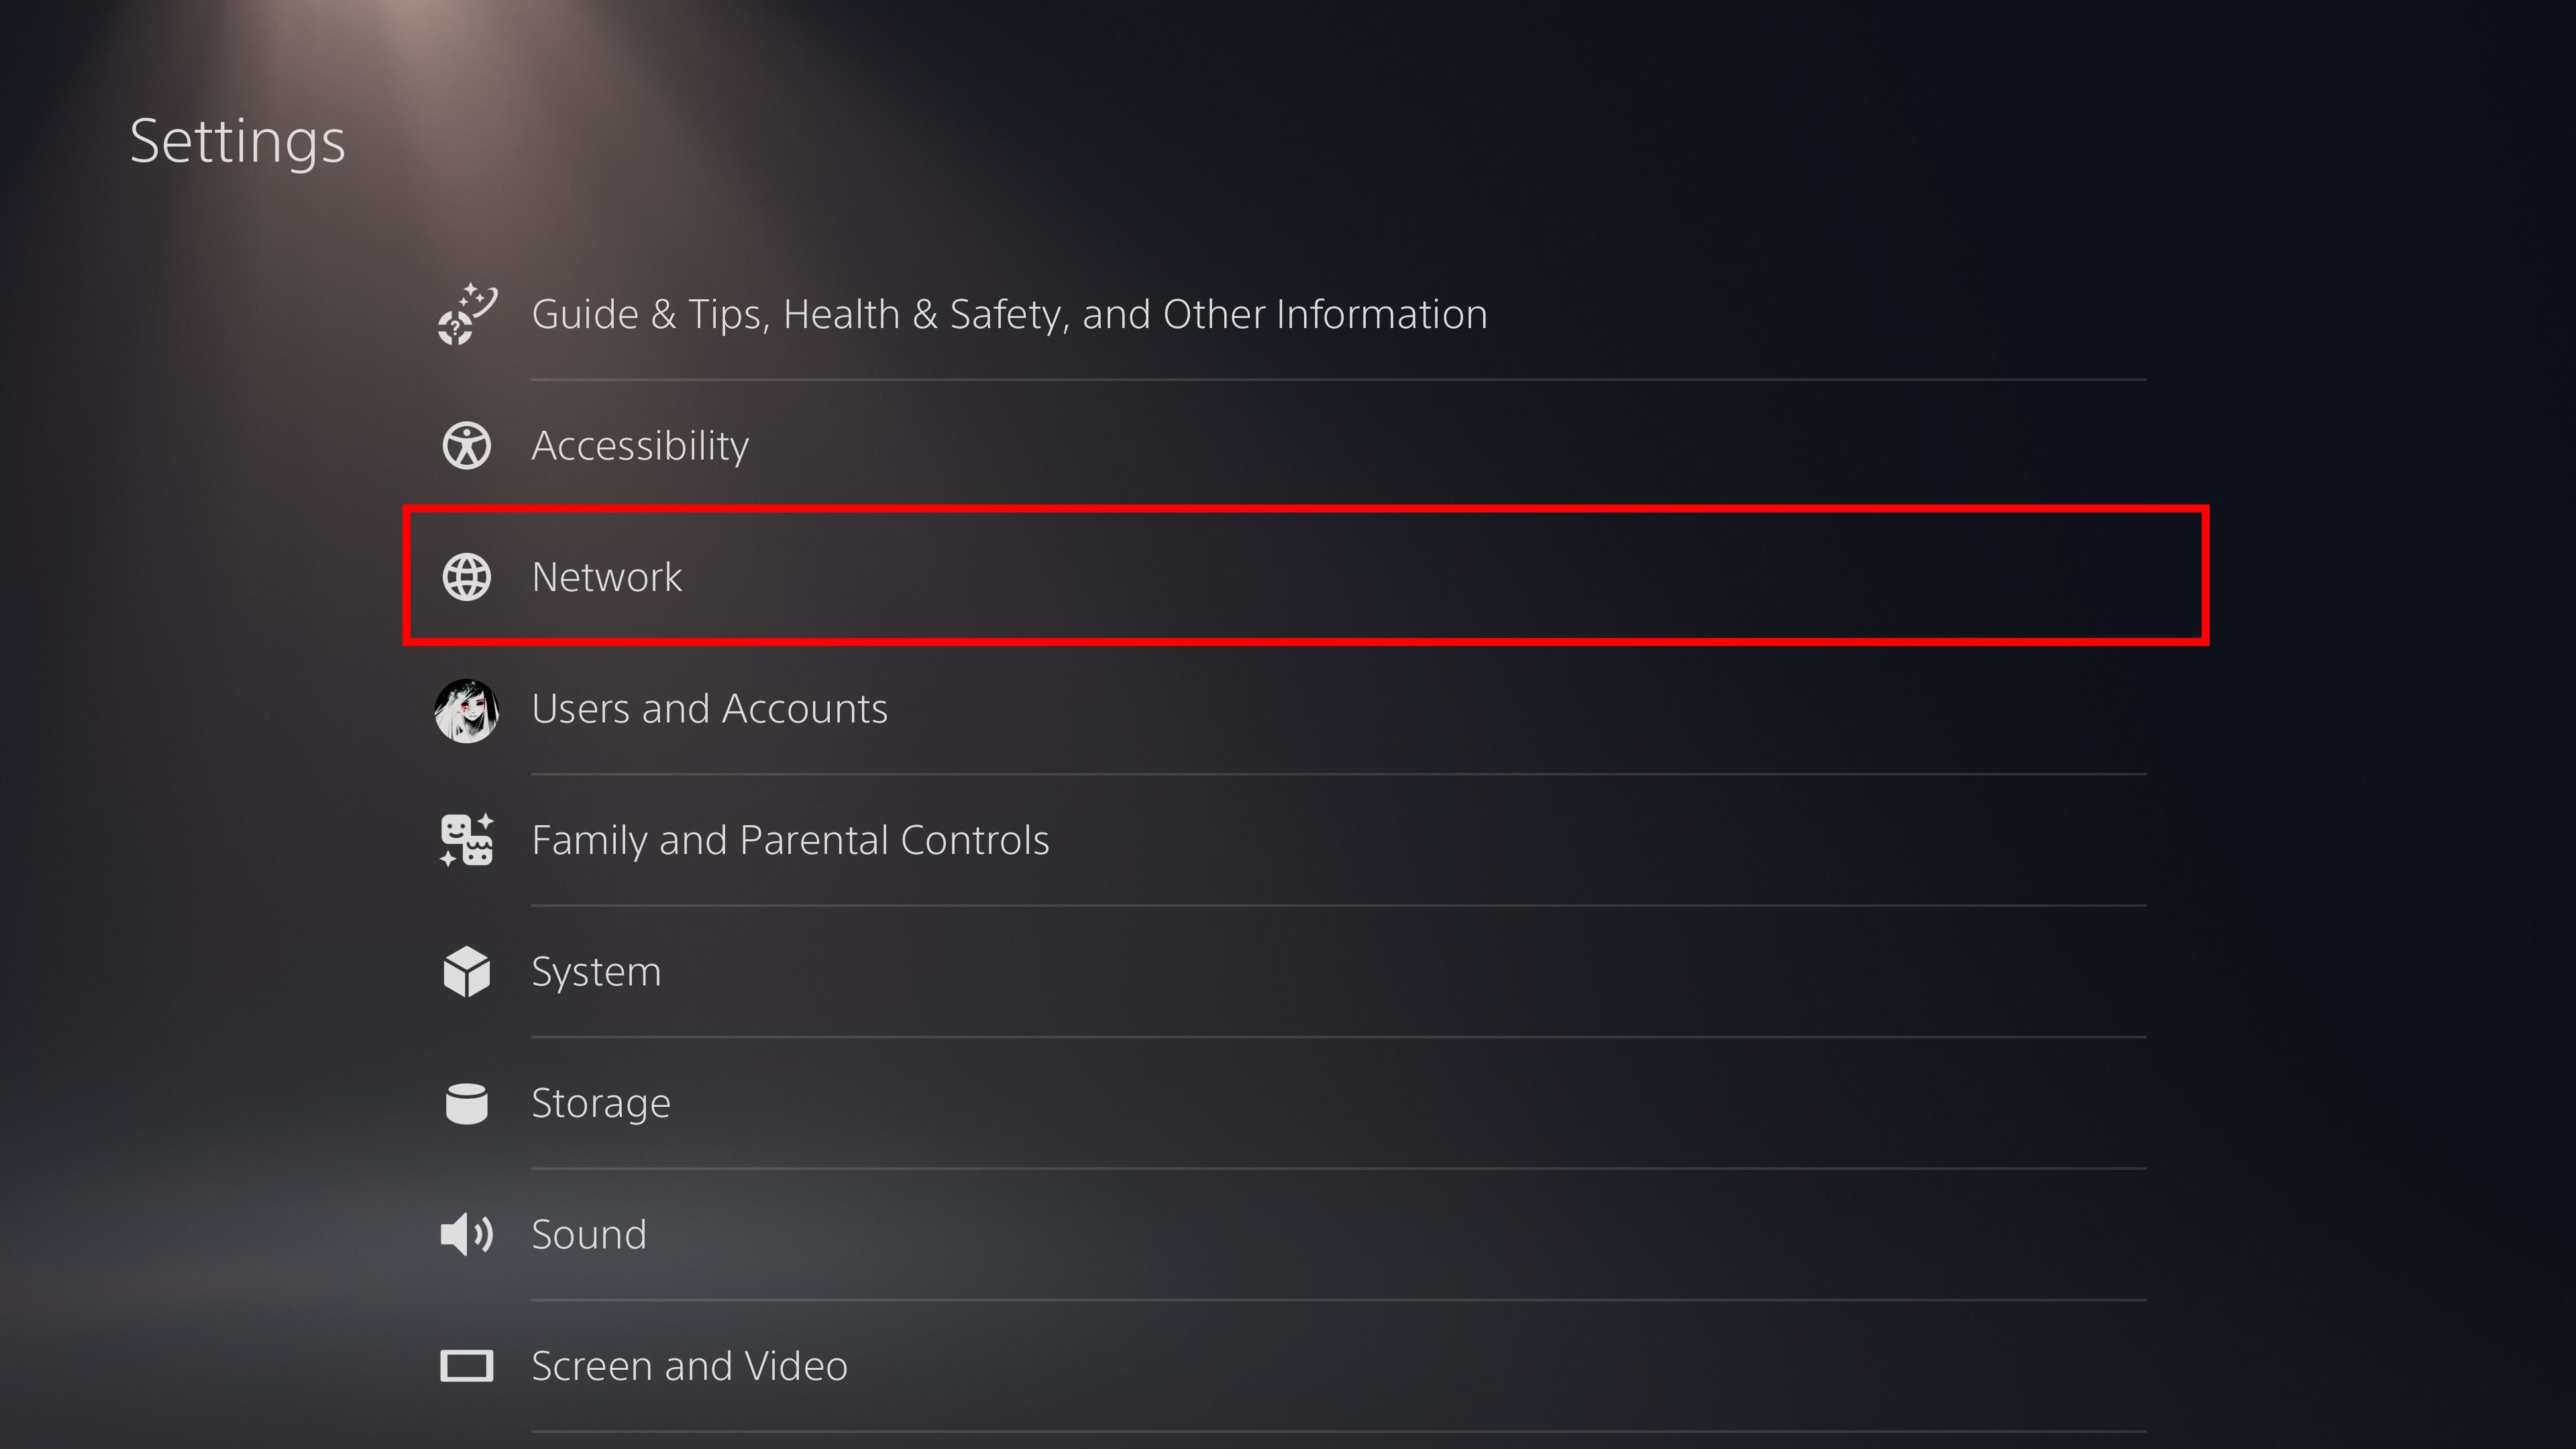
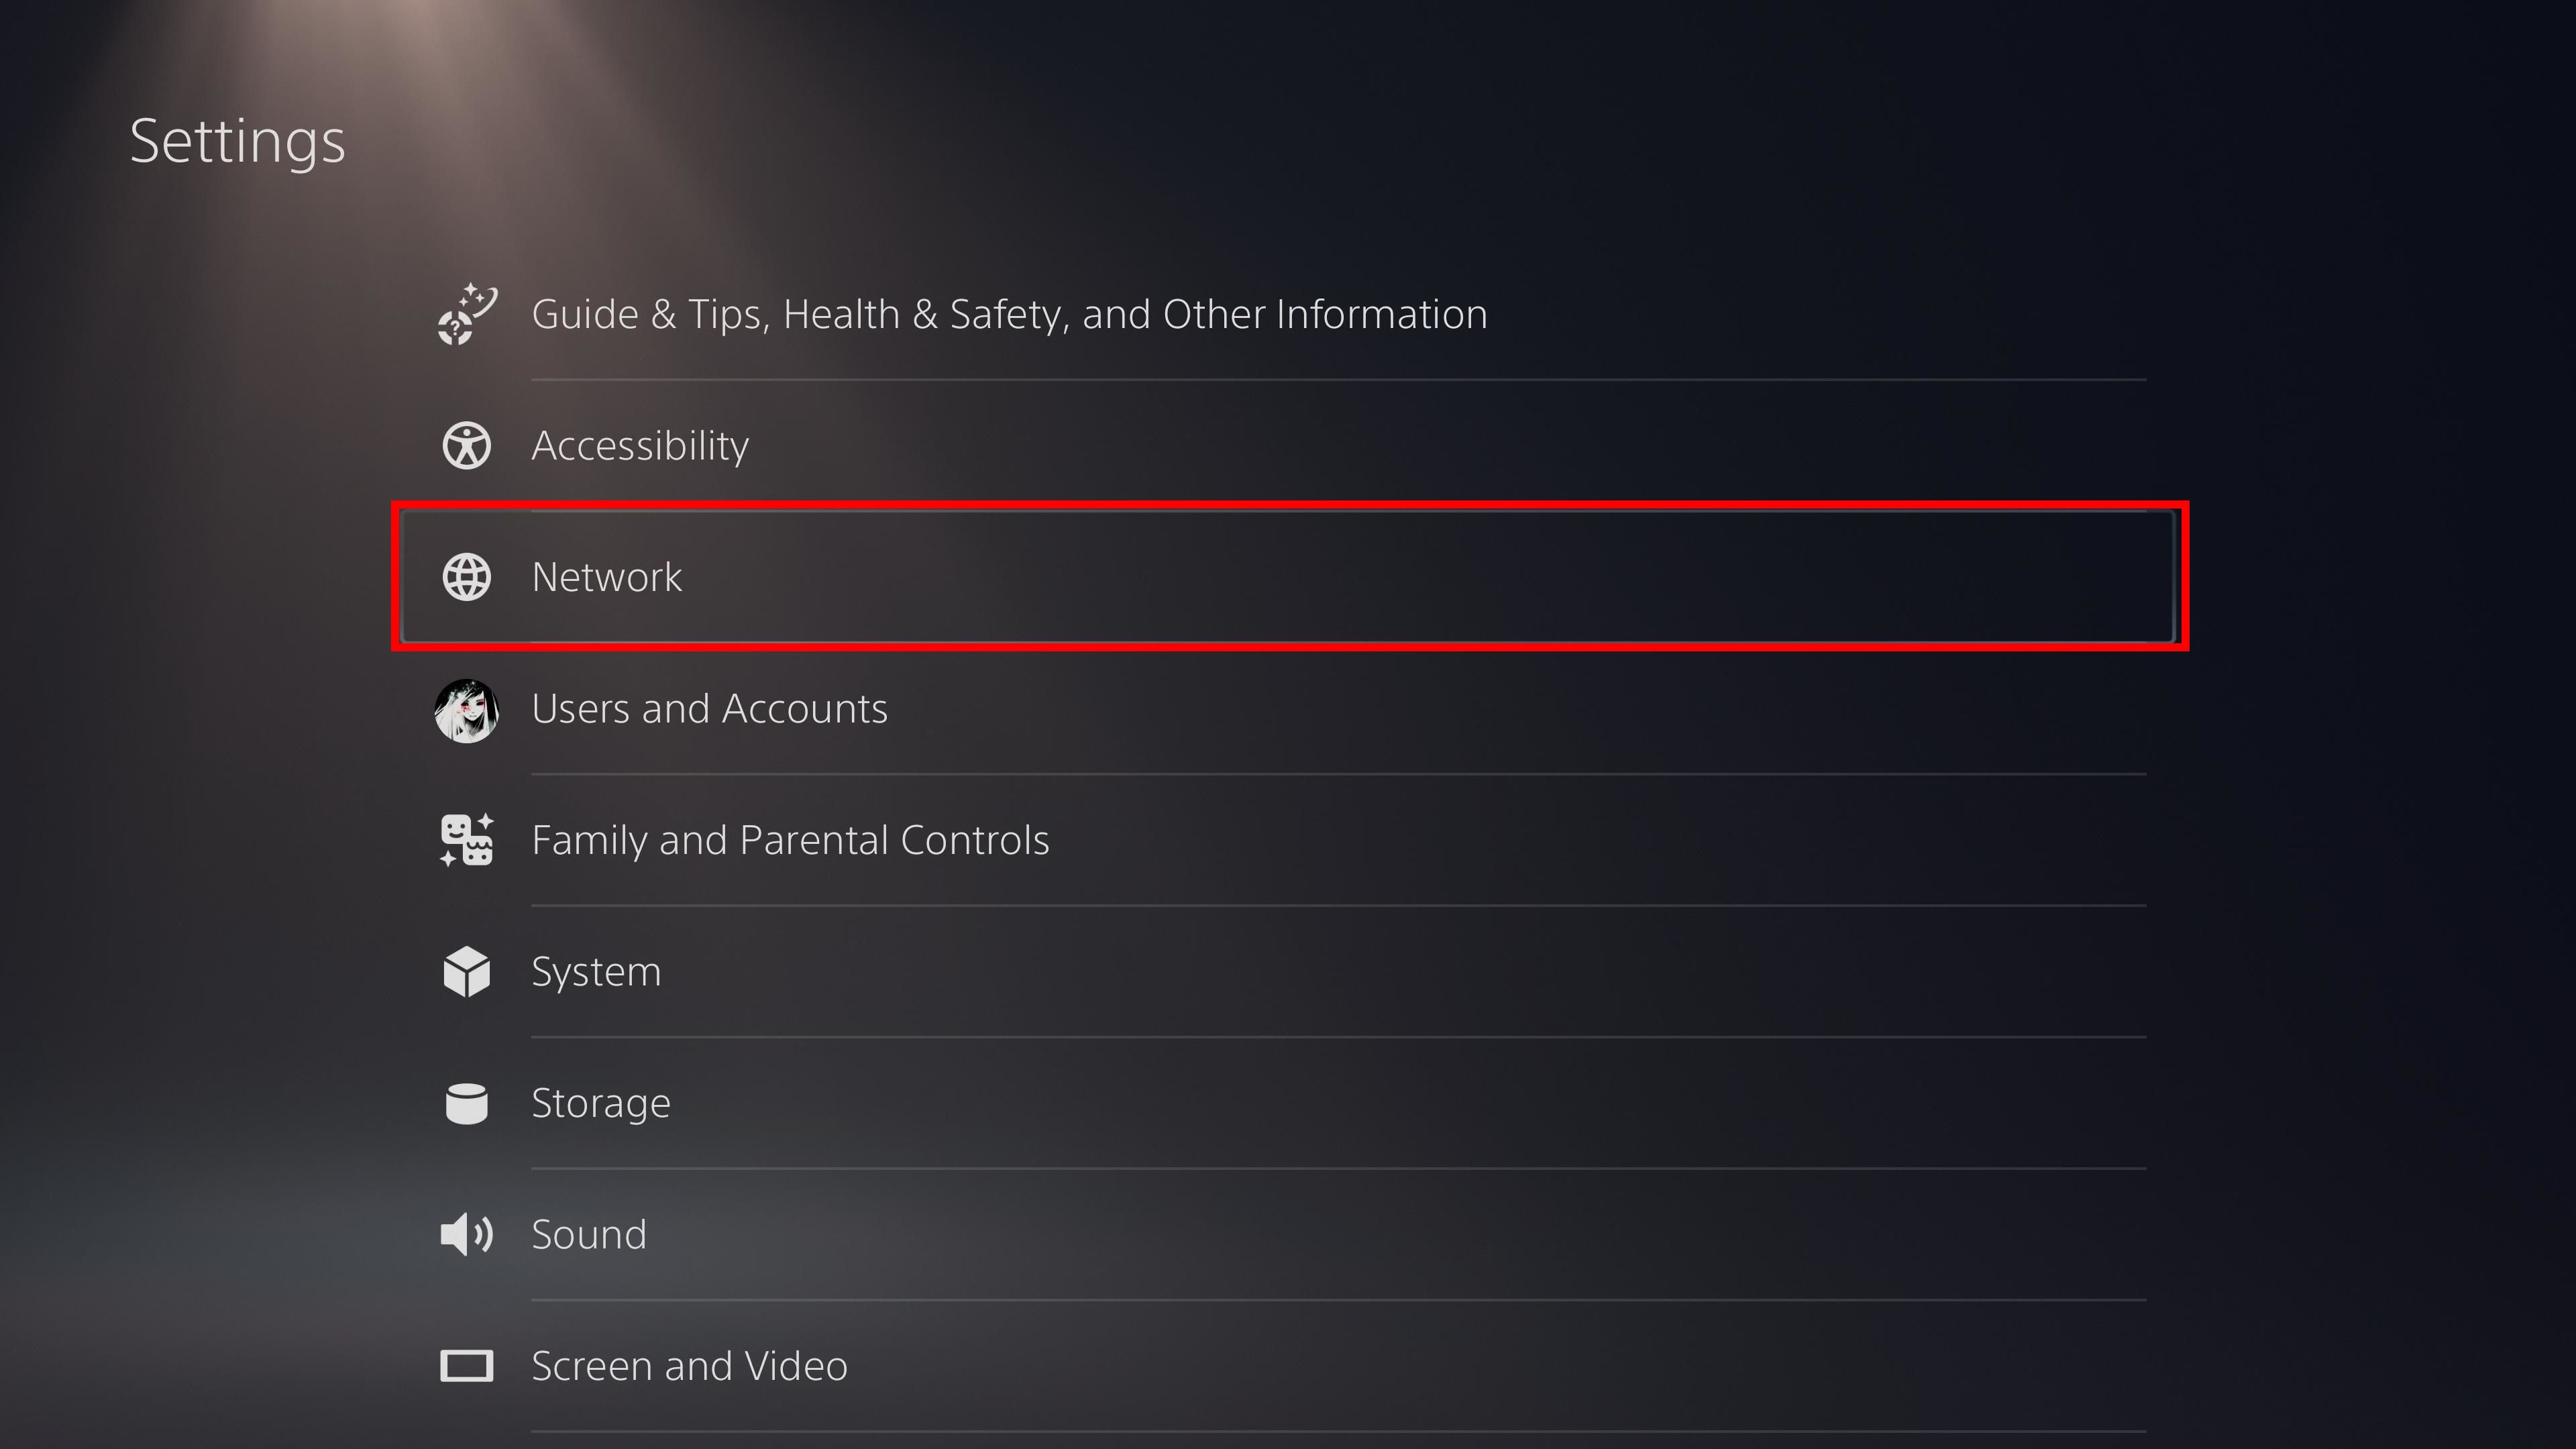
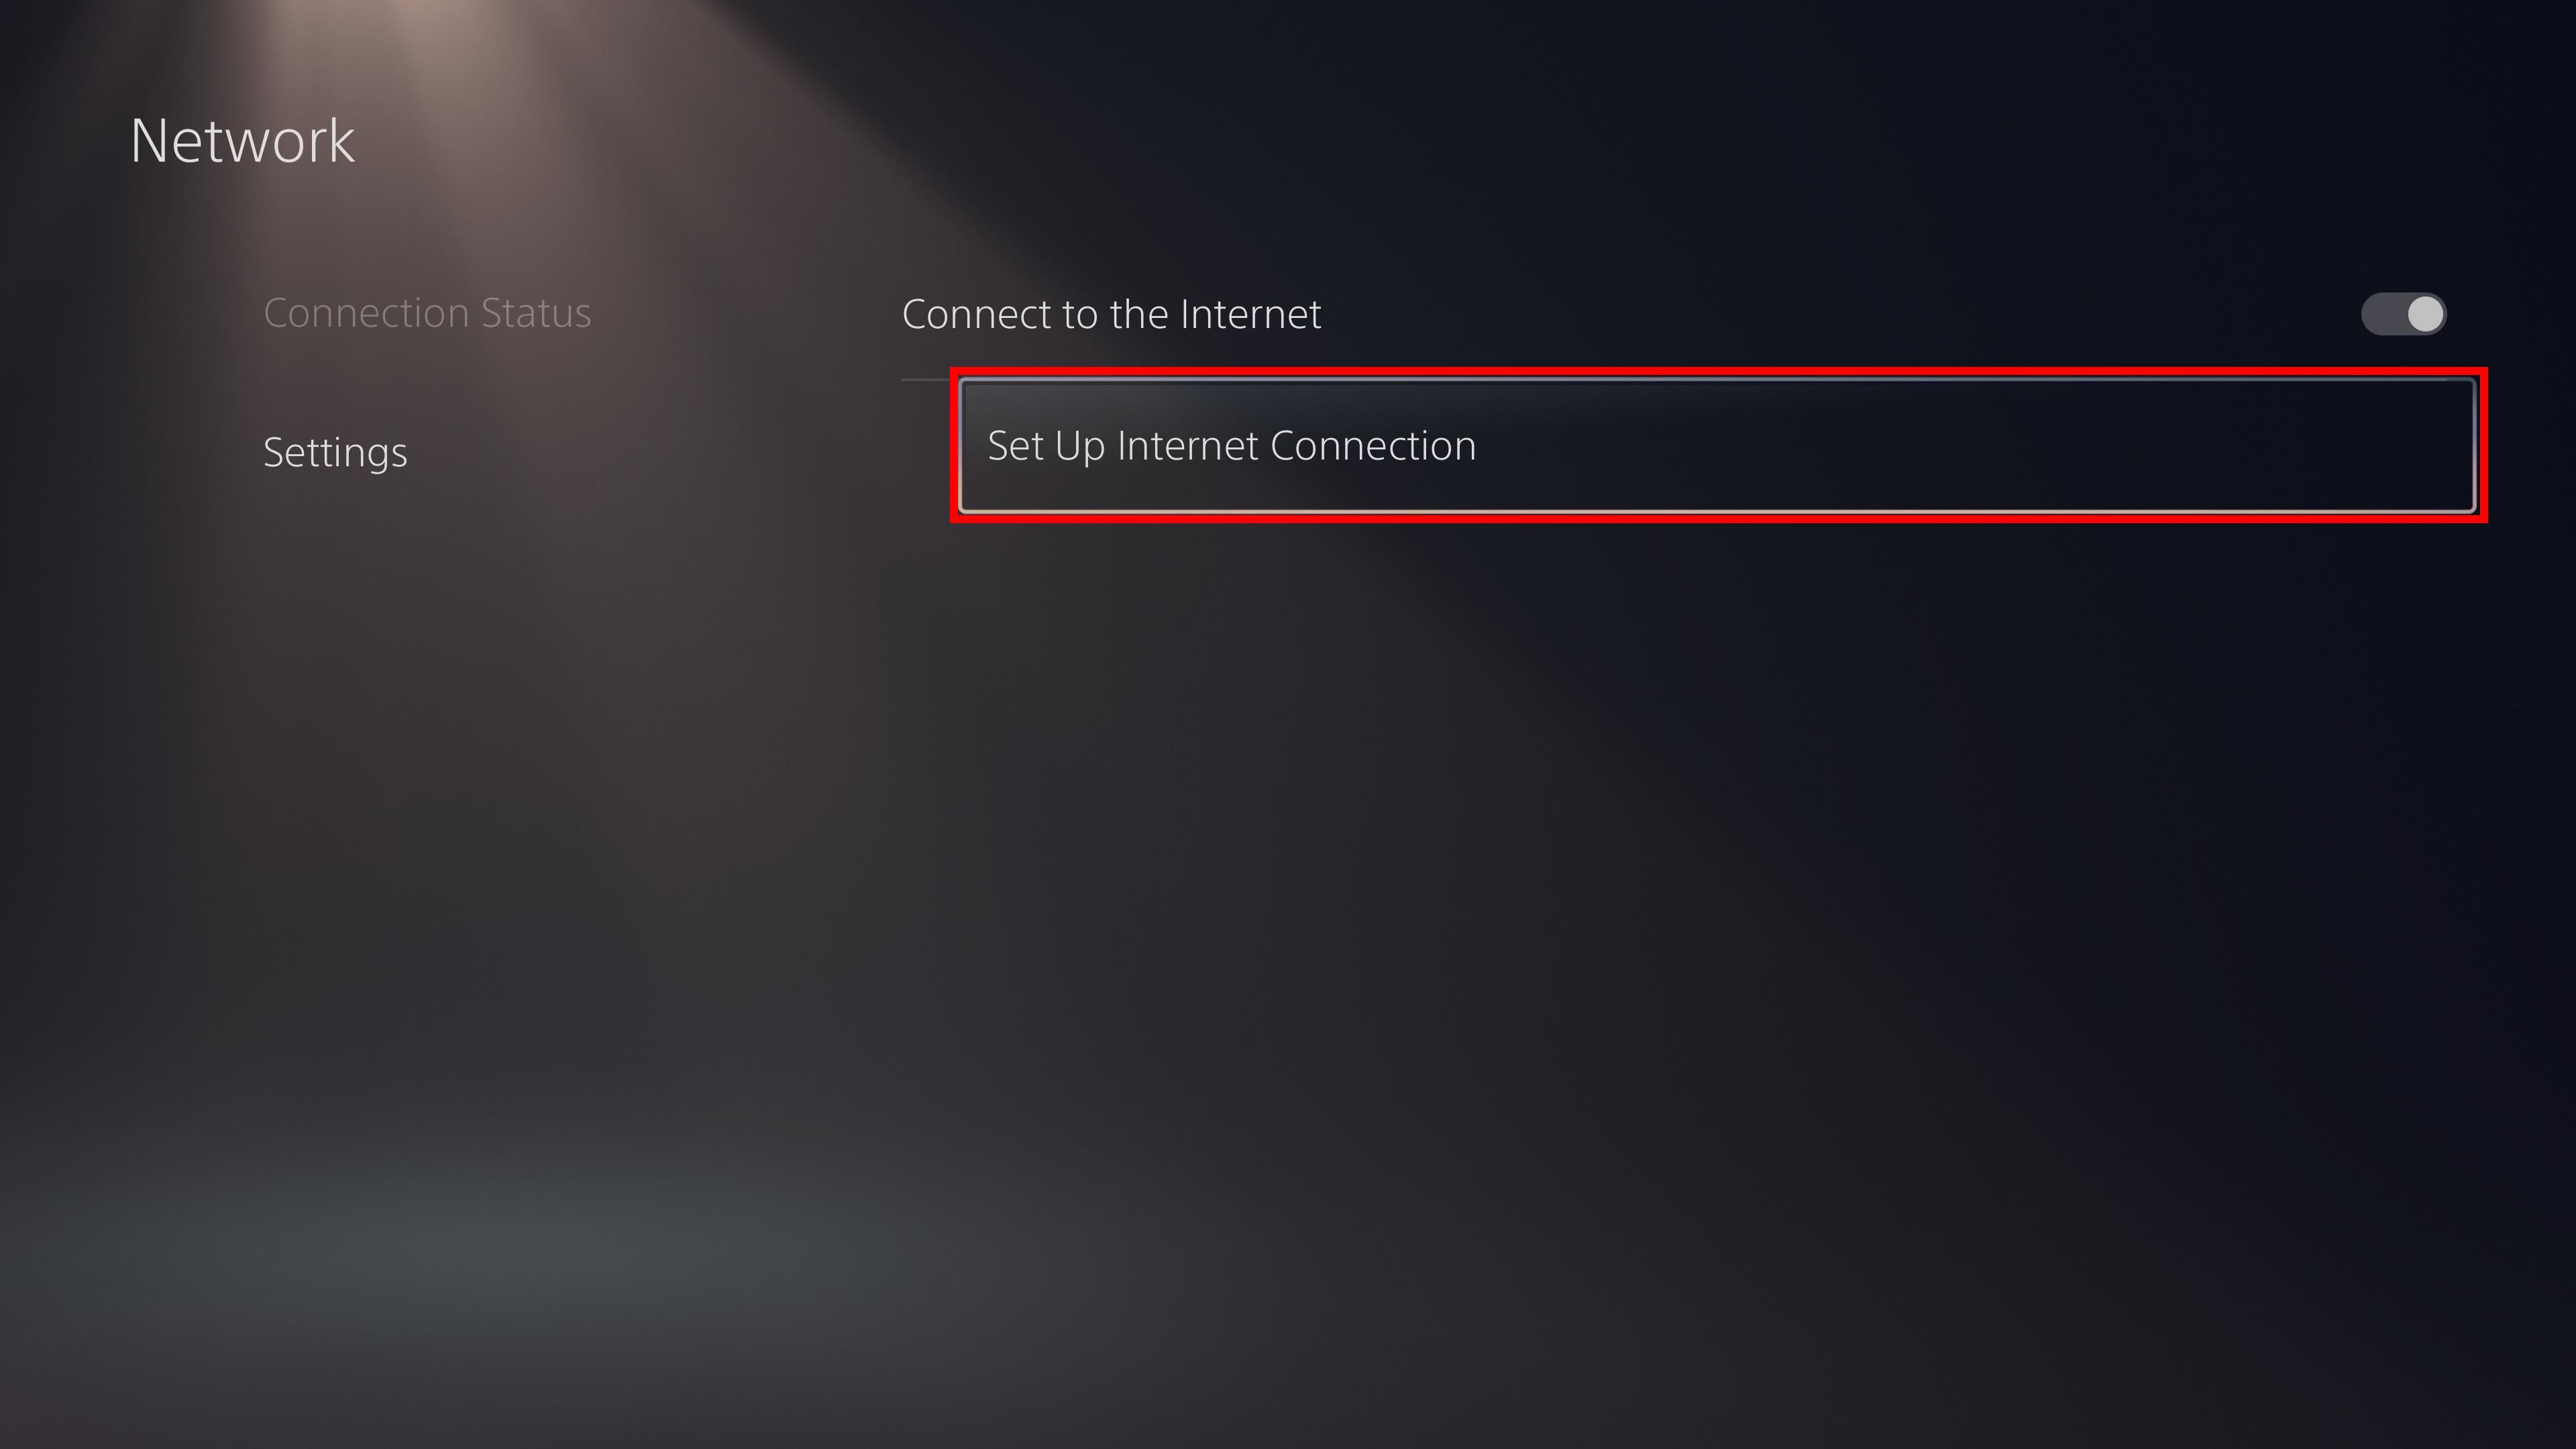
Navigate to Settings > Network. Then, select Set Up Internet Connection and choose Use a LAN Cable and Do Not Use a Proxy server.
How to set up Smart DNS on a PS5
Setting up your PS5 with a Smart DNS connection may allow you to bypass a region lock for streaming services. Read the steps below to learn more.
1. Turn on your Sony PS5 console and access Settings > Network.
2. Inside Network, navigate to Settings > Set Up Internet Connection.
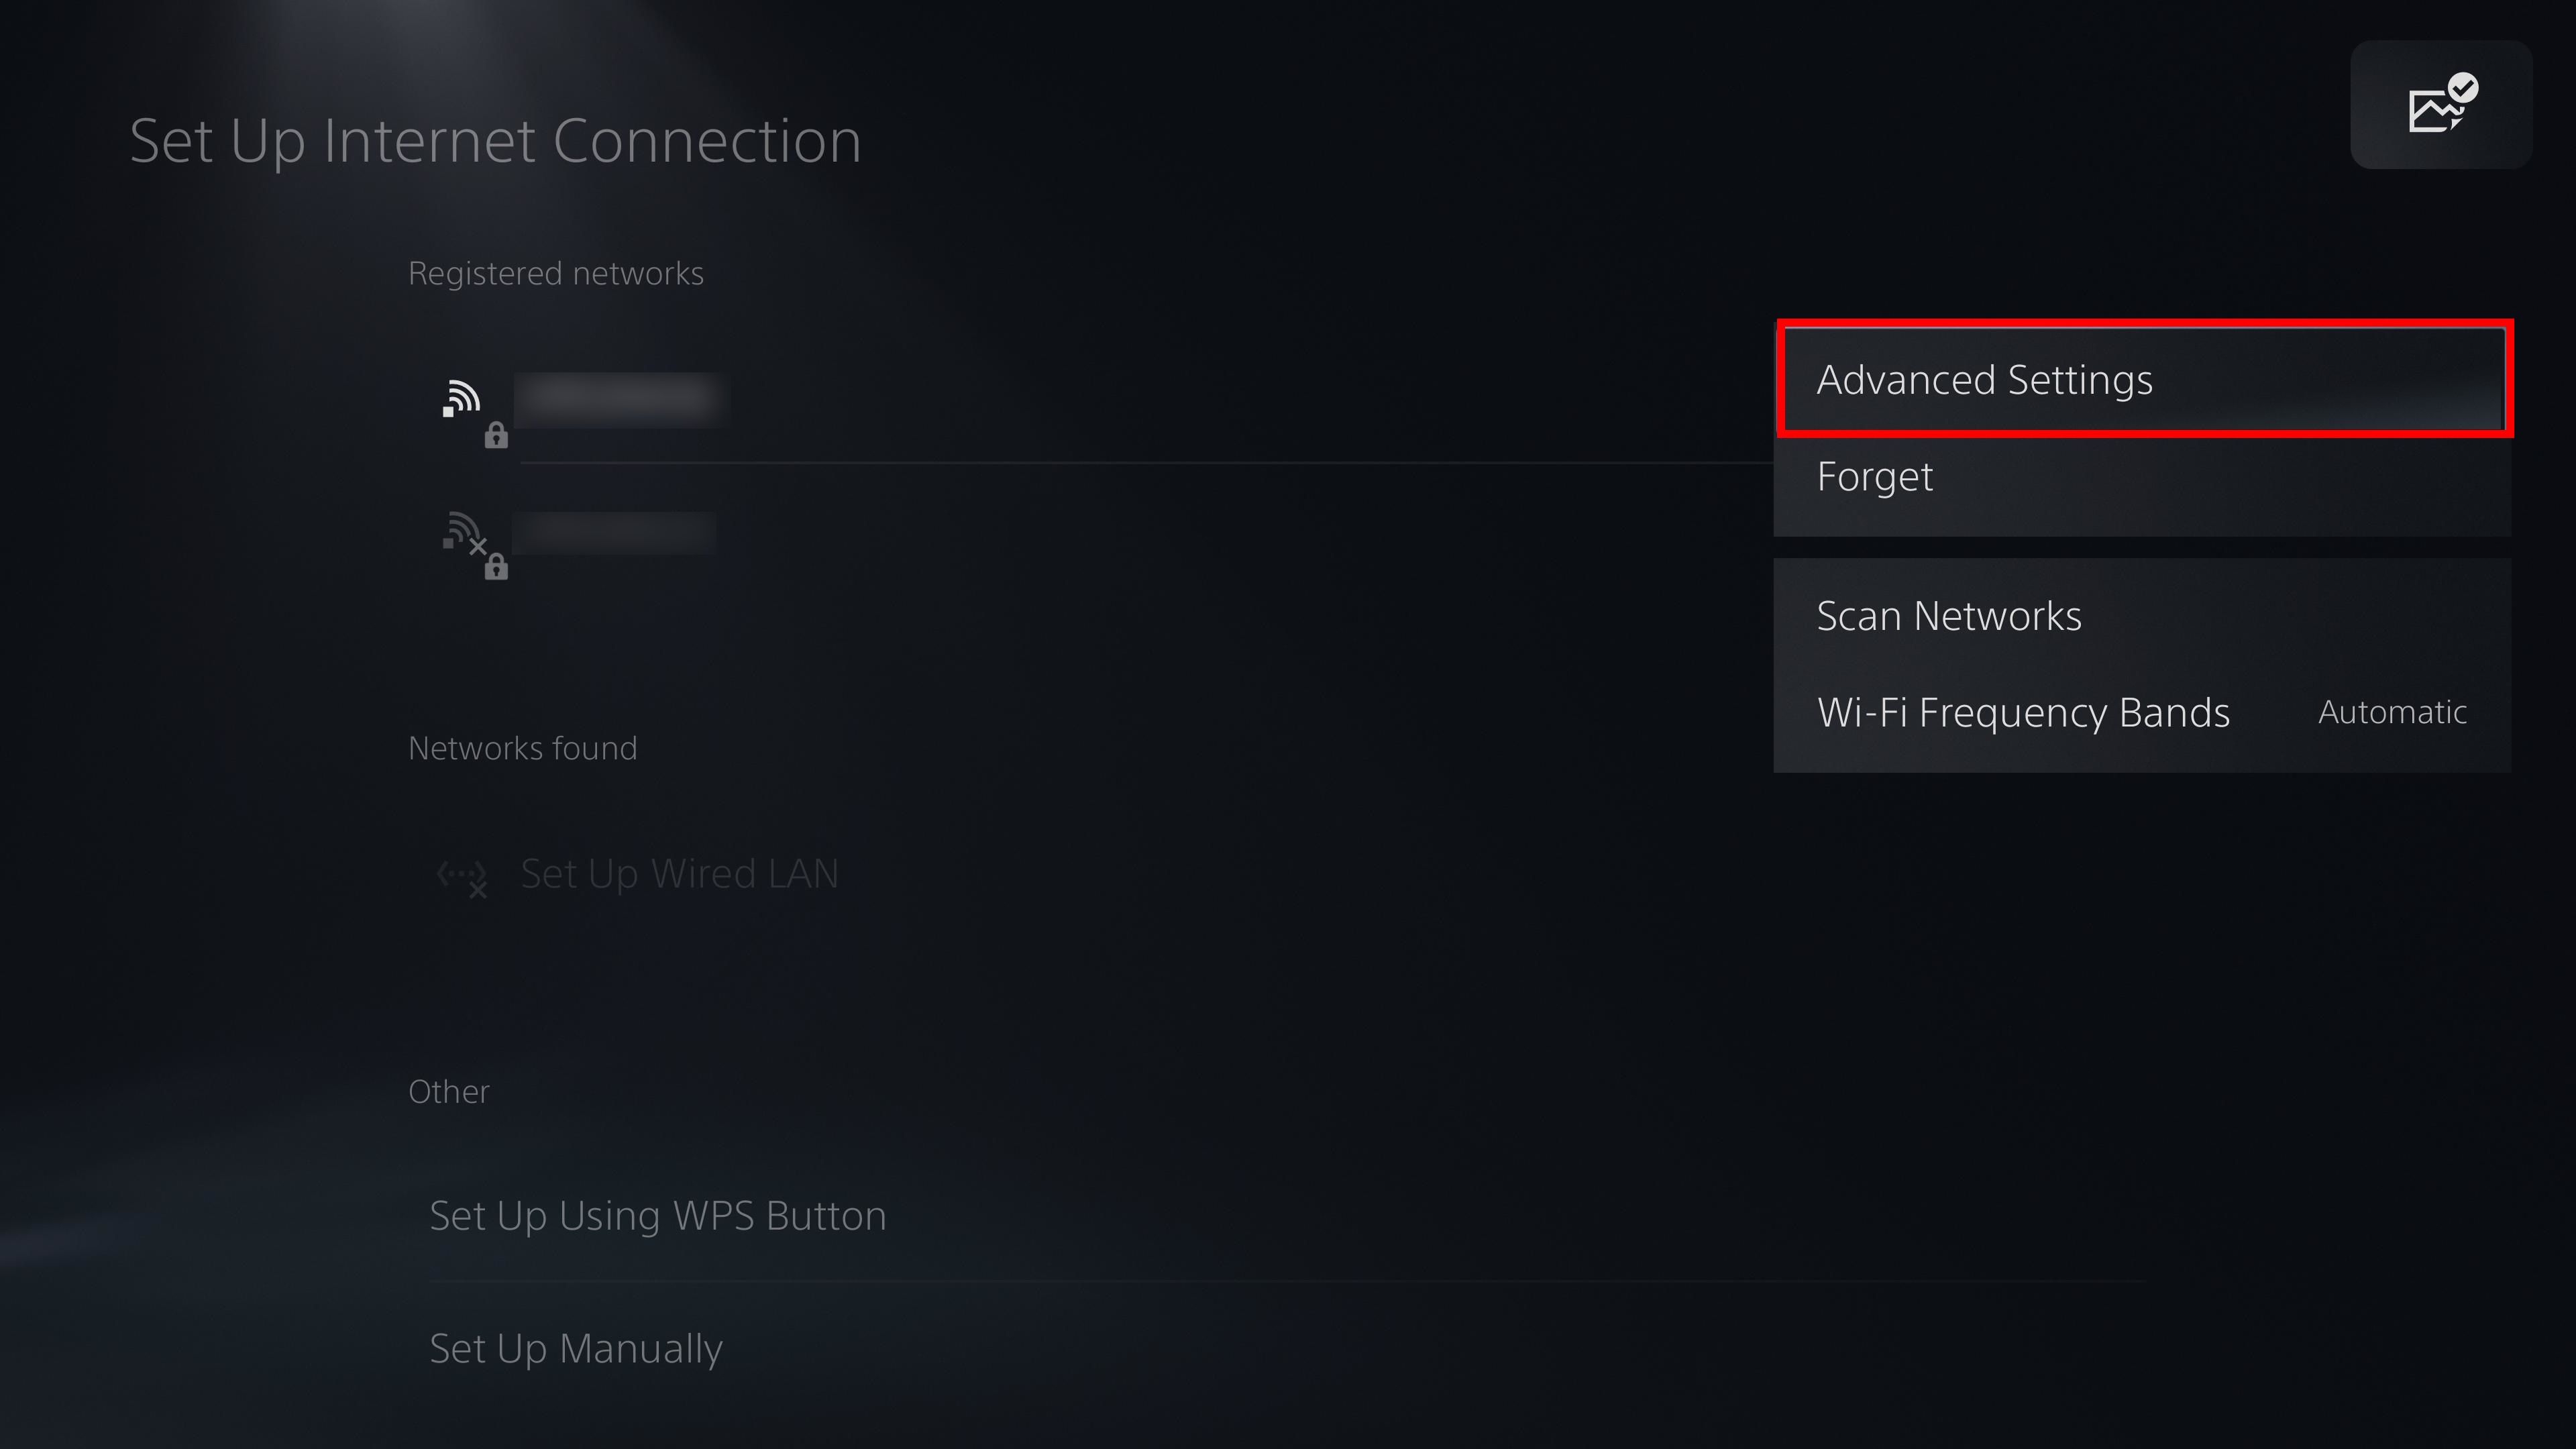
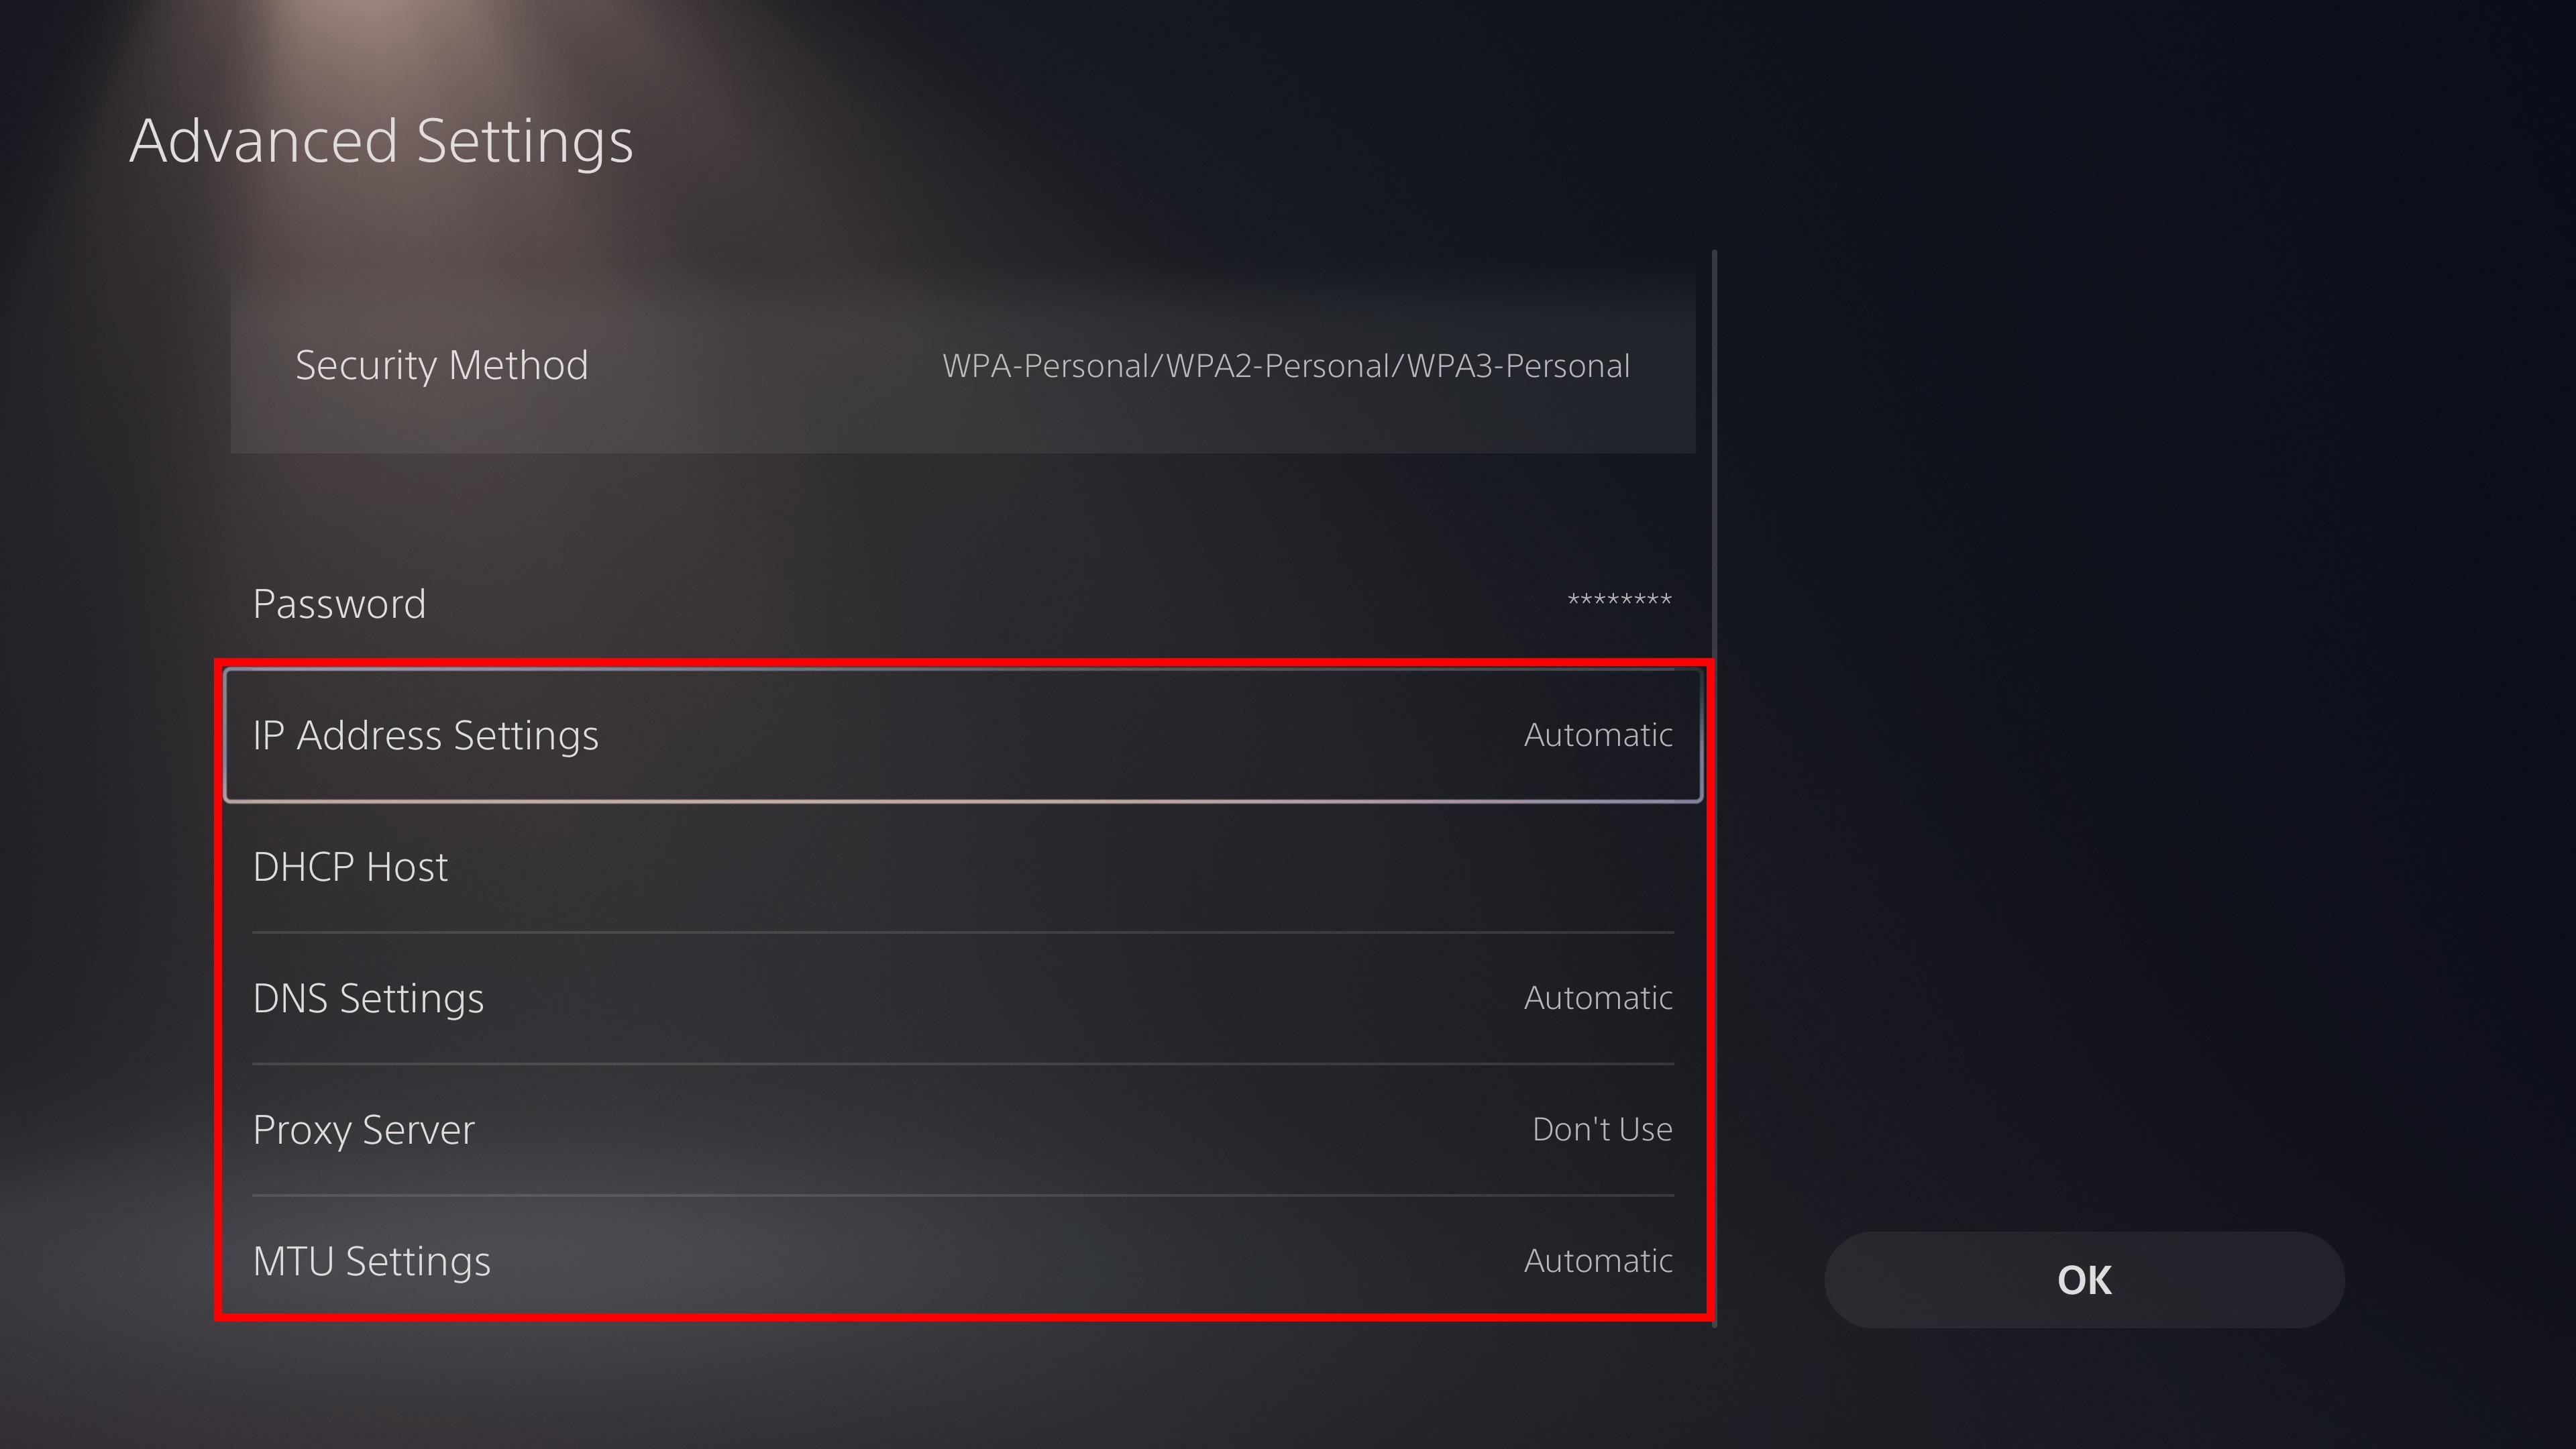
3. Select a LAN or Wi-Fi connection, highlight the connection by pressing the Options button on your controller, and choose Advanced Settings.
4. Inside the Advanced Settings page, change to the following: IP Address Settings to Automatic, DCHP Host to Do Not Specify, Proxy Server to Do Not Use, and MTU Settings to Automatic. See the table below this section for a summary of these settings.
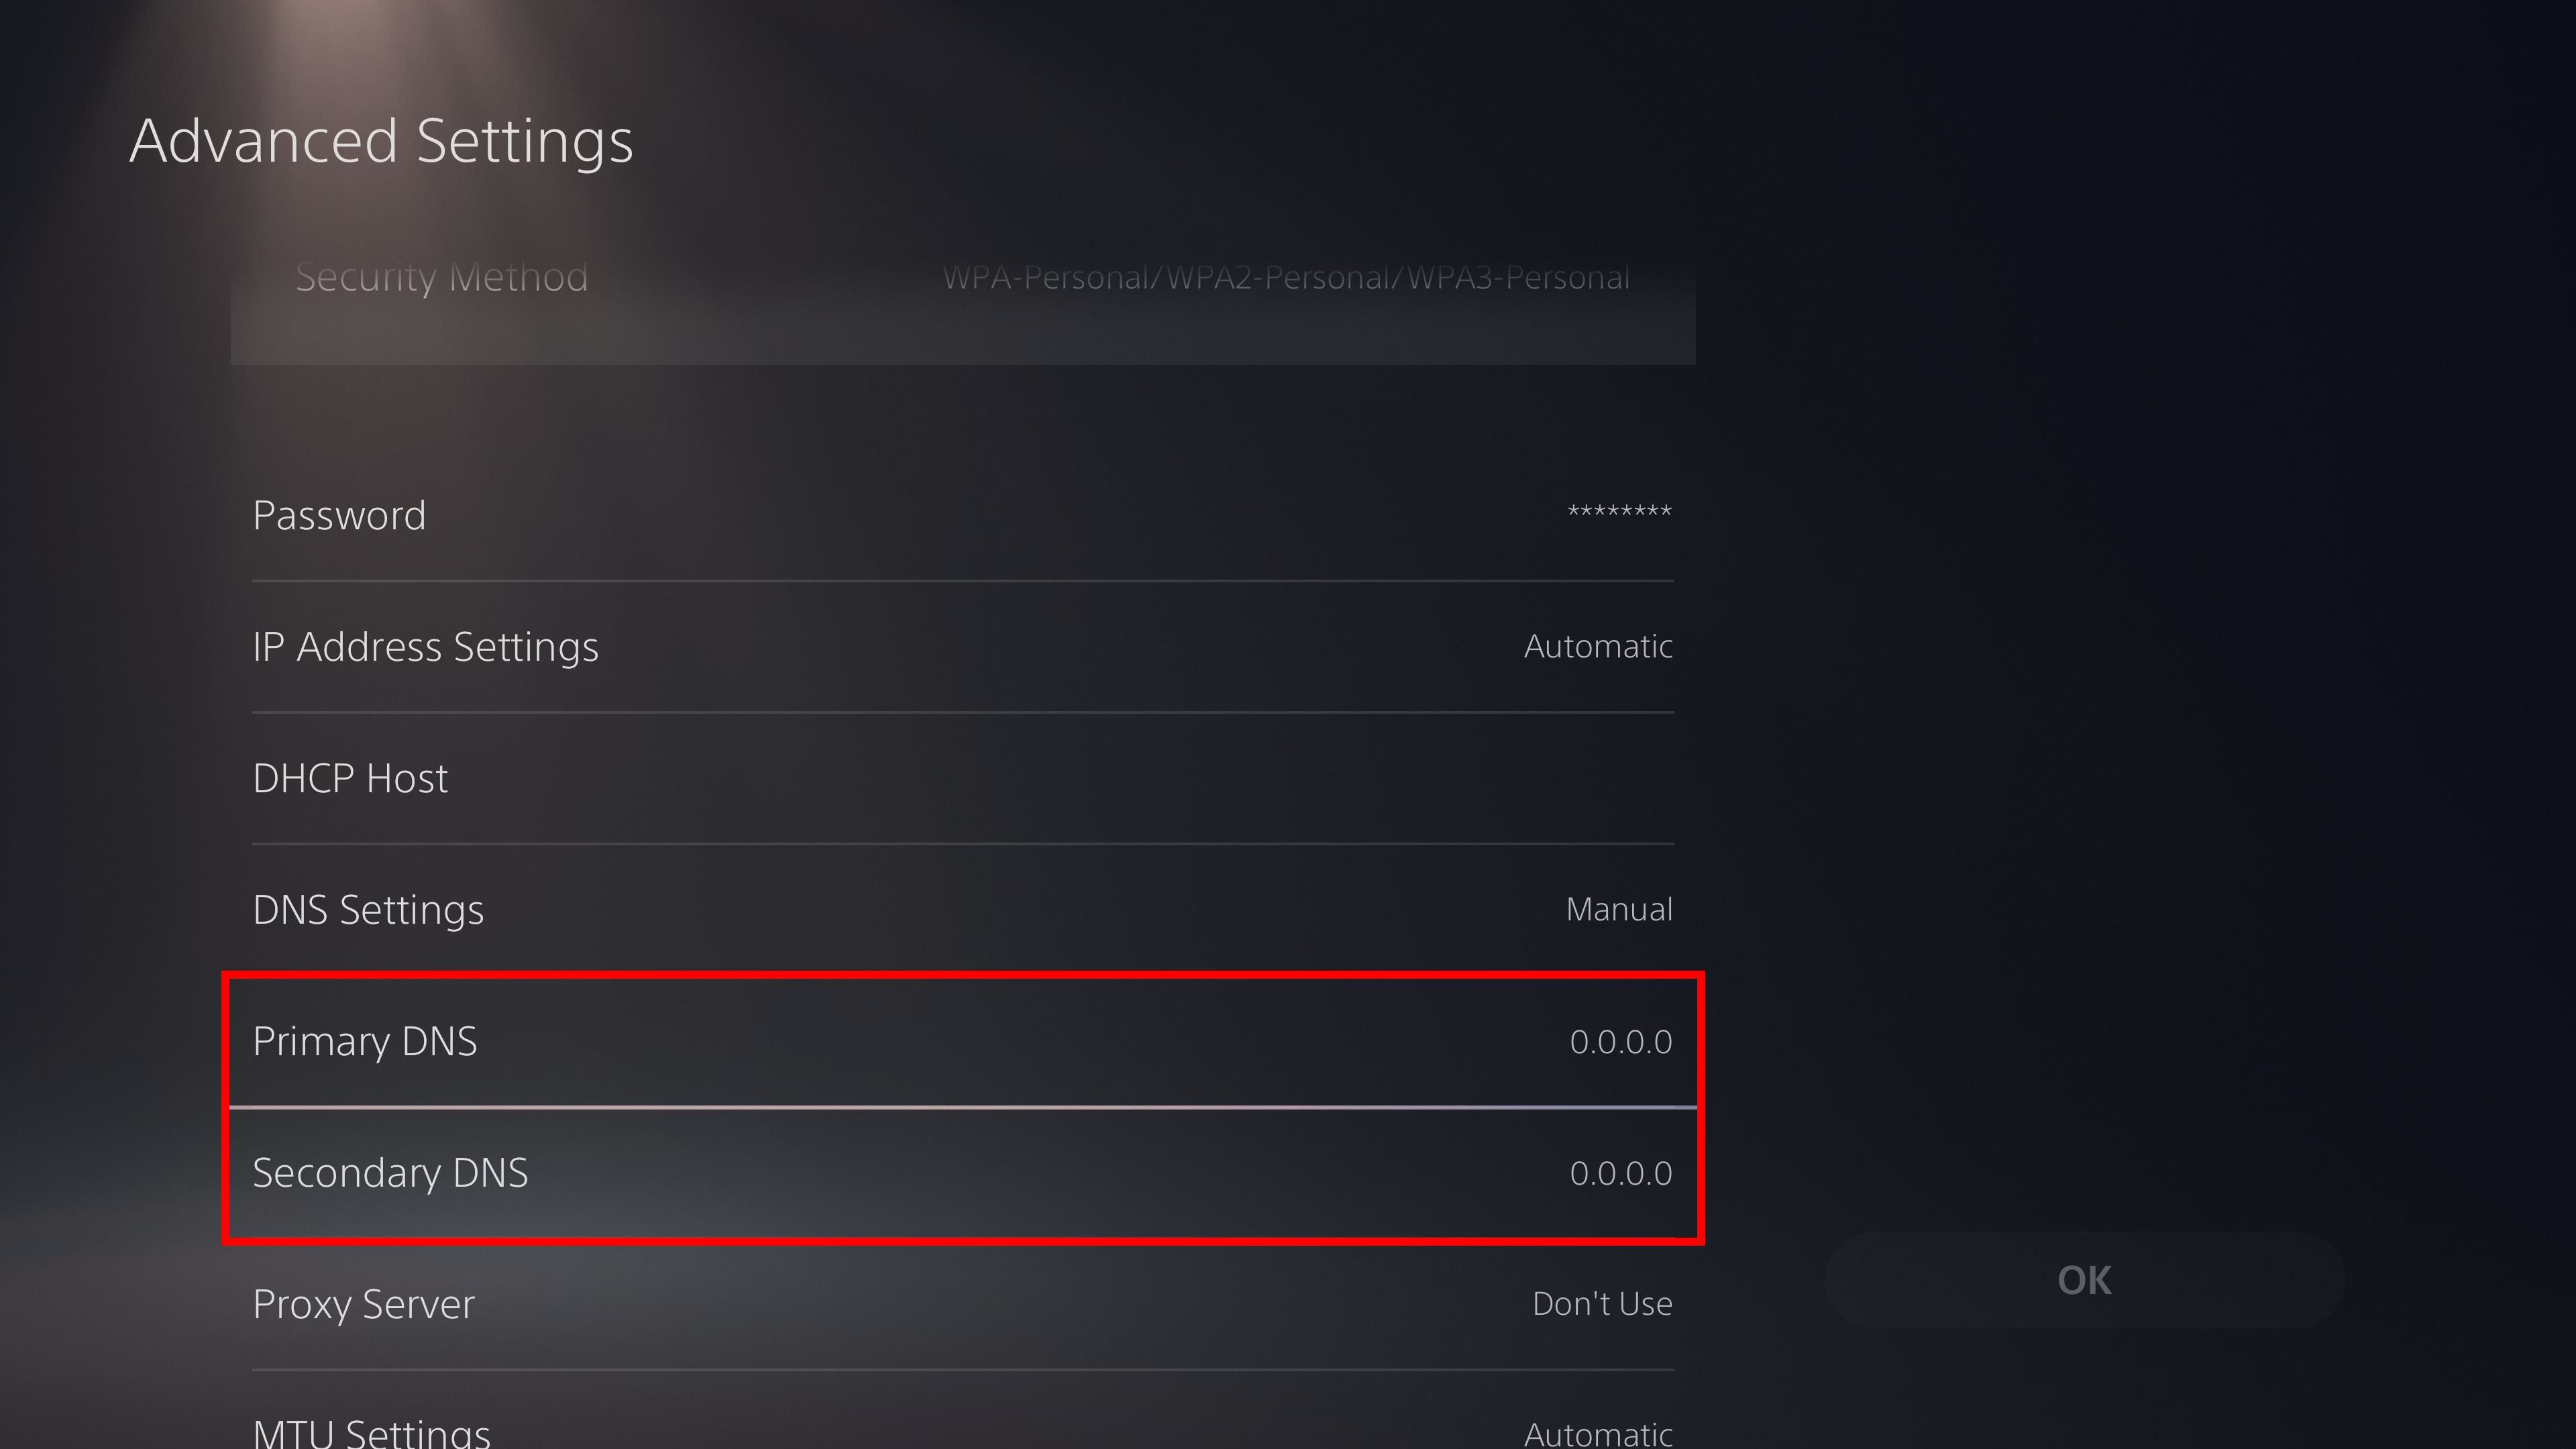
5. Set DNS Settings to Manual, and inside the Primary DNS and Secondary DNS fields, enter the values from your VPN provider.
6. Select OK and choose Test Internet Connection to confirm your new settings.
|
IP Address Settings |
Automatic |
|
DCHP Host |
Do Not Specify |
|
Proxy Server |
Do Not Use |
|
MTU Settings |
Automatic |
How to set up a VPN using a Wi-Fi router
Setting up a VPN via a Wi-Fi router requires your PS5 to read your VPN-supported router as a Wi-Fi source (or connected directly to the router via an Ethernet cable). However, the Wi-Fi router needs VPN support.
If your router doesn’t support a VPN connection, acquire one from our top VPN picks, ExpressVPN (Aircove) and NordVPN (FlashRouters). This method may be slightly more expensive than the others. After turning on the Wi-Fi source and connecting to your PS5, you can immediately access the VPN.
All devices using this Wi-Fi source also have access to the VPN.
Learning more about virtual private networks
Before committing to VPNs, take the time to learn more about them. Some VPNs (often the free options) provide less safety, while others hurt speed and connection stability. Learning when and why it is best to use a VPN could go a long way.


