This article was published as a part of the Data Science Blogathon.
Introduction
In this article, we will explore the details of RESTful architecture, the merits of Fast API, and how to create a simple API with Fast API. But before that, we shall discuss some basics of APIs like their functionalities, uses, and architectures, and then we will move on to more exciting stuff related to REST and Fast API.
What are APIs?
Imagine you went to a restaurant with your partner for a dinner date, and you want to place an order. How would you do it? Call the waiter and place an order. Now, what happens at the backend? The waiter goes to the chef and gives the order details. When the dishes are ready, he brings them to you.
Well, you just learned the way APIs typically work. In technical terms, the API is an intermediary between two software components to communicate with each other. API stands for Application Programming Interface. An interface between two entities.
We just learned how APIs work (superficially). So, what does it mean to have an API for a particular service? For example, Accuweather API for weather data. So, think of it as the waiter at our restaurant. What he does is he lets you access the dishes available in that restaurant. Similarly, an API lets the clients access particular resources of the backend or server. With Twitter API, you can pull tweet streams from a hashtag, follow, unfollow people, bookmark tweets, etc.

APIs interact via a communication medium. As the internet is the most popular communication medium, an API refers to a web API. But APIs existed even before the web. So, not every API is a web API. The web APIs typically use HTTP to request response messages from the server, and these response messages could be of any supported format like XML, JSON, CSV, etc.
As the use of APIs grew, the need for standard data exchange between web services grew. In this way, APIs written in different languages can interact with each other. There are several protocols and architecture developed to address the problem. The most popular of them are SOAP and REST.
The SOAP stands for Service Object Access Protocol and uses HTTP and SMTP to communicate between different systems. The response messages are typically in XML format. On the other hand, REST (Representational State Transfer) APIs aren’t protocols but an architectural style. As long as an API follows the architecture constraints, we are good to go.
RESTful APIs
As REST is not a protocol but an architecture, developers do not need to worry about built-in rules while creating one, unlike SOAP. REST is lightweight, fast, and flexible. The communication medium is HTTP. The message responses can be of various formats such as JSON, XML, plain text, and HTML. JSON is the most popular as it is language agnostic. The REST architecture specifies some guidelines. API adhering to these guidelines is a REST API. These guidelines are,
- Client Server design: A client-server architecture decouples the user interface from the storage interface. This decoupling of clients and servers helps them to evolve independently.
- Stateless: Another constraint is statelessness in client-server communication. Every request from clients must contain all the necessary information to understand it. The server cannot take advantage of previously stored context. Thus the onus of maintaining states lies with clients.
- Cacheable: This constraint requires the response data from the server to a request made by a client must be labeled as cacheable or not. If the data is cacheable, the client will have the privilege to reuse it later.
- Uniform Interface: A uniform interface ensures data transfer in a standardized format instead of specific to an application’s needs.
- Layered system: A layered system allows the architecture to be composed of hierarchical layers. The components cannot see any layer beyond their immediate layers.
- Code on demand: It allows the clients to extend their functionalities by downloading code blocks from servers as applets or scripts.
So, these are the six constraints that make an API a RESTful API.
One can develop REST APIs with any programming language. Examples are Javascript (Node js), Go lang (Gin, Martini), Ruby(Roda, Sinatra), Python (Flask, Django, FASTapi), Java (spring boot), PHP (Laravel), etc.
For this article, we will be focussing on Python’s FASTapi.
FAST API
Fast API is a Python web framework for creating APIs and web services. It got released in 2018 as an open-source Python web framework. Being a relatively new Fast API has garnered much reputation among developers. Tech behemoths like Microsoft, Uber and many more have started using Fast API in their tech stacks.
The unique selling point of Fast API is in its speed. Python is often dubbed a slow programming language and sometimes unsuitable for developing applications where execution speed is the prime need. But Fast API, as its name suggests, is the fastest Python framework, on par with Go and Node js. All thanks to ASGI (Asynchronous Server Gateway Interface). ASGI allows FAST API to support concurrency and async code. It fundamentally separates Fast API from Flask web framework, which supports WSGI (Web Server Gateway Interface).
So, what is ASGI and WSGI? WSGI handles the requests from clients synchronously. Each request has to wait until the previous one is complete. Thus, making the entire process slow. But ASGI handles the requests asynchronously. Any request does not need to wait for the completion of the previous one. Hence, making execution faster. The Flask, Bottle, and Django are some examples of WSGI-based frameworks. Fast API is an ASGI-based framework.
Now, let’s point out some of the prime aspects of Fast API.
- Excellent Performance: Like we already discussed, Fast API is the fastest Python web framework in the market now.
- Concurrency Support: Fast API supports concurrent programming.
- In-built documentation: Swagger UI GUI allows automatic browser-based documentation of API.
- In-built data validation: Fast API uses Pydantic for data validation, which saves a lot of time. It returns a JSON with the reason for any wrong data type.
We now have some initial ideas for Fast API. Now, we will move to the part where we do all the code stuff.
Install Requirements
First, We will install all the requirements to run Fast API applications. Like any Python project, we will create a virtual environment where we will install all the dependencies and libraries for the project. The reason for using a virtual environment is Python is not very good at resolving dependency issues. Installing packages to the operating system’s global python environment might conflict with system-relevant packages. So, we create virtual environments.
We can do that by running simple scripts.
python -m venv fastapiWe created a virtual environment named ‘fastapi’ in the current directory. Then we will launch it by typing the following code.
fastapi/Scripts/activate
It will activate our virtual environment. The next step is to install the required libraries.
Install Fast API with pip command. Open up your shell and type in the following code.
python -m pip install fastapi uvicorn[standard]So, we installed the fastapi and uvicorn server in our virtual environment. We will see what it does in a few moments.
Creating Simple API
Create a python file for your project. And type in the below codes. You may do it in any IDE.
from fastapi import FastAPI

app = FastAPI()

@app.get("/")
async def root():
return {"message": "to be or not to be"}- In the above code snippet, we imported the FastAPi class from the fastapi module we just installed.
- Then we created an app object of the class FastAPI.
- The @app.get(“/”) is responsible for path operation, which is a decorator. It indicates that the below function is responsible for handling requests that go to the “/” path using the get operation.
- The get operation is one of the HTTP operations along with Post, put and Patch, etc.
- Next is the async function root, which returns a dictionary.
Note: The difference between the async/await function and a normal function is that in an async function, the function pauses while awaiting its results and let other such functions run in the meantime. For more reading on asynchronous functions, visit here.
In the above code, we can also write a regular function.
Next, in the shell, type in the below script.
uvicorn main: app --reload
In the above, script main is the name of the Python file, and the app is the name of the FastAPI instance we created in our code. The reload is for developing purposes. When you hit ctrl+s after changing your code, it will automatically update it in the uvicorn server. We don’t have to run the above shell command anymore.
The output of the above script is
(fastapi) (base) PS D:> uvicorn main:app --reload
←[32mINFO←[0m:     Will watch for changes in these directories: ['D:\']
←[32mINFO←[0m:     Uvicorn running on ←[1mhttp://127.0.0.1:8000←[0m (Press CTRL+C to quit)
←[32mINFO←[0m:     Started reloader process [←[36m←[1m24796←[0m] using ←[36m←[1mWatchFiles←[0m
←[32mINFO←[0m:     Started server process [←[36m28020←[0m]
←[32mINFO←[0m:     Waiting for application startup.
←[32mINFO←[0m:     Application startup complete.
Now, visit http://127.0.0.1:8000 you will see a dictionary output.
{"message":"Hello World"}
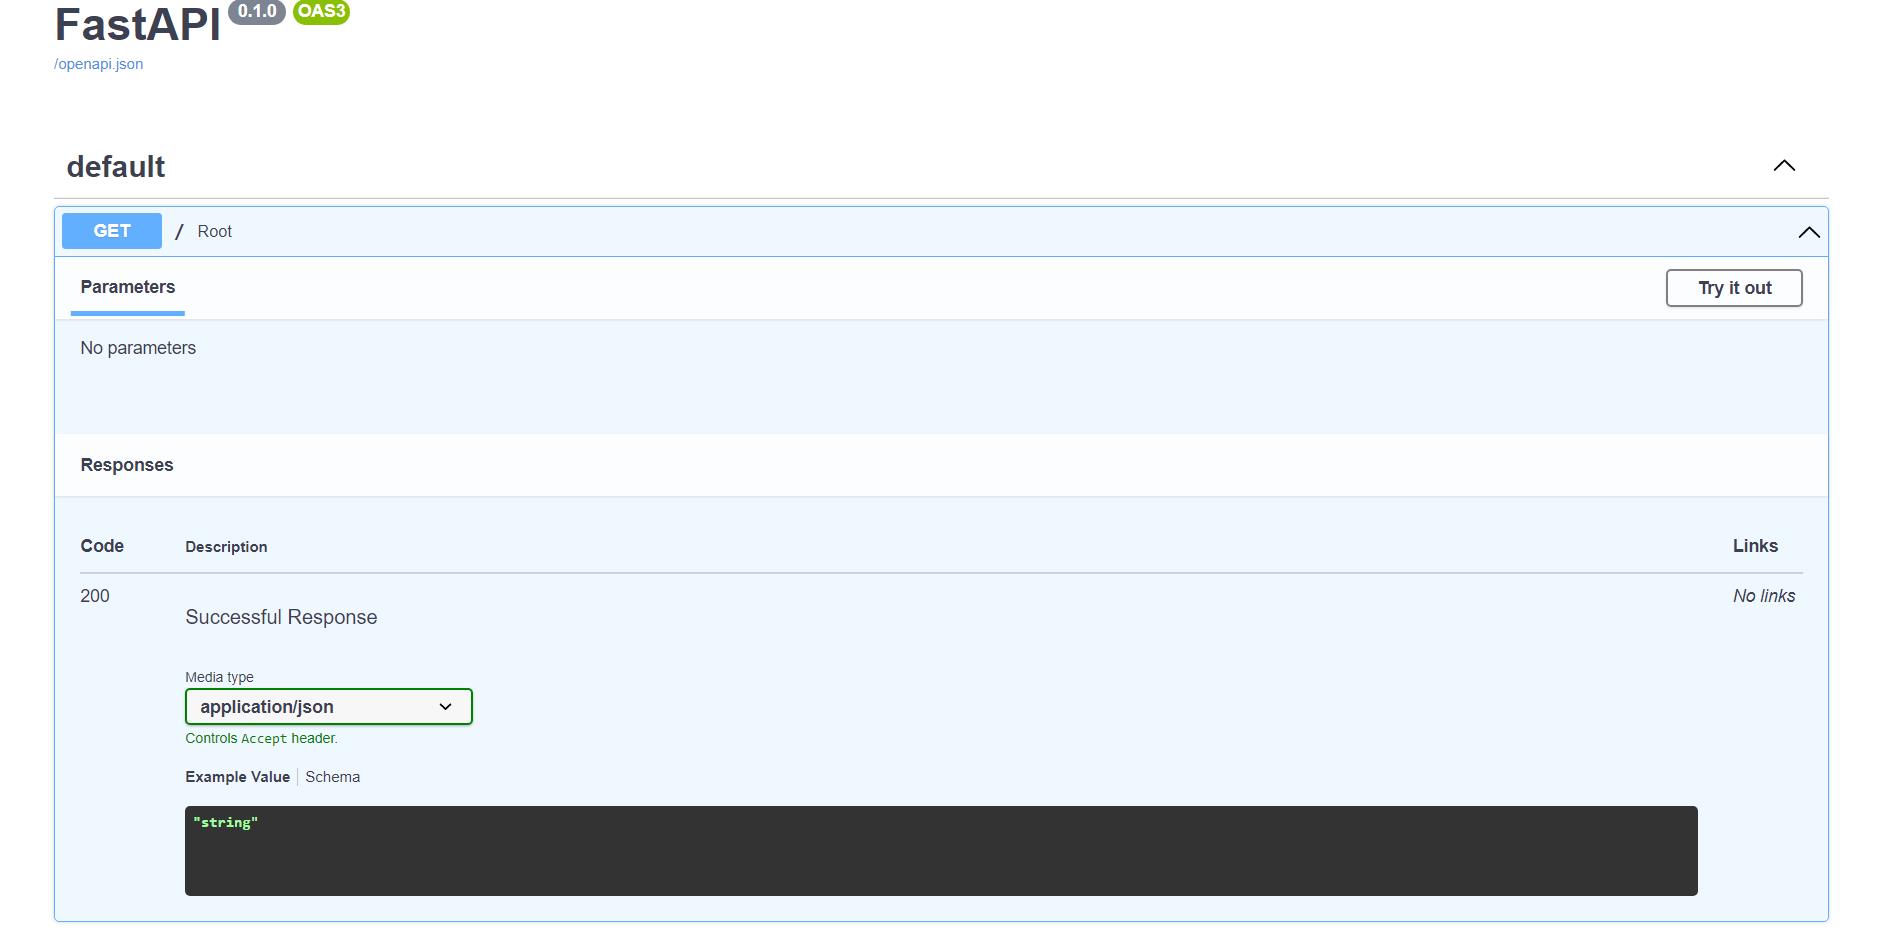
Visit http://127.0.0.1:8000/docs in your local browser. A swagger GUI will open up.

For alternative API documentation, visit http://127.0.0.1:8000/docs.
Path Parameters
As per Open API standards, a path parameter is the variable part of a URL path. It points to a specific resource location within a collection. See the below code for a better understanding,
from fastapi import FastAPI

app = FastAPI()

@app.get("/user/{user_id}")

async def read_item(user_id:int):

return {"user id": user_id}
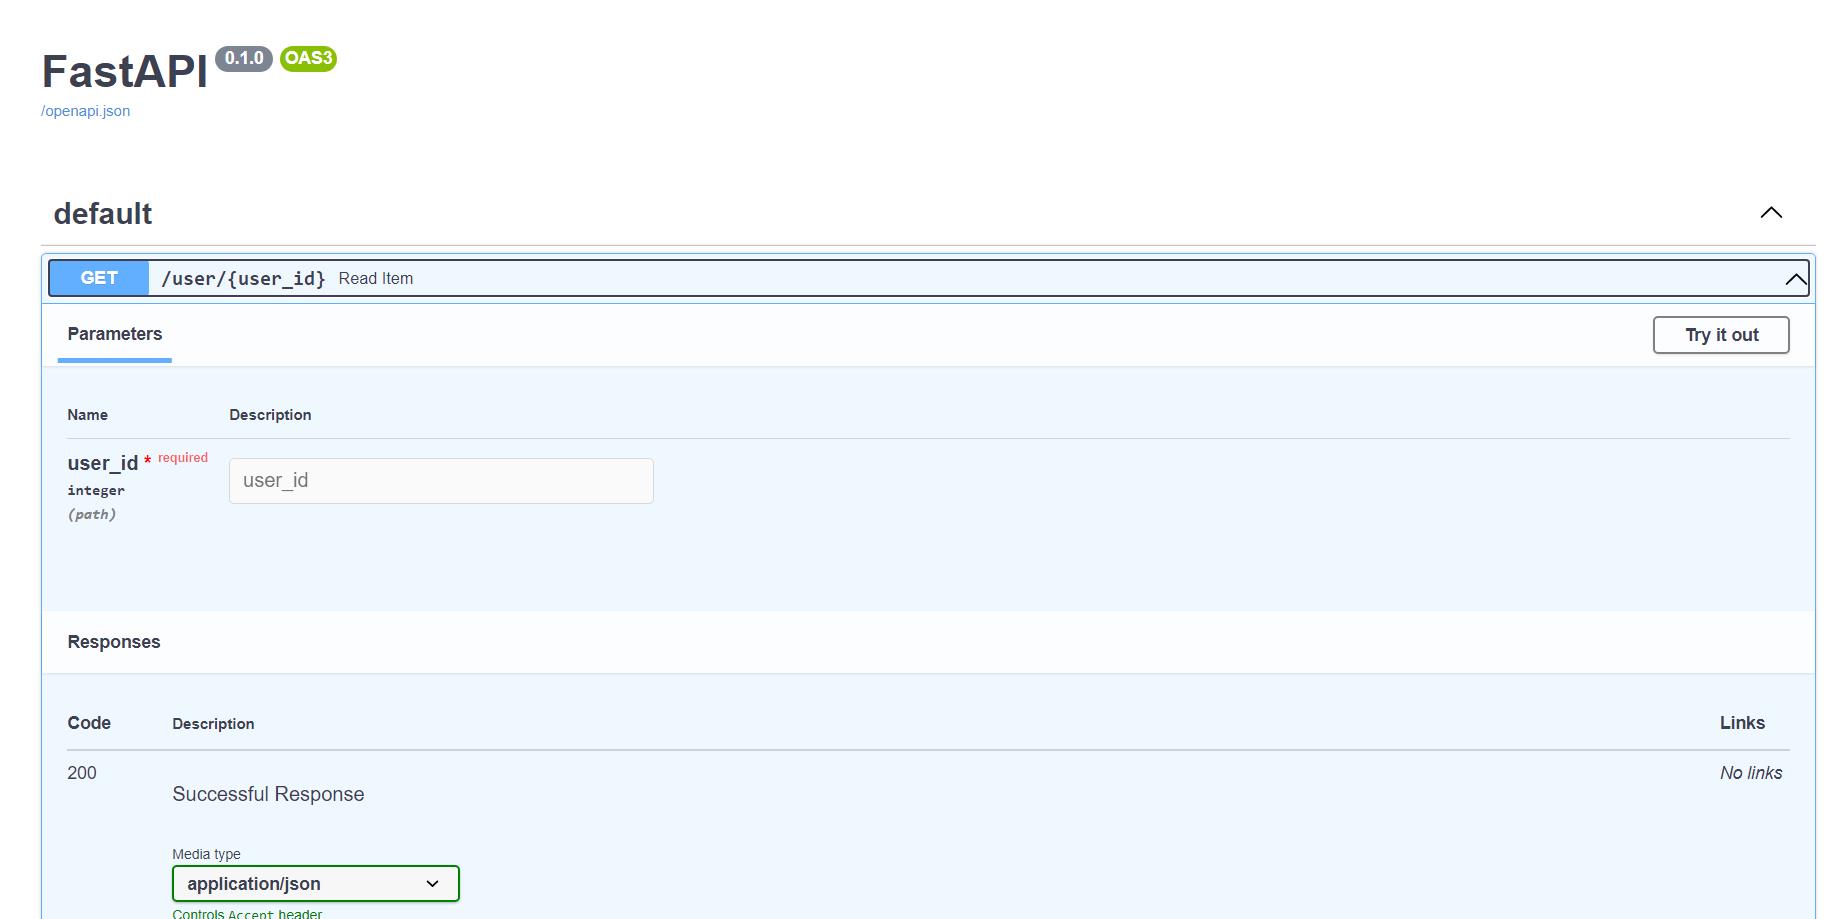
The path parameter value goes to the read_item function. Notice we have mentioned the type of user_id, which means user_id has to be an integer. By default, the value is a string.
Visit http://127.0.0.1:8000/user/12
{"user id":100}
You can provide anything other than a string, and the output will be
{"detail":[{"loc":["path","user_id"],"msg":"value is not a valid integer","type":"type_error.integer"}]}
The Pydantic is responsible for all the under-the-hood data validation
The swagger Ui

Query Parameters
Any parameters other than the path parameters are query parameters. These are the most common types of parameters. The query is the set of key-value pairs that go after the ? in a URL, separated by & characters. Consider the below example.
from fastapi import FastAPI
app = FastAPI()
@app.get("/items/{item_id}")
async def read_user_item(item_id: str, needy: str):
    item = {"item_id": item_id, "needy": needy}
    return item
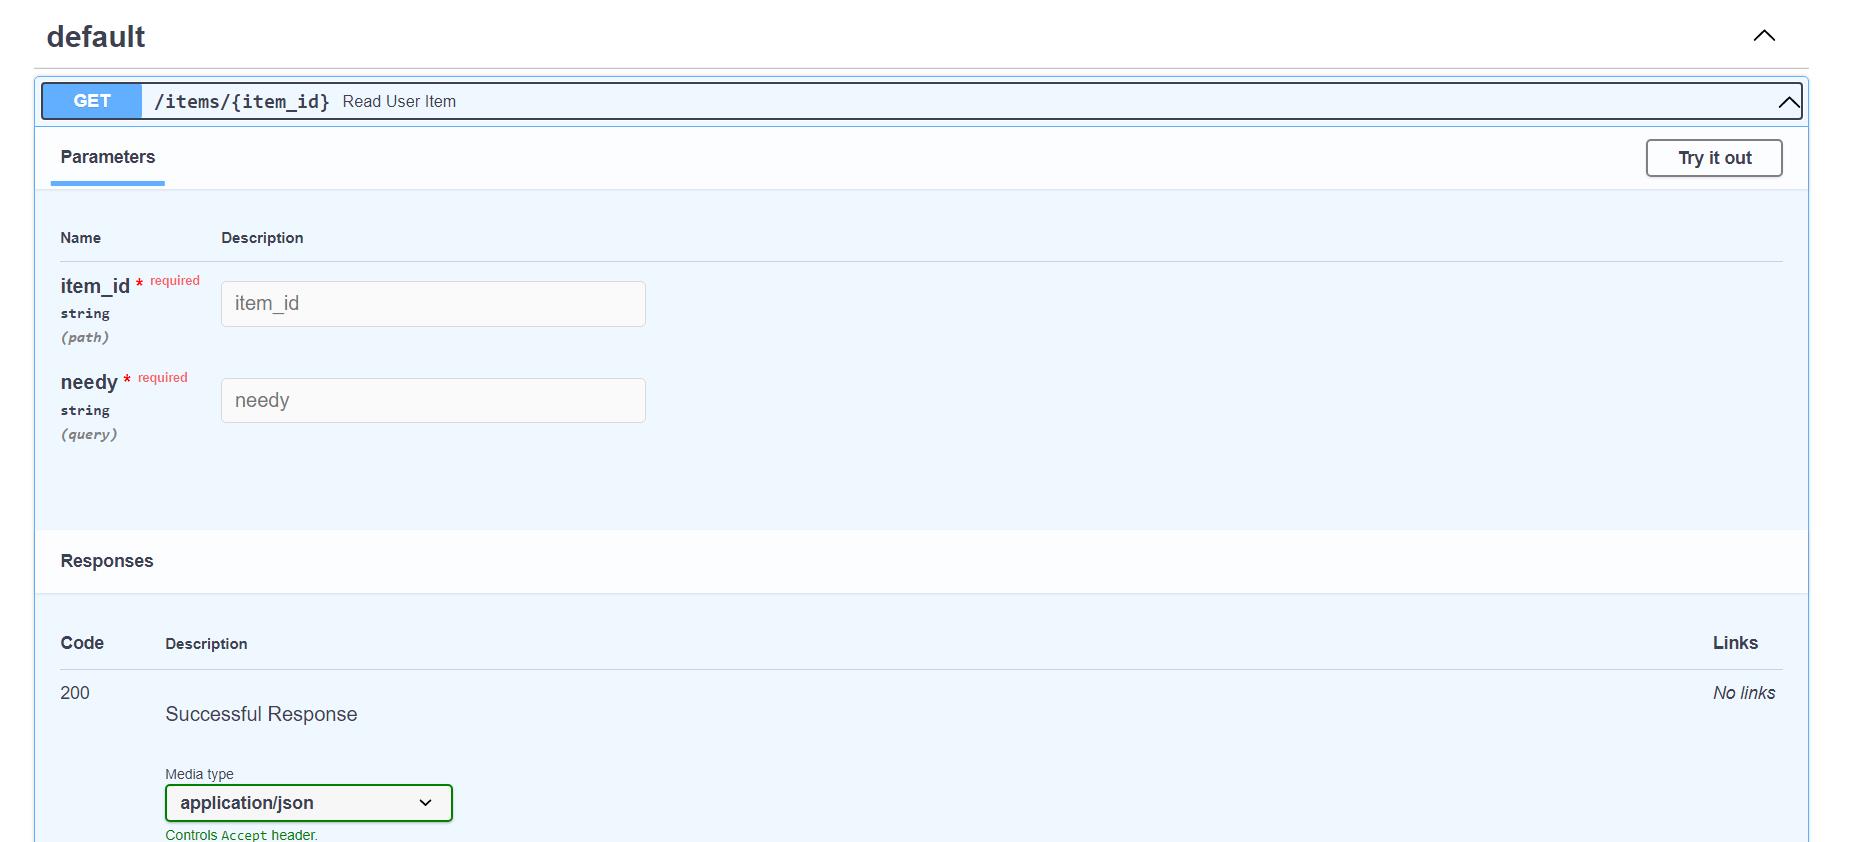
Visit http://127.0.0.1:8000/items/foo. We will get an error in the path function as the ‘needy’ parameter is mandatory, and we have only supplied path parameter item_id as ‘foo’.
{"detail":[{"loc":["query","needy"],"msg":"field required","type":"value_error.missing"}]}
Now, visit http://127.0.0.1:8000/items/foo-item?needy=needy.
{"item_id":"foo-item","needy":"needy"}
Swagger Ui

Request Body
A client sends data to API through a request body and receives a response body in return. The clients don’t need to send requests. API must return a response body to the clients.
We will declare our data model as a user_details class that inherits from the Pydantic base model. We will then use Python data types to define attributes. See the below example.
from fastapi import FastAPI
from pydantic import BaseModel
from typing import Union
app = FastAPI()
class user_details(BaseModel):
    user_id : str
    user_name : str
    income : int
    age : Union[int, None] = None
@app.post('/users/')
async def user_func(user : user_details ):
    if user.income > 1000000:
        tax = (user.income/100)*30
        return f'Mr/Ms {user.user_name}, user Id  {user.user_id} will pay a sum of {tax} as income tax'
    else:
        return f'Mr/Ms {user.user_name}, user Id  {user.user_id} will pay a sum of {0} as income tax'
The request body user_details is the child class of Pydantic’s BaseModel. We then defined attributes such as user name, Id etc. In the user_func function, we declared the user as user_details type just as we did in path and query parameters.
Inside the function, we can access all the methods directly.
We can also use path, query, and request body together.
@app.put("/users/{user_add}")
async def create_item(user_add: str, user: user_details, x: Union[str, None] = None):
    result = {"user_add": user_add, **user.dict()}
    if x:
        result.update({"x": x})
    return result
The function parameters will be recognized as follows:
- If a parameter is declared in the path URL, it will be a path parameter. (user_add)
- If the parameter is of a singular type (like
int,float,str,bool) it will be interpreted as a query parameter. (x) - If the parameter is declared to be of the type of a Pydantic model, it will be a request body. (user)
ML Model as a Web Service
Now that we know the nuts and bolts of fast API, we will create a predictive model and deploy it as a web service. All we need to do is putting all the pieces we learned so far together.
As discussed earlier, create a virtual environment, install necessary libraries, and create two Python files. One for model creation and the other for fast API creation.
The codes for our model
import pandas as pd

df = pd.read_csv('D:/Data Sets/penguins_size.csv')

df.dropna(inplace=True) #removing Null values

df.drop('island', axis=1, inplace=True)


#label encoding

from sklearn.preprocessing import LabelEncoder

enc = LabelEncoder()

for col in df.select_dtypes(include='object'):

df[col] = enc.fit_transform(df[col])


#train test split

from sklearn.model_selection import train_test_split

y = df.species

df.drop('species', axis=1,inplace=True)

X_train, X_test, y_train, y_test = train_test_split(df, y,test_size=0.15)


#model train

from sklearn.ensemble import RandomForestClassifier

model = RandomForestClassifier()

model.fit(X_train, y_train)

y_pred = model.predict(X_test)

from sklearn.metrics import accuracy_score

acc = accuracy_score(y_pred, y_test)

print(f'The accuracy of model is {acc}')


#save model

from joblib import dump

dump(model,'penguin_model')
It is a simple model where we used a penguin dataset. After training the data, we saved the model using Joblib so that we will be able to use the model later in our fast API. Let’s create our API.
1. Import necessary libraries and load the saved model
from fastapi import FastAPI
from pydantic import BaseModel
from joblib import load
model = load('penguin_model')
class my_input(BaseModel):
    culmen_length_mm: float
    culmen_depth_mm: float
    flipper_length_mm: float
    body_mass_g: float
    sex: int
@app.post('/predict/')
async def main(input: my_input):
data = input.dict()
data_ = [[data['culmen_length_mm'], data['culmen_depth_mm'], data['flipper_length_mm'], data['body_mass_g'], data['sex']]]
species = model.predict(data_)[0]
probability = model.predict_proba(data_).max()
if species == 0:
species_name = 'Adelie'
elif species == 1:
species_name = 'Chinstrap'
else:
species_name = 'Gentoo'
return {
'prediction': species_name,
'probability': float(probability)
}
Now run the Python file where we defined our model. After successful execution, you will see a Joblib model in the same directory. Now run the application through uvicorn as we discussed earlier.
uvicorn app_name:app --reload
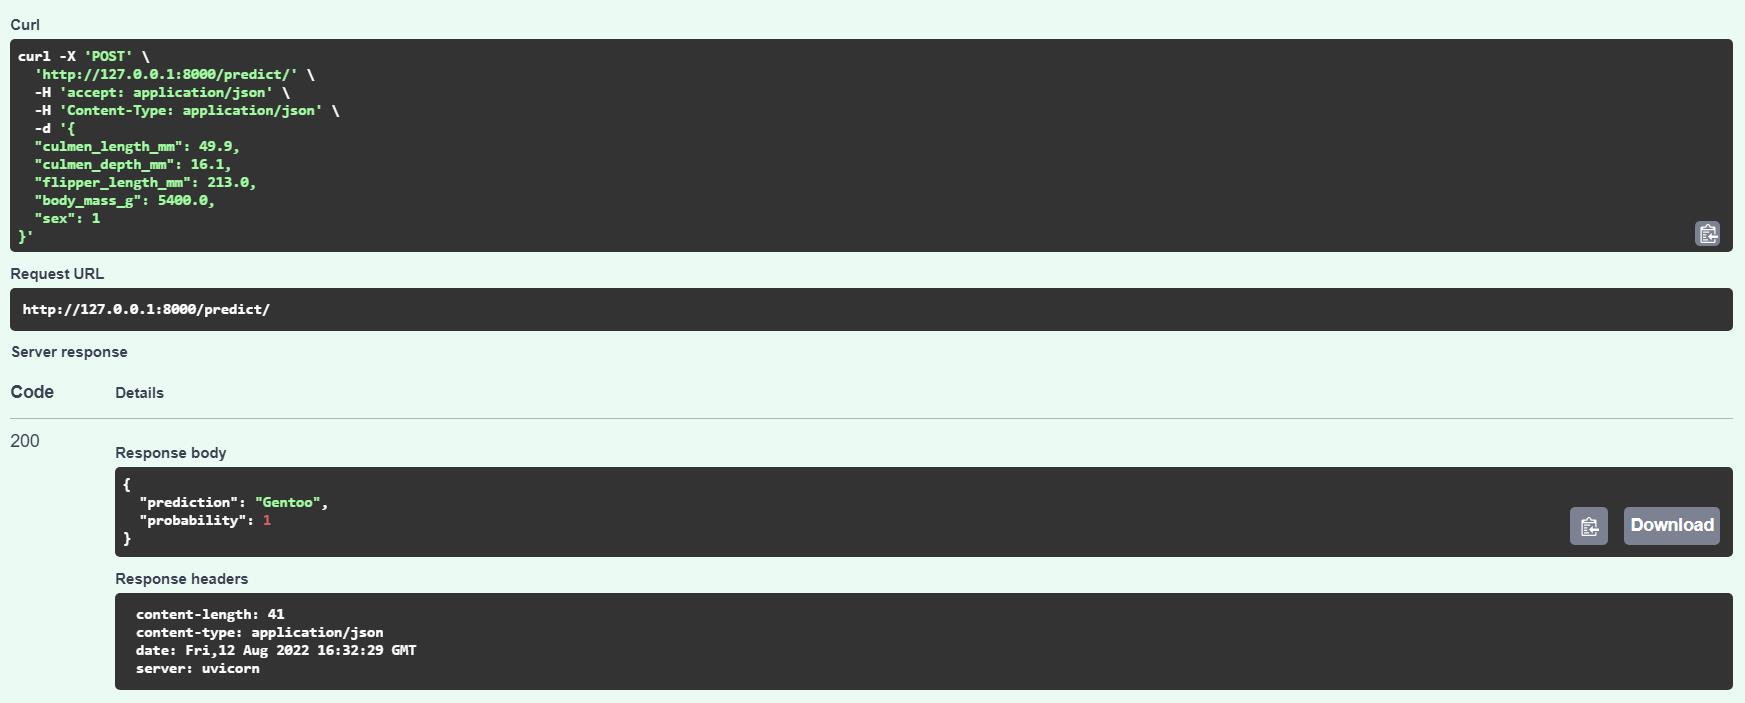
We can test our API right here in Swagger UI http://127.0.0.1:8000/docs. To do that, pass appropriate values in the request body.

It’s working.
Conclusion
Fast API is a new addition to Python web frameworks. Despite being a new entrant, it is already gaining traction in the developer’s community. The execution speed of async programming with Python’s easiness is what sets it apart. Throughout the article, we touched on several topics essential to get you started with Fast API.
Here are the key takeaways from the article.
- Restful APIs are the APIs that follow REST architectural constraints (client-server, cacheable, stateless etc)
- Fast API is the fastest and easiest for API design among all the Python web frameworks.
- Prime aspects of Fast API are in-built data validation, In-built documentation, concurrency, and performance.
- Throughout the article, we went through some key concepts of Fast API, such as path parameters, query parameters, request body etc. And built an API to serve an ML model.
So, this was all about Fast API initial steps. I hope you enjoyed the article.
The media shown in this article is not owned by Analytics Vidhya and is used at the Author’s discretion.


