This article was published as a part of the Data Science Blogathon.
Introduction
Selling old stuff had always been a hassle in earlier times. No matter how good an item might have been, finding a buyer and getting the appropriate Market price was always a challenge. One was only able to sell items within a known circle at a price on which both would agree, face to face. However, the advent of the digital era and the growing popularity of platforms like Craiglist, eBay, OLX, and Quickr have made lives a lot easier. They have created a marketplace for people to buy and sell goods as per their needs without the need of having to know each other personally. One can post an item that they no longer wish to use, and another person who likes it can purchase it directly from the seller at the listed price.

Scenario
We will attempt to determine the market price for a car that we would like to sell. The details of our car are as follows:
- Make and Model – Swift Dzire
- Year of Purchase – 2009
- Km Driven – 80,000
- Current Location – Rajouri Garden
Approach
Our approach to addressing the issue would be as follows:
1. Search for all the listings on the OLX platform for the same make and model of our car.
2. Extract all the relevant information and prepare the data.
3. Use the appropriate variables to build a machine learning model that, based on certain inputs be able to determine the market price of a car.
4. Input the details of our car to fetch the price that we should put on our listing.
WARNING! Please refer to the robots.txt of the respective website before scrapping any data. In case the website does not allow scrapping of what you want to extract, please mark an email to the web administrator before proceeding.
Stage 1 – Search
We will start with importing the necessary libraries
In order to automatically search for the relevant listing and extract the details, we will use Selenium
import selenium
from selenium import webdriver as wb
from selenium.webdriver.common.by import By
from selenium.webdriver.support.ui import WebDriverWait
from selenium.webdriver.support import expected_conditions as EC
from selenium.common.exceptions import TimeoutException
from selenium.webdriver.common.action_chains import ActionChains
For basic data wrangling, format conversion and cleaning we will use pandas, numpy, datetime and time
import pandas as pd
import numpy as np
import datetime
import time
from datetime import date as dt
from datetime import timedelta
For building our model, we will use Linear Regression
from sklearn.linear_model import LinearRegression
from sklearn.model_selection import train_test_split
We firstly create a variable called ‘item’, to which we assign the name of the item we want to sell.
item = 'Swift Dzire'

location = 'Rajouri Garden'
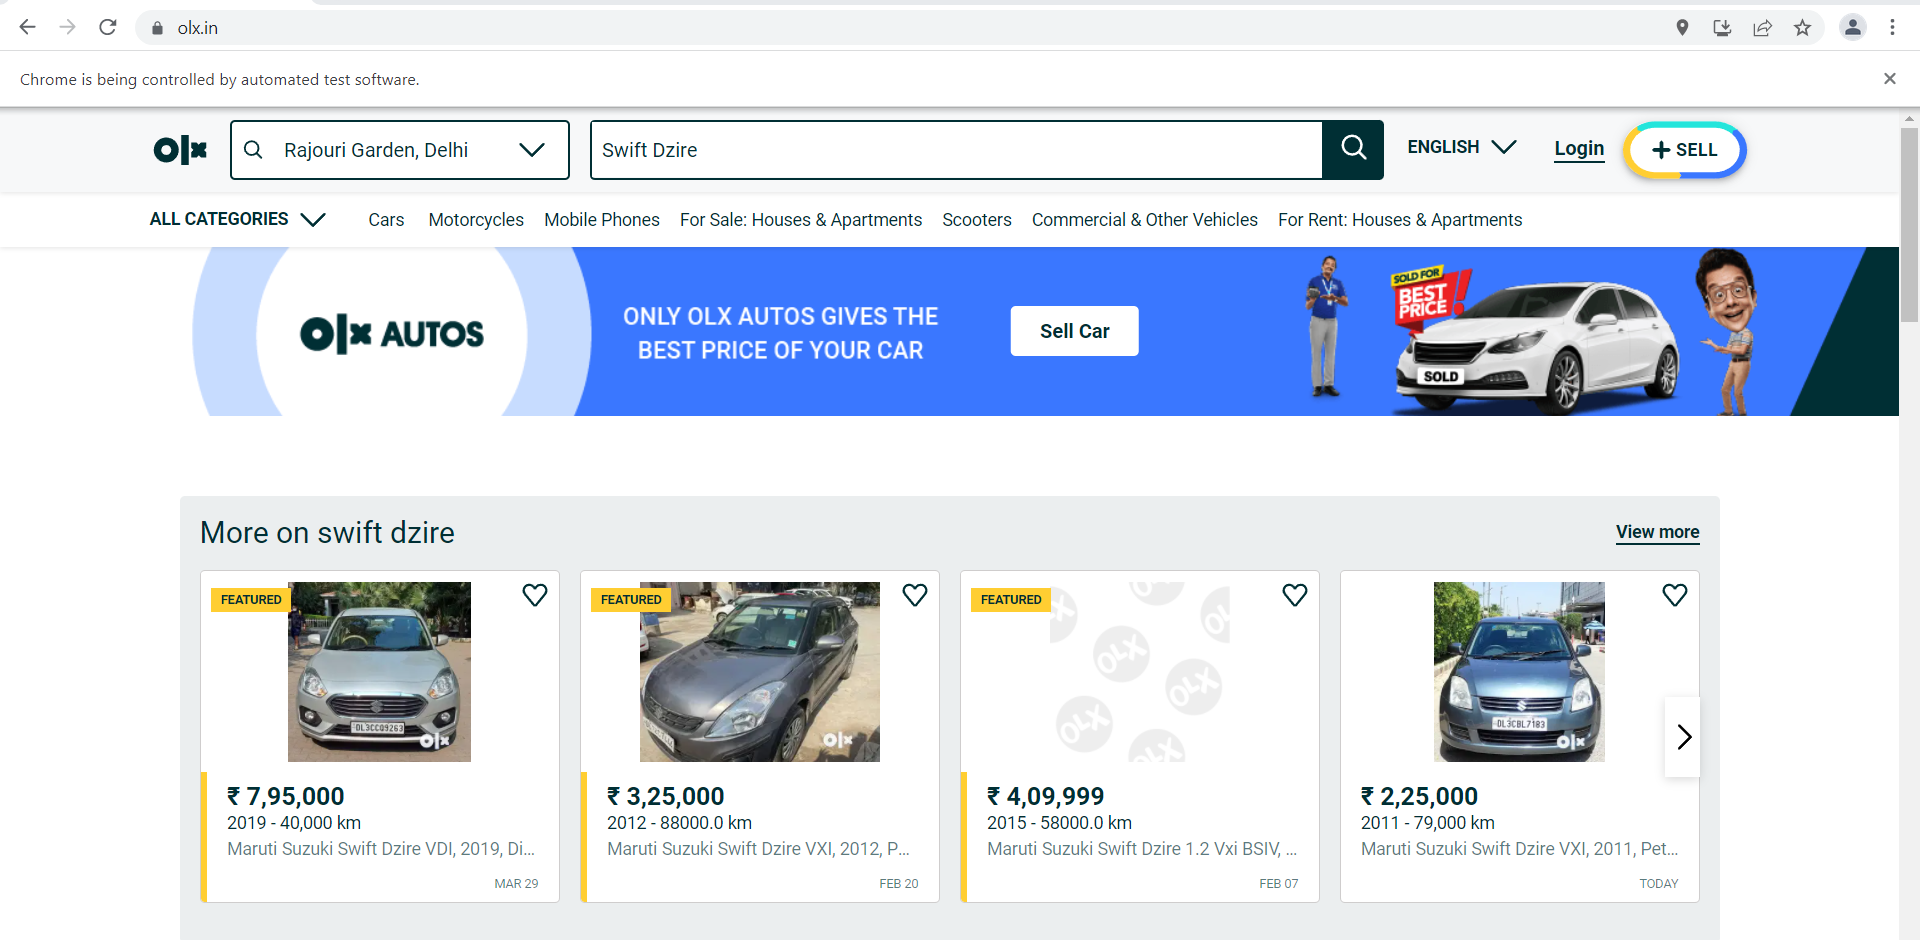
Next, we would want to open the OLX website using chrome driver and search for Swift Dzire in the location we are interested in.

Source: Olx.in
driver = wb.Chrome(r"PATH WHERE CHROMEDRIVER IS SAVEDchromedriver.exe")

driver.get('https://www.olx.in/')

driver.find_element_by_xpath('//*[@id="container"]/header/div/div/div[2]/div/div/div[1]/div/div[1]/input').clear()

driver.find_element_by_xpath('//*[@id="container"]/header/div/div/div[2]/div/div/div[1]/div/div[1]/input').send_keys(location)

time.sleep(5)

driver.find_element_by_xpath('//*[@id="container"]/header/div/div/div[2]/div/div/div[1]/div/div[2]/div/div/div/div/span/b').click()

driver.find_element_by_xpath('//*[@id="container"]/header/div/div/div[2]/div/div/div[2]/div/form/fieldset/div/input').send_keys(item)

time.sleep(5)

driver.find_element_by_xpath('//*[@id="container"]/header/div/div/div[2]/div/div/div[2]/div/form/ul/li[1]').click()
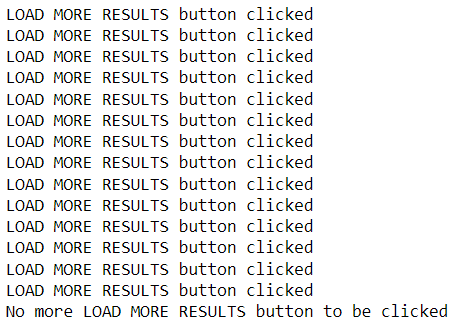
The above piece of code will present to us all the listings of Swift Dzire in and around our selected location. However, one challenge that we now encounter is that the initial set of listings shows only 20-30 options, whereas we would need more in order to build our model. There are, in fact, more listings available on the page, but in order to access those, we will continuously have to click on the ‘Load more’ button till all the listings are visible. We will incorporate this into our script. Till the time the load more button is available, it will be clicked, and we will get the message – ‘LOAD MORE RESULTS button clicked.’ Once all the results are listed, and there are no more ‘Load more’ buttons left, the following message will be printed – ‘No more LOAD MORE RESULTS button to be clicked.’
while True:
    try:
        ActionChains(driver).move_to_element(WebDriverWait(driver, 20).until(EC.element_to_be_clickable((By.XPATH, "//button[contains(., 'load more')]")))).pause(5).click().perform()
        print("LOAD MORE RESULTS button clicked")
    except TimeoutException:
        print("No more LOAD MORE RESULTS button to be clicked")
        break

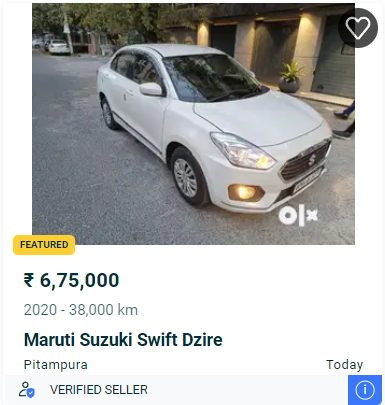
Now that we have loaded all the results, we will extract all the information that we can potentially use to determine the market price. A typical listing looks like this

Source: OLX
Stage 2 – Data Extraction and Preparation
From this we will extract the following and save the information to an empty dataframe called ‘df’:
1. Maker name
2. Year of purchase
3. Km driven
4. Location
5. Verified Seller or not
6. Price
df = pd.DataFrame()
n = 200
for i in range(1,n):
    try:
        make = driver.find_element_by_xpath('//*[@id="container"]/main/div/div/section/div/div/div[4]/div[2]/div/div[3]/ul/li['+str(i)+']/a/div[1]/div[2]/div[2]').text
        make = pd.Series(make)
        det = driver.find_element_by_xpath('//*[@id="container"]/main/div/div/section/div/div/div[4]/div[2]/div/div[3]/ul/li['+str(i)+']/a/div[1]/div[2]/div[1]').text
        year = pd.Series(det.split(' - ')[0])
        km = pd.Series(det.split(' - ')[1])
        price = driver.find_element_by_xpath('//*[@id="container"]/main/div/div/section/div/div/div[4]/div[2]/div/div[3]/ul/li['+str(i)+']/a/div[1]/div[2]/span').text
        price = pd.Series(price)
        det2 = driver.find_element_by_xpath('//*[@id="container"]/main/div/div/section/div/div/div[4]/div[2]/div/div[3]/ul/li['+str(i)+']/a/div[1]/div[2]/div[3]').text
        location = pd.Series(det2.split('n')[0])
        date = pd.Series(det2.split('n')[1])
        try:
            verified = driver.find_element_by_xpath('//*[@id="container"]/main/div/div/section/div/div/div[4]/div[2]/div/div[3]/ul/li['+str(i)+']/a/div[2]/div/div[1]/div/div/div').text
            verified = pd.Series(verified)
        except:
            verified = 0
    except:
        continue
    df_temp = pd.DataFrame({'Car Model':make,'Year of Purchase':year,'Km Driven':km,'Location':location,'Date Posted':date,'Verified':verified,'Price':price})
    df = df.append(df_temp)
Within the obtained dataframe, we will first have to do some basic data cleaning where we remove the commas from Price and Km Driven and convert them to integers.
df['Price'] = df['Price'].str.replace(",","").str.extract('(d+)')
df['Km Driven'] = df['Km Driven'].str.replace(",","").str.extract('(d+)')
df['Price'] = df['Price'].astype(float).astype(int)
df['Km Driven'] = df['Km Driven'].astype(float).astype(int)
As you can see in the image above, for the listings that are put up on the same day, there instead of a date ‘Today’ is mentioned. Similarly, for the items listed one day prior, ‘Yesterday’ is mentioned. For dates that are listed as ‘4 days ago’ or ‘7 days ago’, we extract the first part of the string, convert it to an integer and subtract those many days from today’s date to get the actual date of posting. We will convert such strings into proper dates as our objective is to create a variable called ‘Days Since Posting’, using the same.
df.loc[df['Date Posted']=='Today','Date Posted']=datetime.datetime.now().date()

df.loc[df['Date Posted']=='Yesterday','Date Posted']=datetime.datetime.now().date() - timedelta(days=1)

df.loc[df['Date Posted'].str.contains(' days ago',na=False),'Date Posted']=datetime.datetime.now().date() - timedelta(days=int(df[df['Date Posted'].str.contains(' days ago',na=False)]['Date Posted'].iloc[0].split(' ')[0]))

def date_convert(date_to_convert):
return datetime.datetime.strptime(date_to_convert, '%b %d').strftime(str(2022)+'-%m-%d')
for i,j in zip(df['Date Posted'],range(0,n)):
try:
df['Date Posted'].iloc[j] = date_convert(str(i))
except:
continue
df['Days Since Posting'] = (pd.to_datetime(datetime.datetime.now().date()) - pd.to_datetime(df['Date Posted'])).dt.days
Once created, we will convert this along with ‘Year of Purchase’ to integers.
df['Year of Purchase'] = df['Year of Purchase'].astype(float).astype(int)
df['Days Since Posting'] = df['Days Since Posting'].astype(float).astype(int)
Further, we will use one-hot encoding to convert the verified seller column
df['Verified'] = np.where(df['Verified']==0,0,1)
Finally, we will get the following dataframe.

The ‘Location‘ variable in its current form cannot be used in our model given that it’s categorical in nature. Thus, to be able to make use of it, we will first have to transform this into dummy variables and then use the relevant variable in our model. We convert this to dummy variables as follows:
df = pd.get_dummies(df,columns=['Location'])
Stage 3 – Model Building
As we have got our base data ready, we will now proceed toward building our model. We will use ‘Year of Purchase’, ‘Km Driven’, ‘Verified’, ‘Days Since Posting’ and ‘Location_Rajouri Garden’ as our input variables and ‘Price’ as our target variable.
X = df[['Year of Purchase','Km Driven','Verified','Days Since Posting','Location_Rajouri Garden']]

y = df[['Price']]
We will use a 25% test dataset size and fit the Linear Regression model on the training set.
X_train, X_test, y_train, y_test = train_test_split(X,y,test_size=0.25)
model = LinearRegression().fit(X_train,y_train)
We check the training and test set accuracies.
print("Training set accuracy",model.score(X_train,y_train))
print("Test set accuracy",model.score(X_test,y_test))

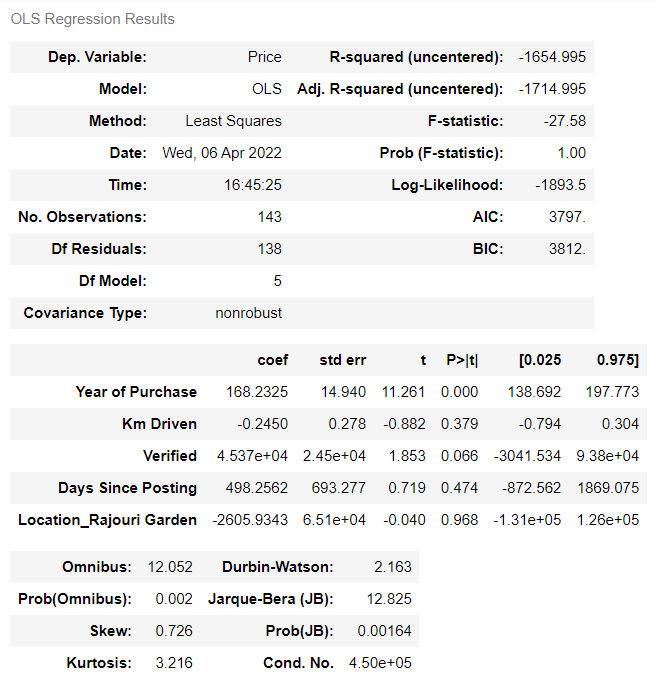
Let’s check out the summary of our model

Stage 4 – Predicting the Market Price
Finally, we will use details of our own car and feed them into the model. Let’s revisit the input variable details we have of our own car
- Year of Purchase – 2009
- Km Driven – 80,000
- Verified – 0
- Days Since Posting – 0
- Location-Rajouri Garden – 1
Till now we are not a verified seller and would have to use 0 for the relevant feature. However, as we saw in our model summary the coefficient for ‘Verified’ is positive, i.e., being a verified seller should enable us to list our vehicle at a higher price. Let’s test this with both the approaches – for a non-verified seller first and then a verified seller.
print("Market price for my car as a non-verified seller would be Rs.",int(round(model.predict([[2009,80000,0,0,1]]).flatten()[0]))){answer image}

print("Market price for my car as a verified seller would be Rs.",int(round(model.predict([[2009,80000,1,0,1]]).flatten()[0])))

Conclusion
Thus, we saw how we could use the various capabilities of Python to determine the market price of items we want to sell on an online marketplace like OLX, Craiglist, or eBay. We extracted information from all similar listings in our area and built a basic machine learning model, which we used to predict the price to be set based on the features of our vehicle. Further, we also got to know that it would be better to list our vehicle as a verified seller on OLX. Being a verified seller would fetch us a 17% higher price as compared to being a non-verified seller.
The media shown in this article is not owned by Analytics Vidhya and is used at the Author’s discretion.


